Compressor Operations
Purpose
To ensure the safe, efficient, and consistent operation of the compressors used in diving operations at Sea Saba.
Scope
This SOP applies to all dive staff involved in compressor operations. It covers startup, filling, routine checks, and shutdown procedures. All dive staff are required to familiarize themselves with these procedures and adhere to them strictly during compressor room duties.
Procedure
Turn on the Equipment
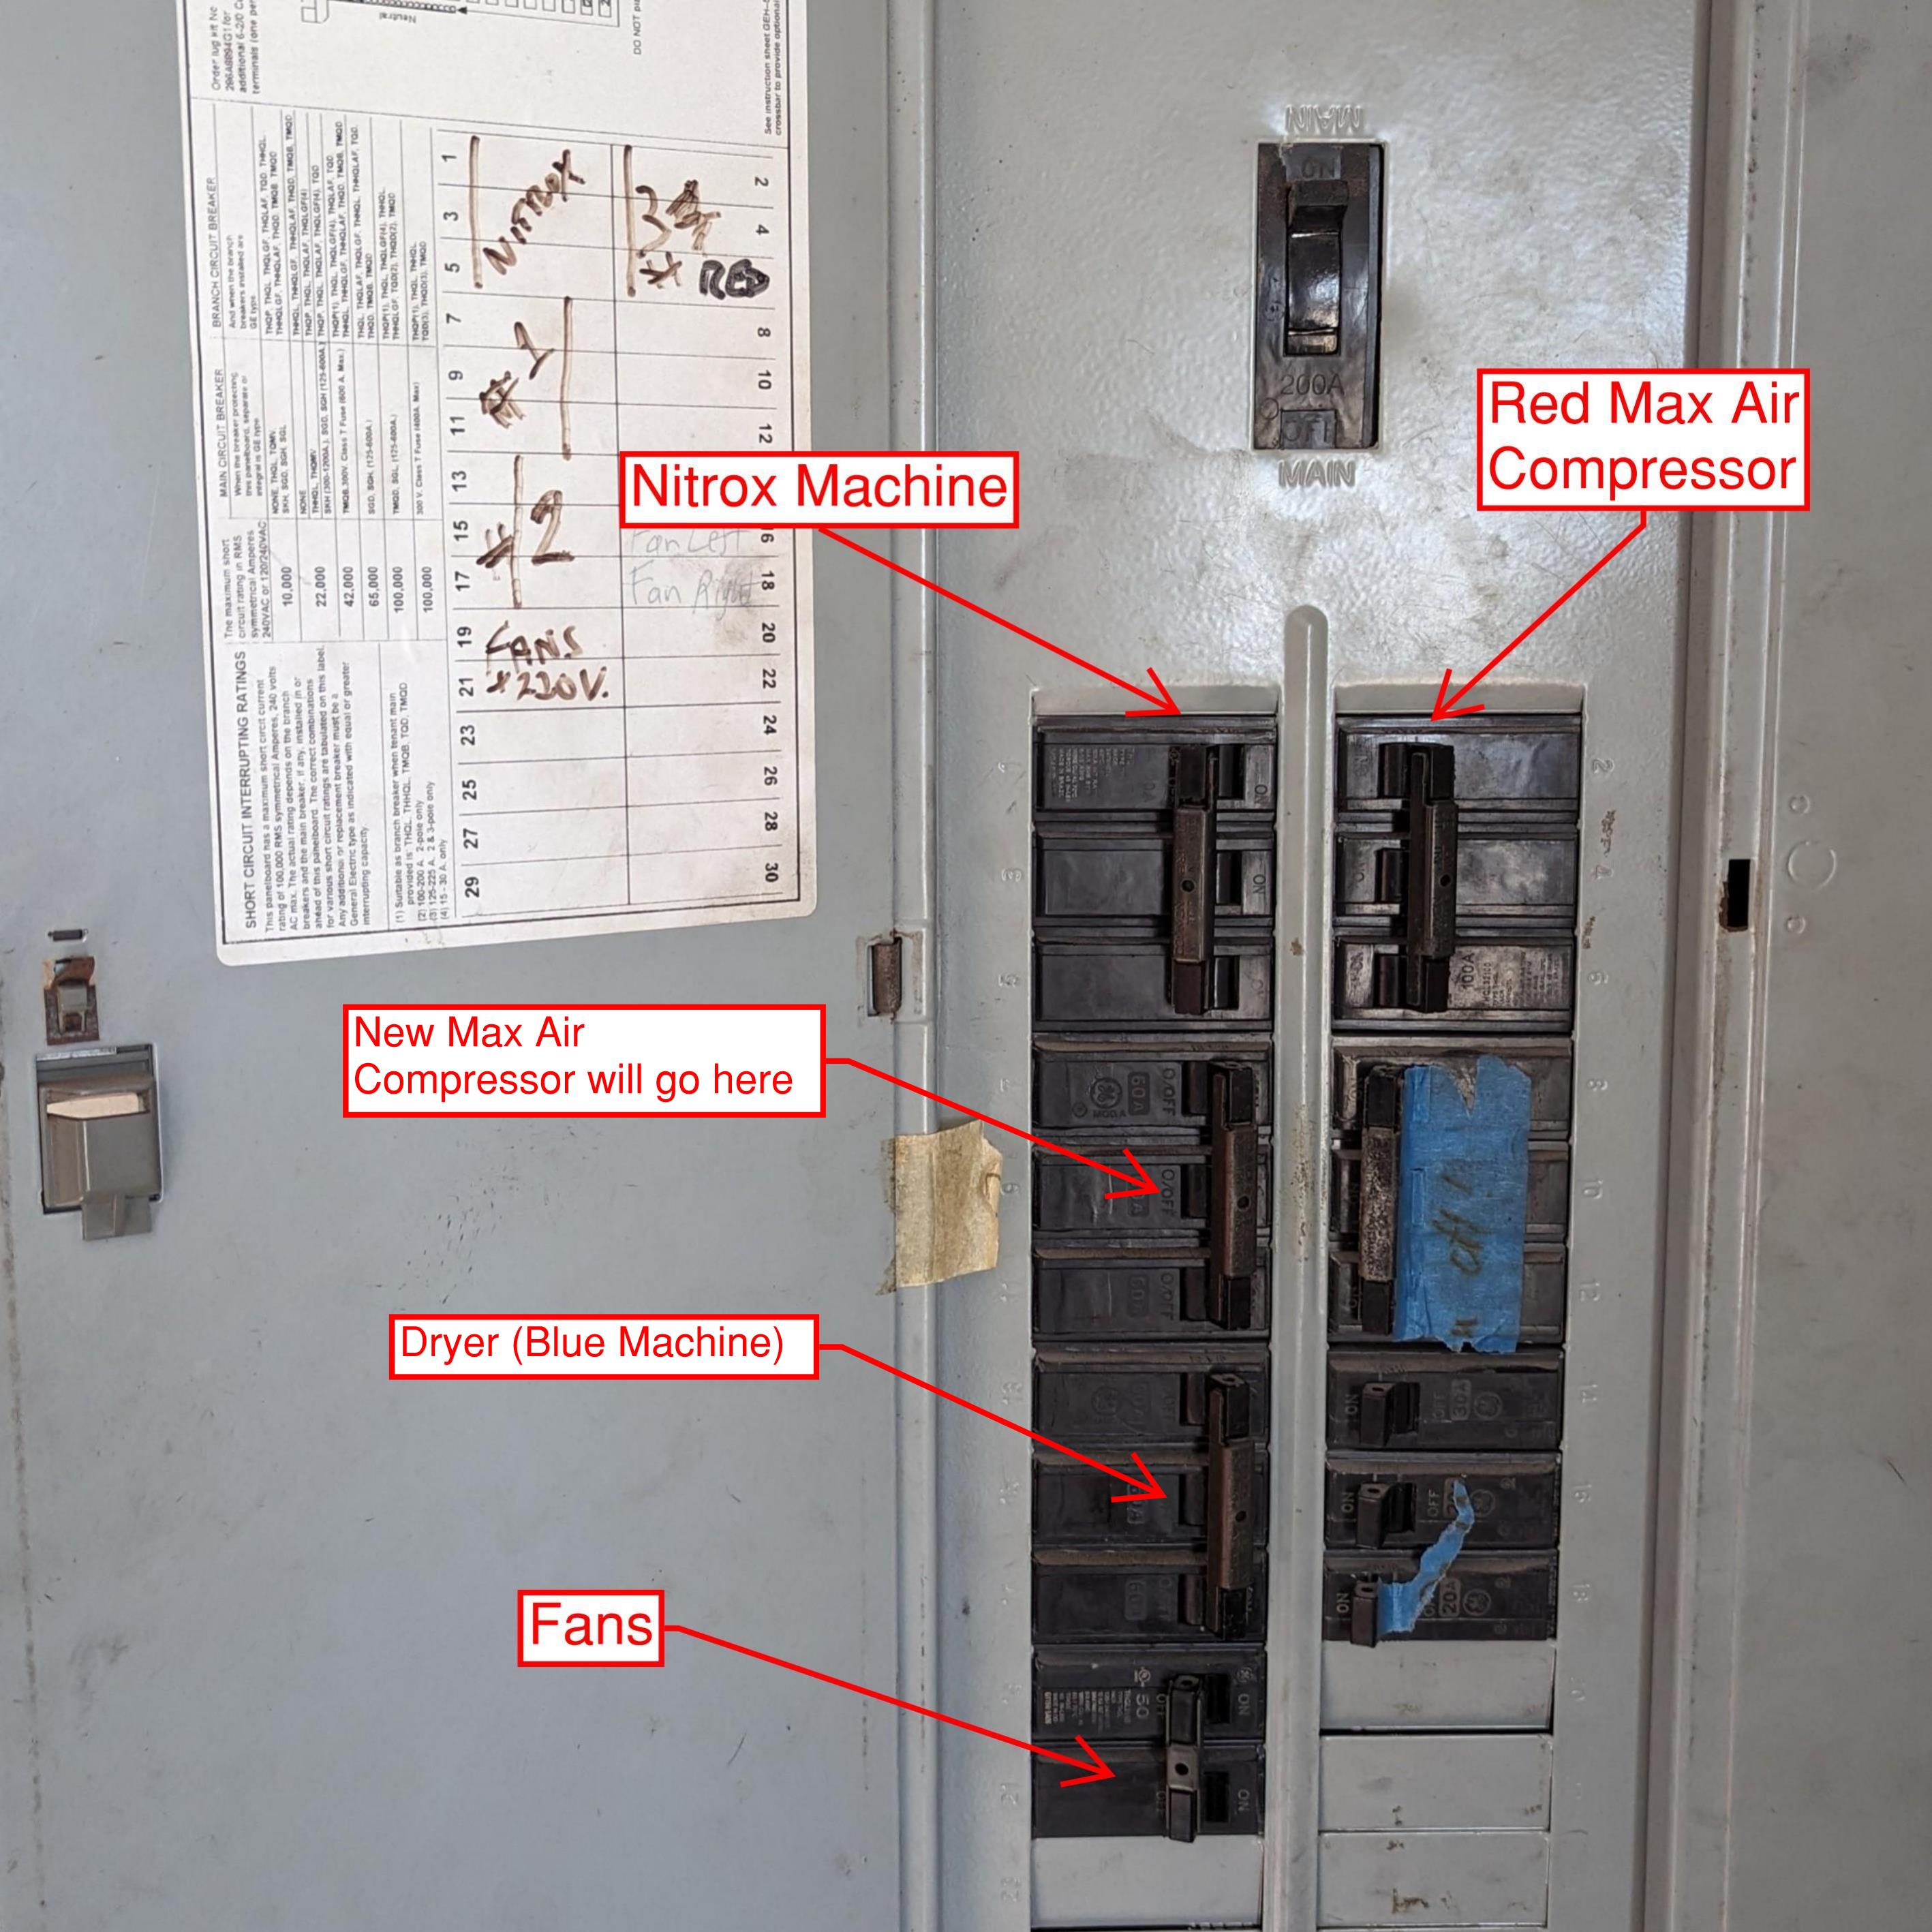
- Turn on breakers: Activate breakers for the fans and Compressor 3 (Red Max-Air) when filling air. If filling nitrox, also turn on the Nitrox breaker.
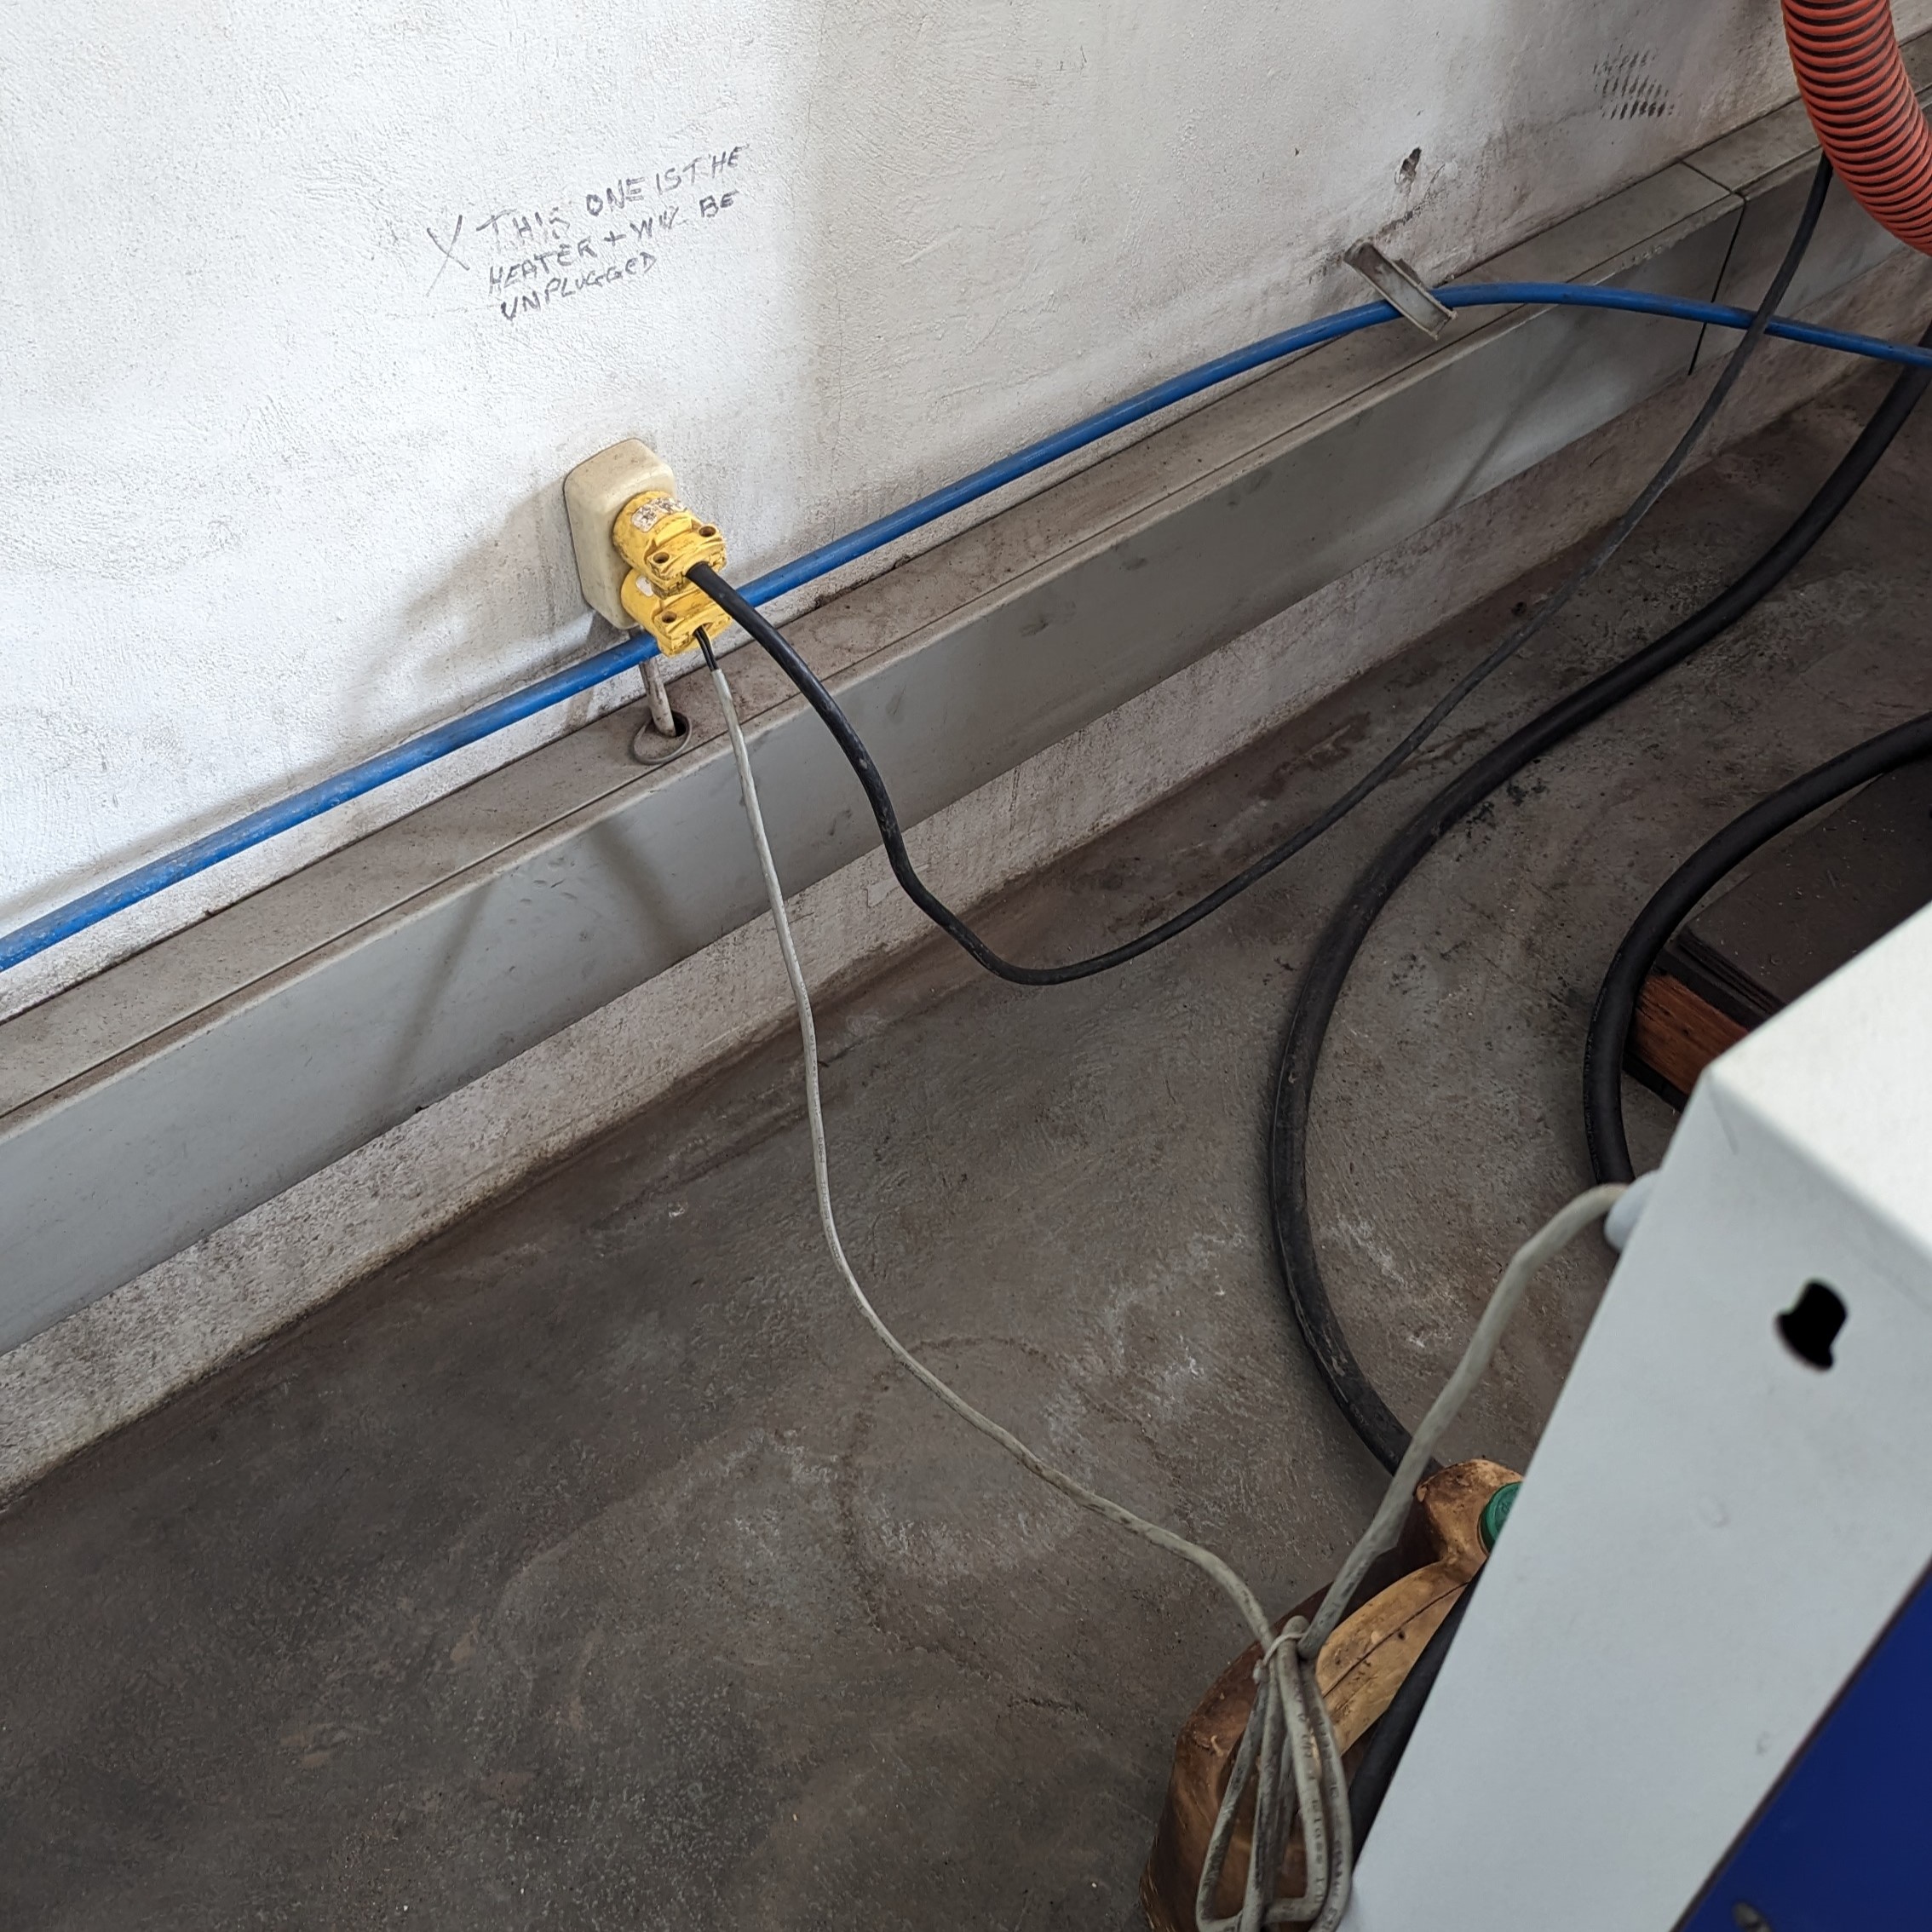
- Plug in the heater and dryer: Located behind the air dryer on the wall.
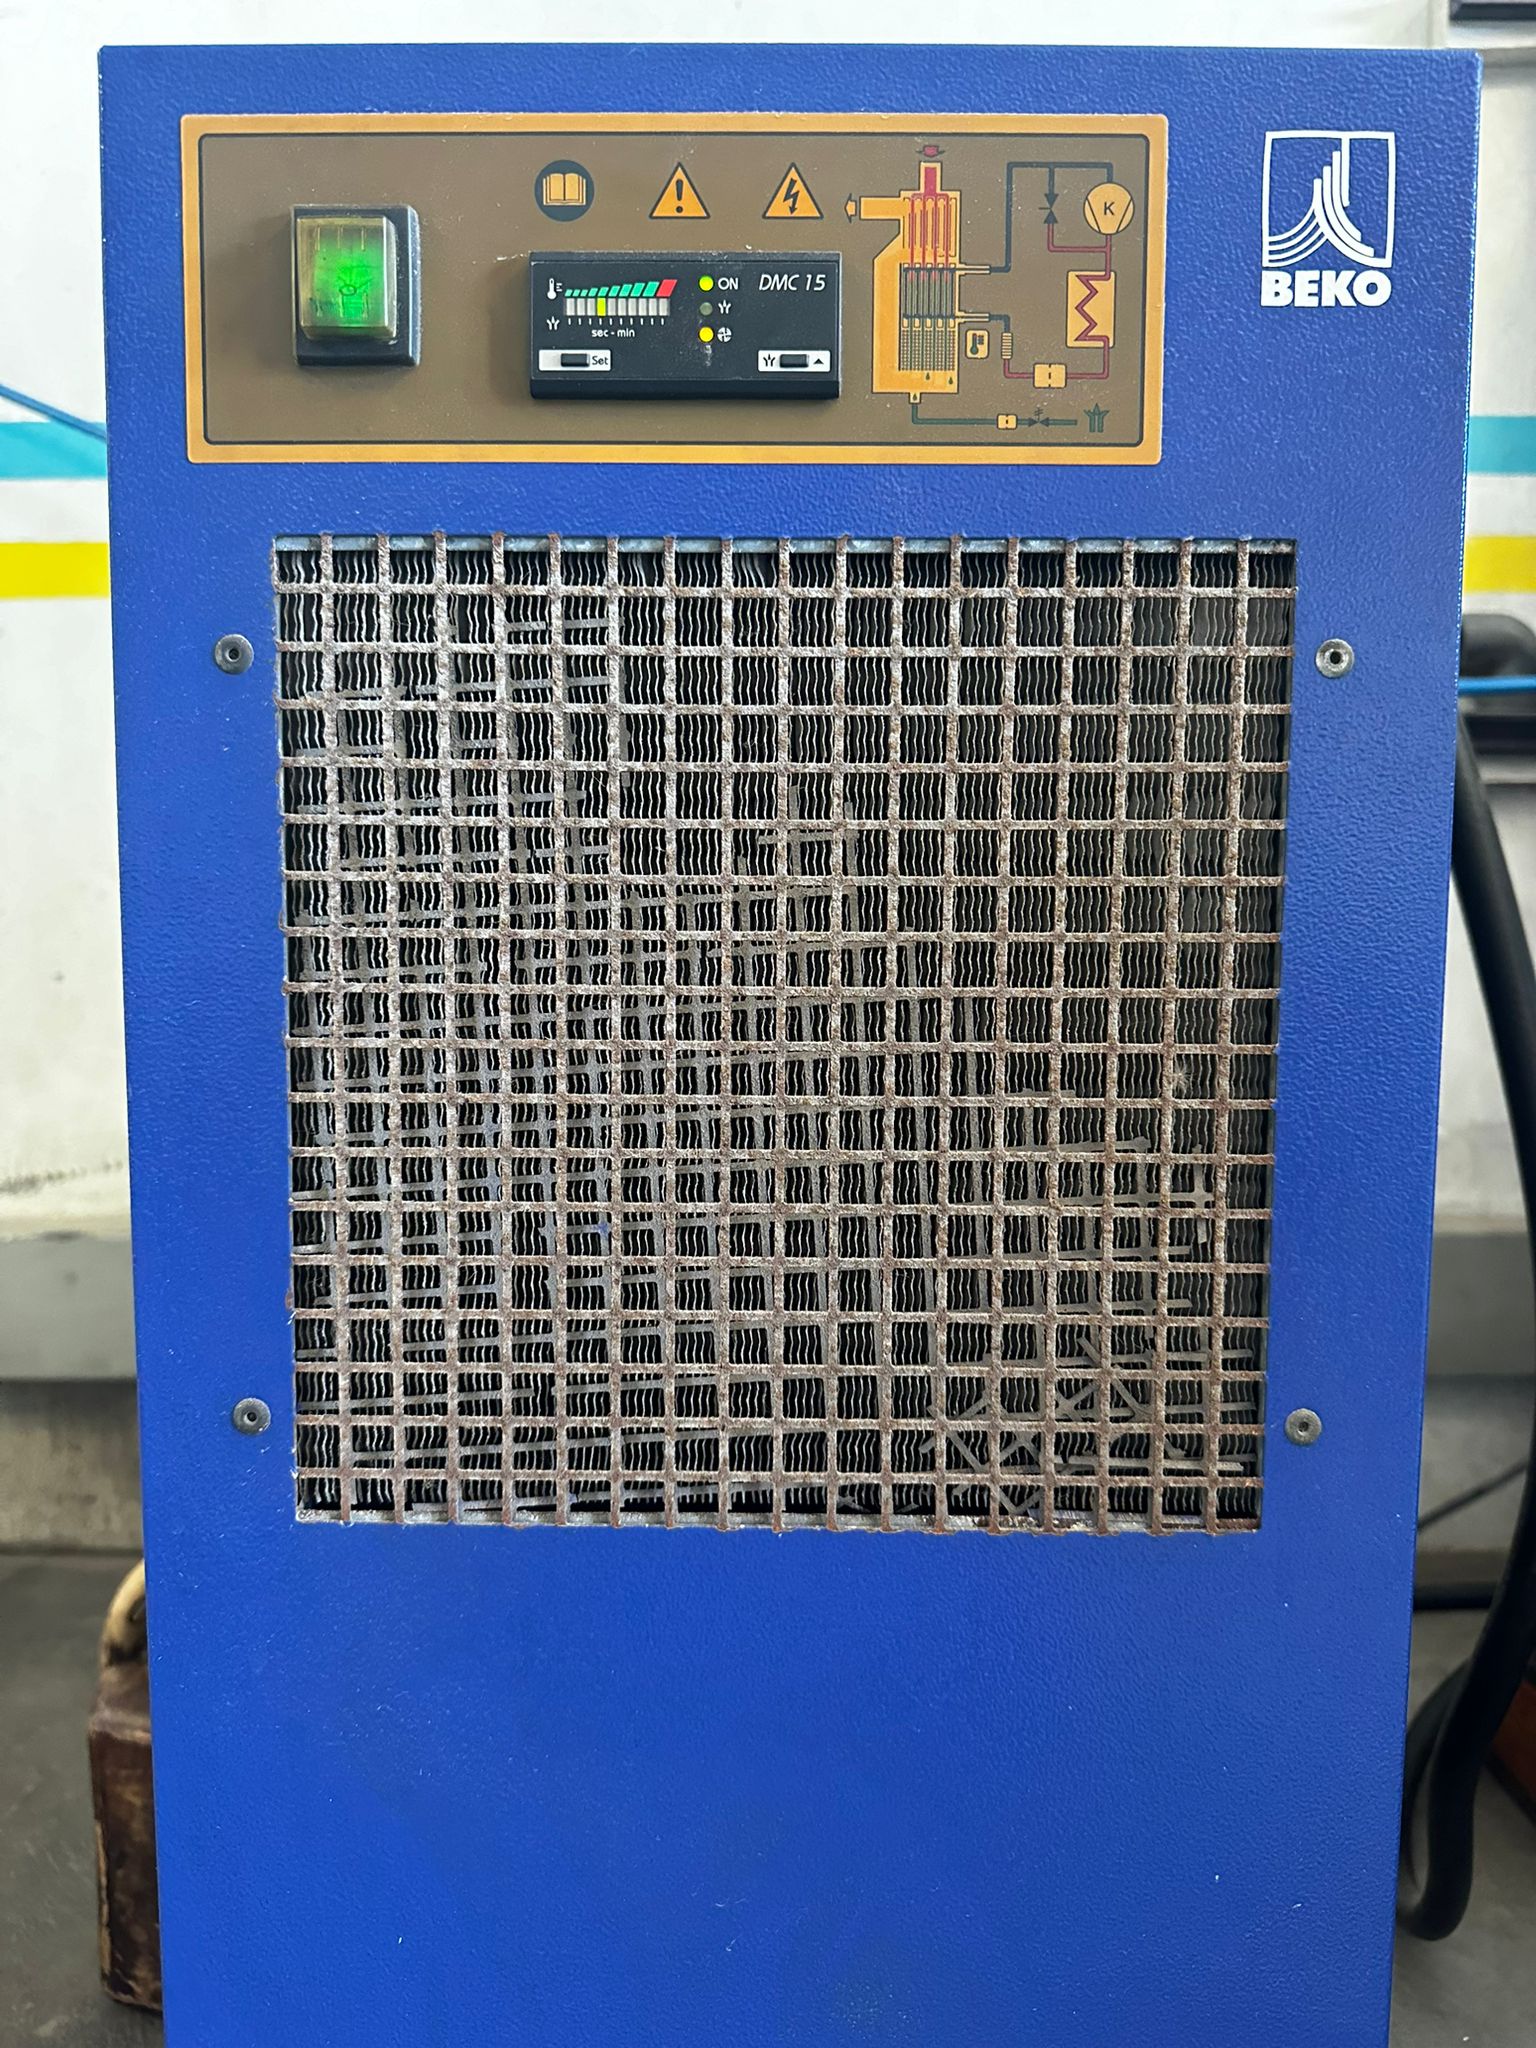
- Turn on the dryer: Turn on the blue machine to allow it to warm up.
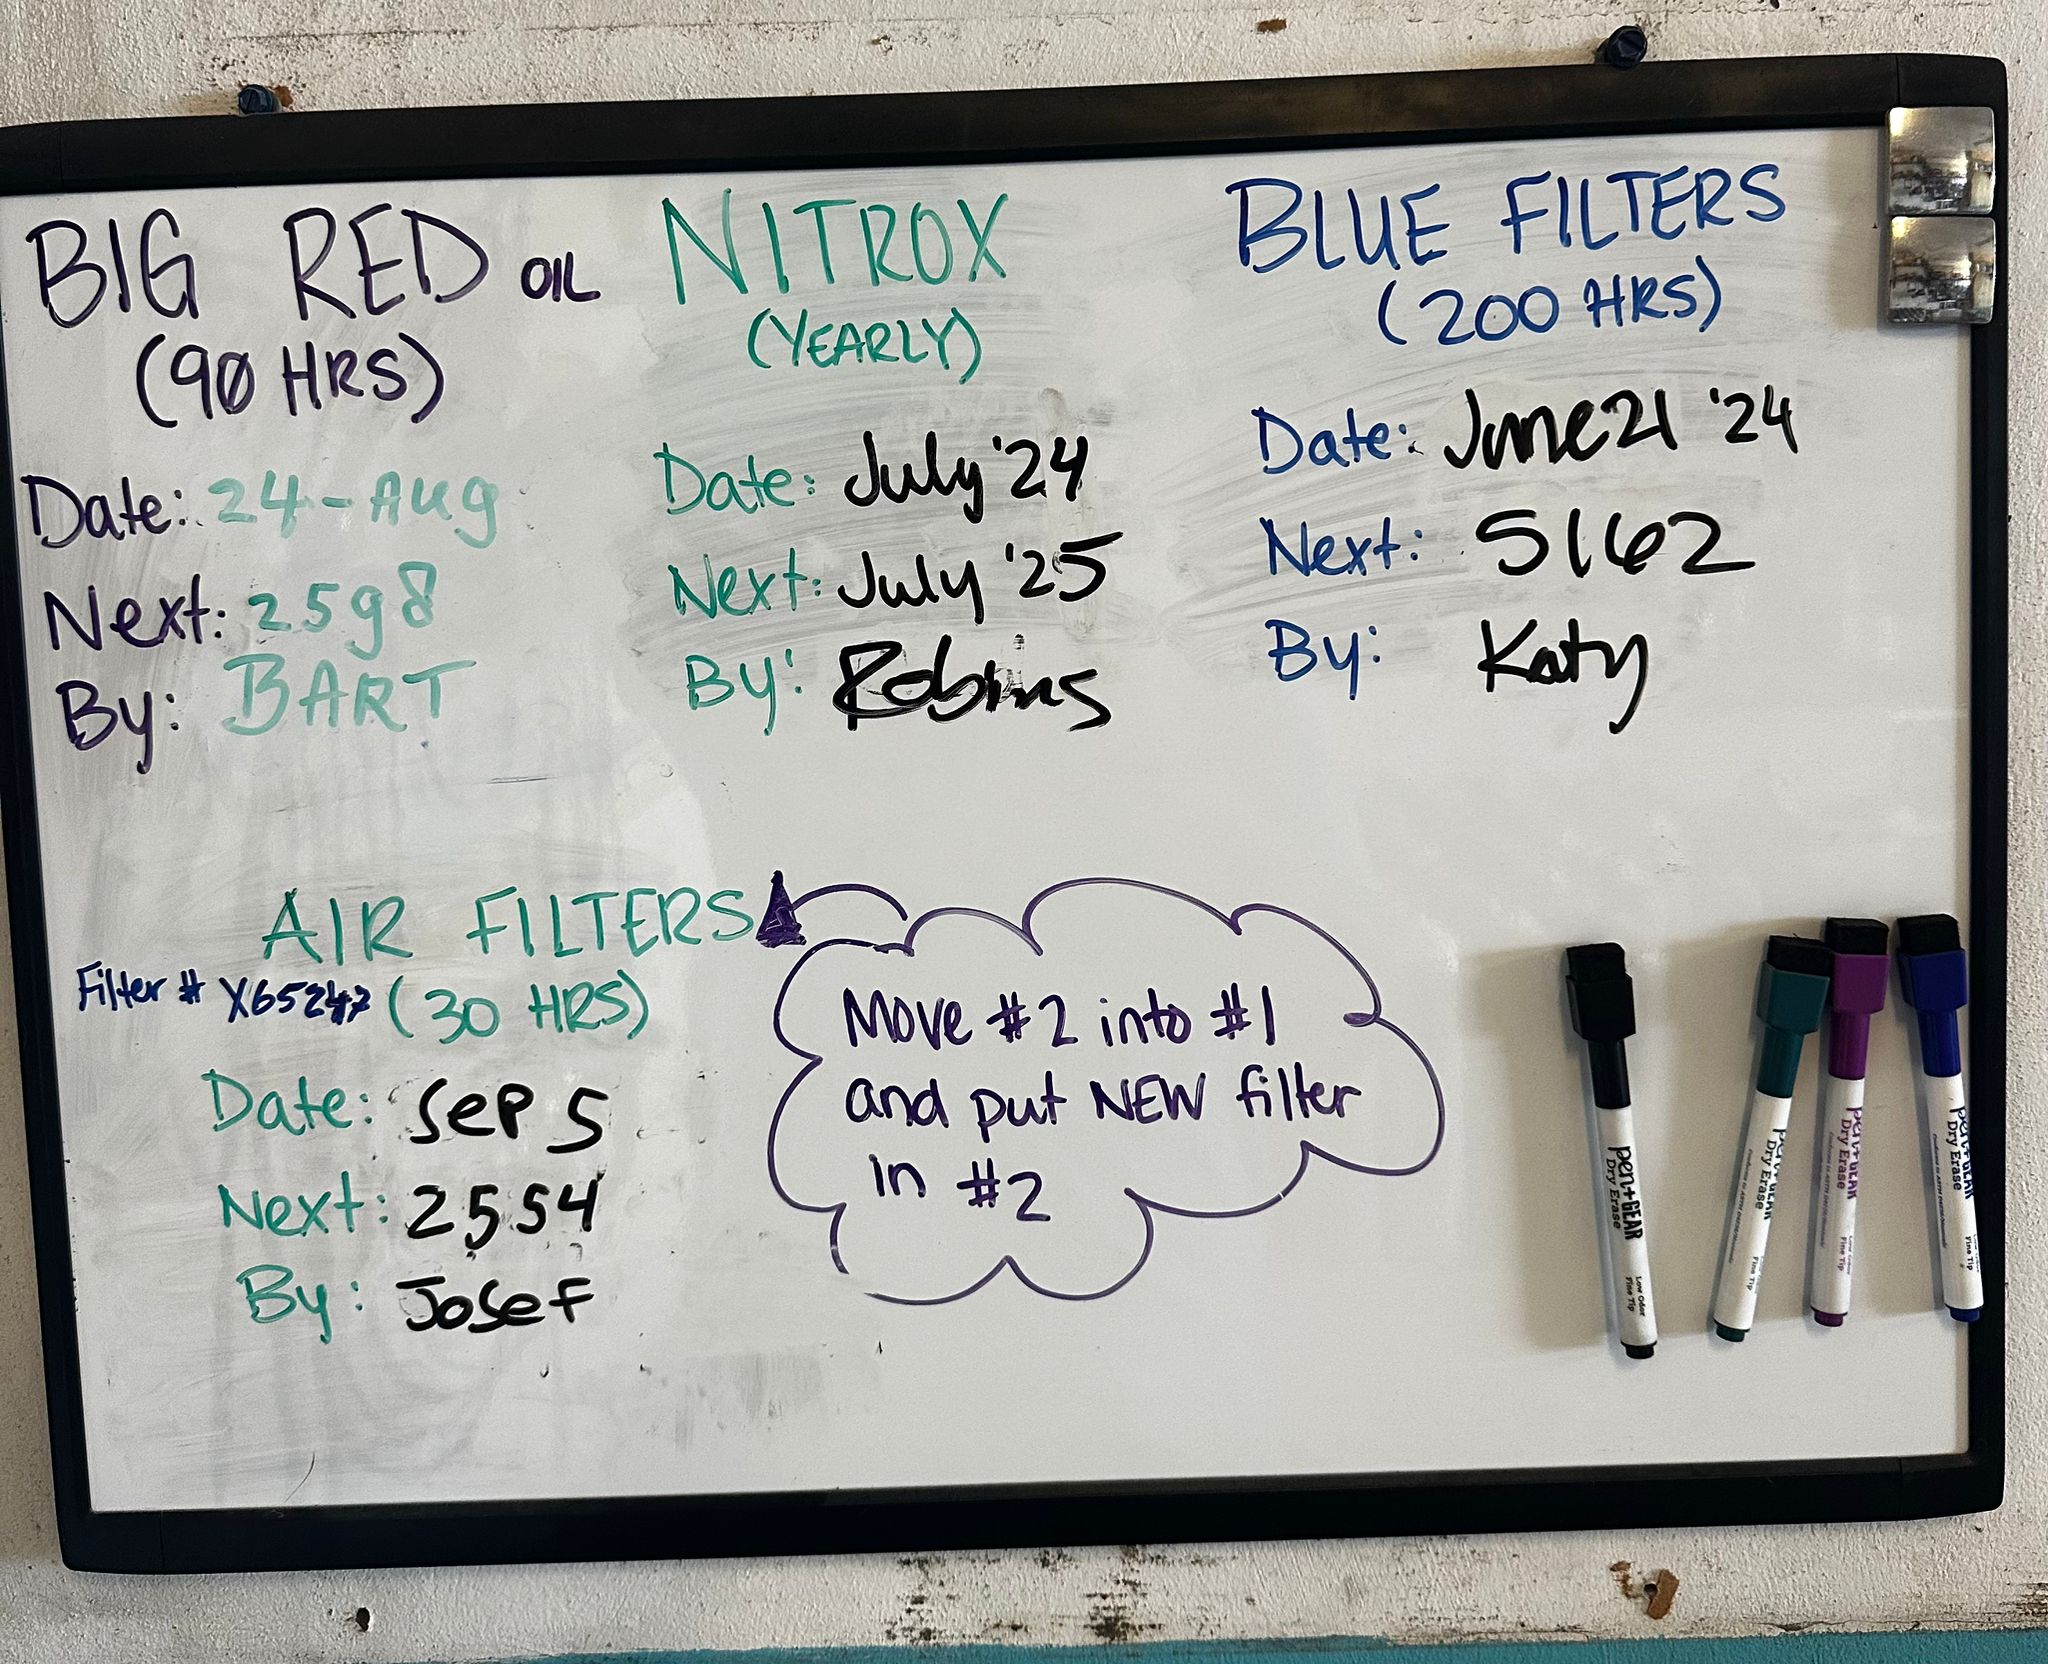
Check Air Filter and Oil Change Status
- Check the dry erase board: Review air filter and oil change status.
- Nitrox Blue Filters: Tracked with the Nitrox Machine Hour meter.
- Red Compressor and Air Filters: Tracked with the Red Compressor Hour meter.
- Reference: Refer to Compressor Servicing for more information about changing oil and filters.
Check Oil Levels
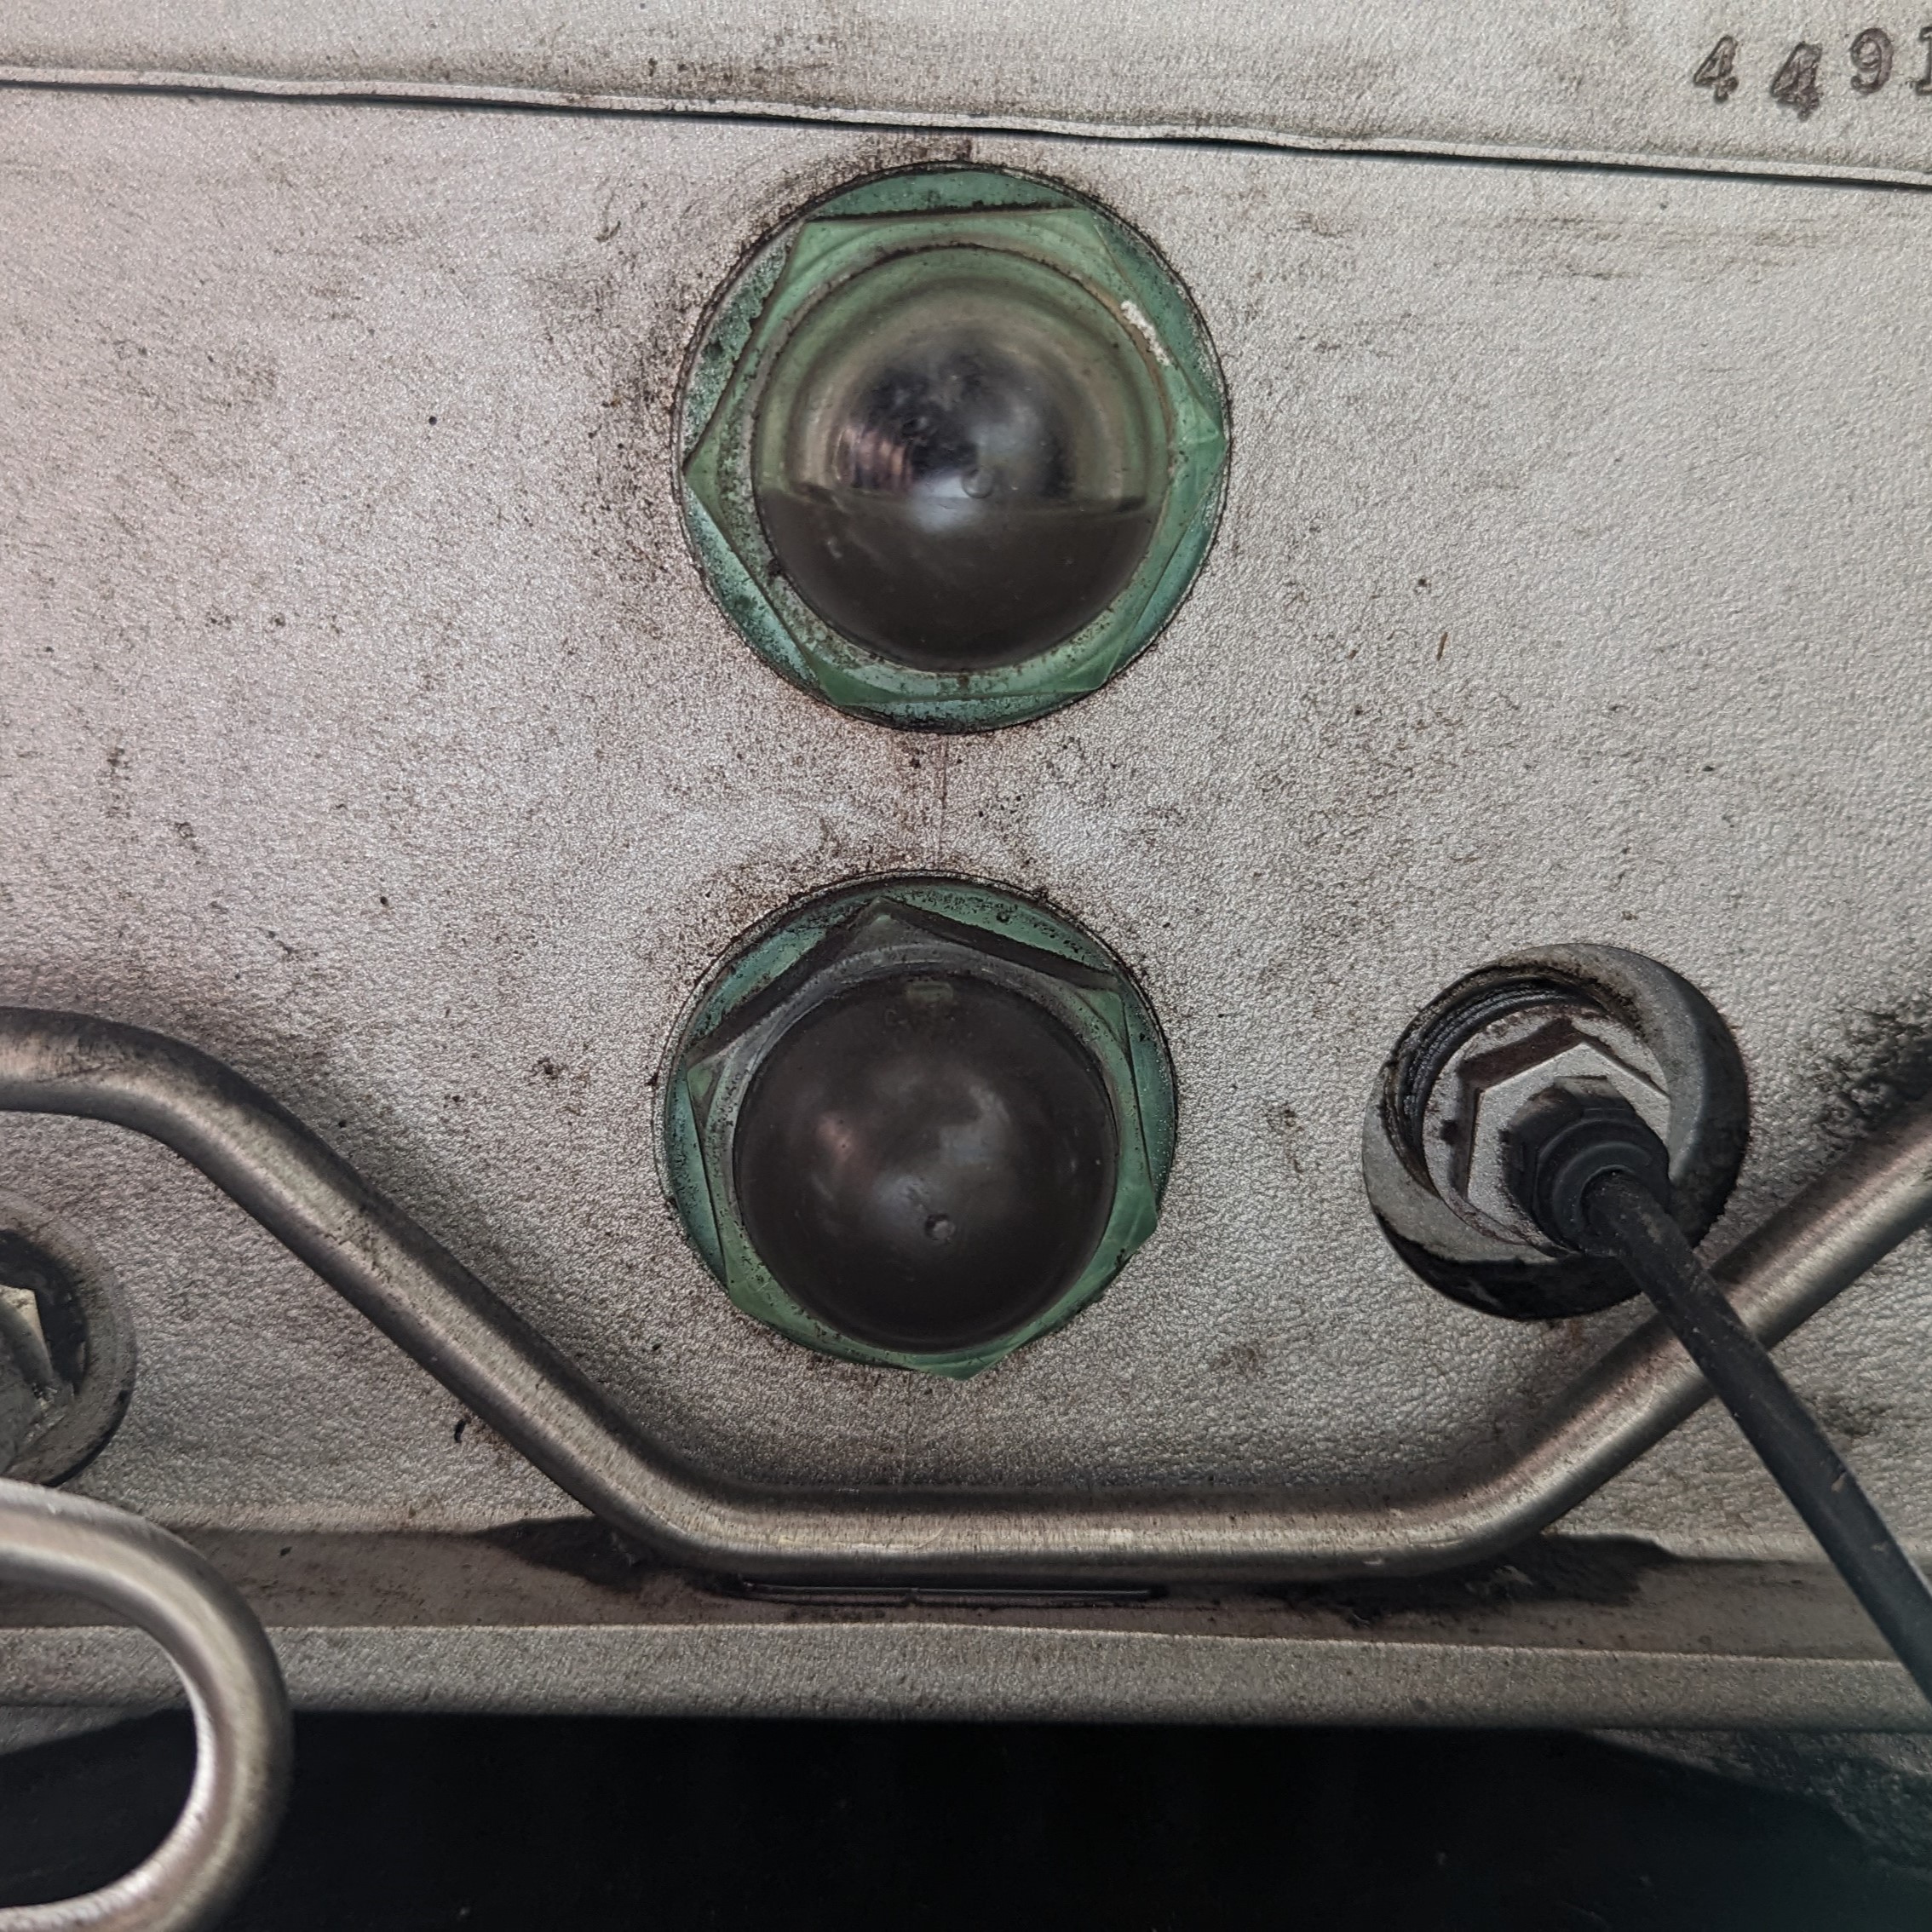
- Red Compressor: Has 2 sight glasses. The oil should be approximately halfway up the top sight glass.
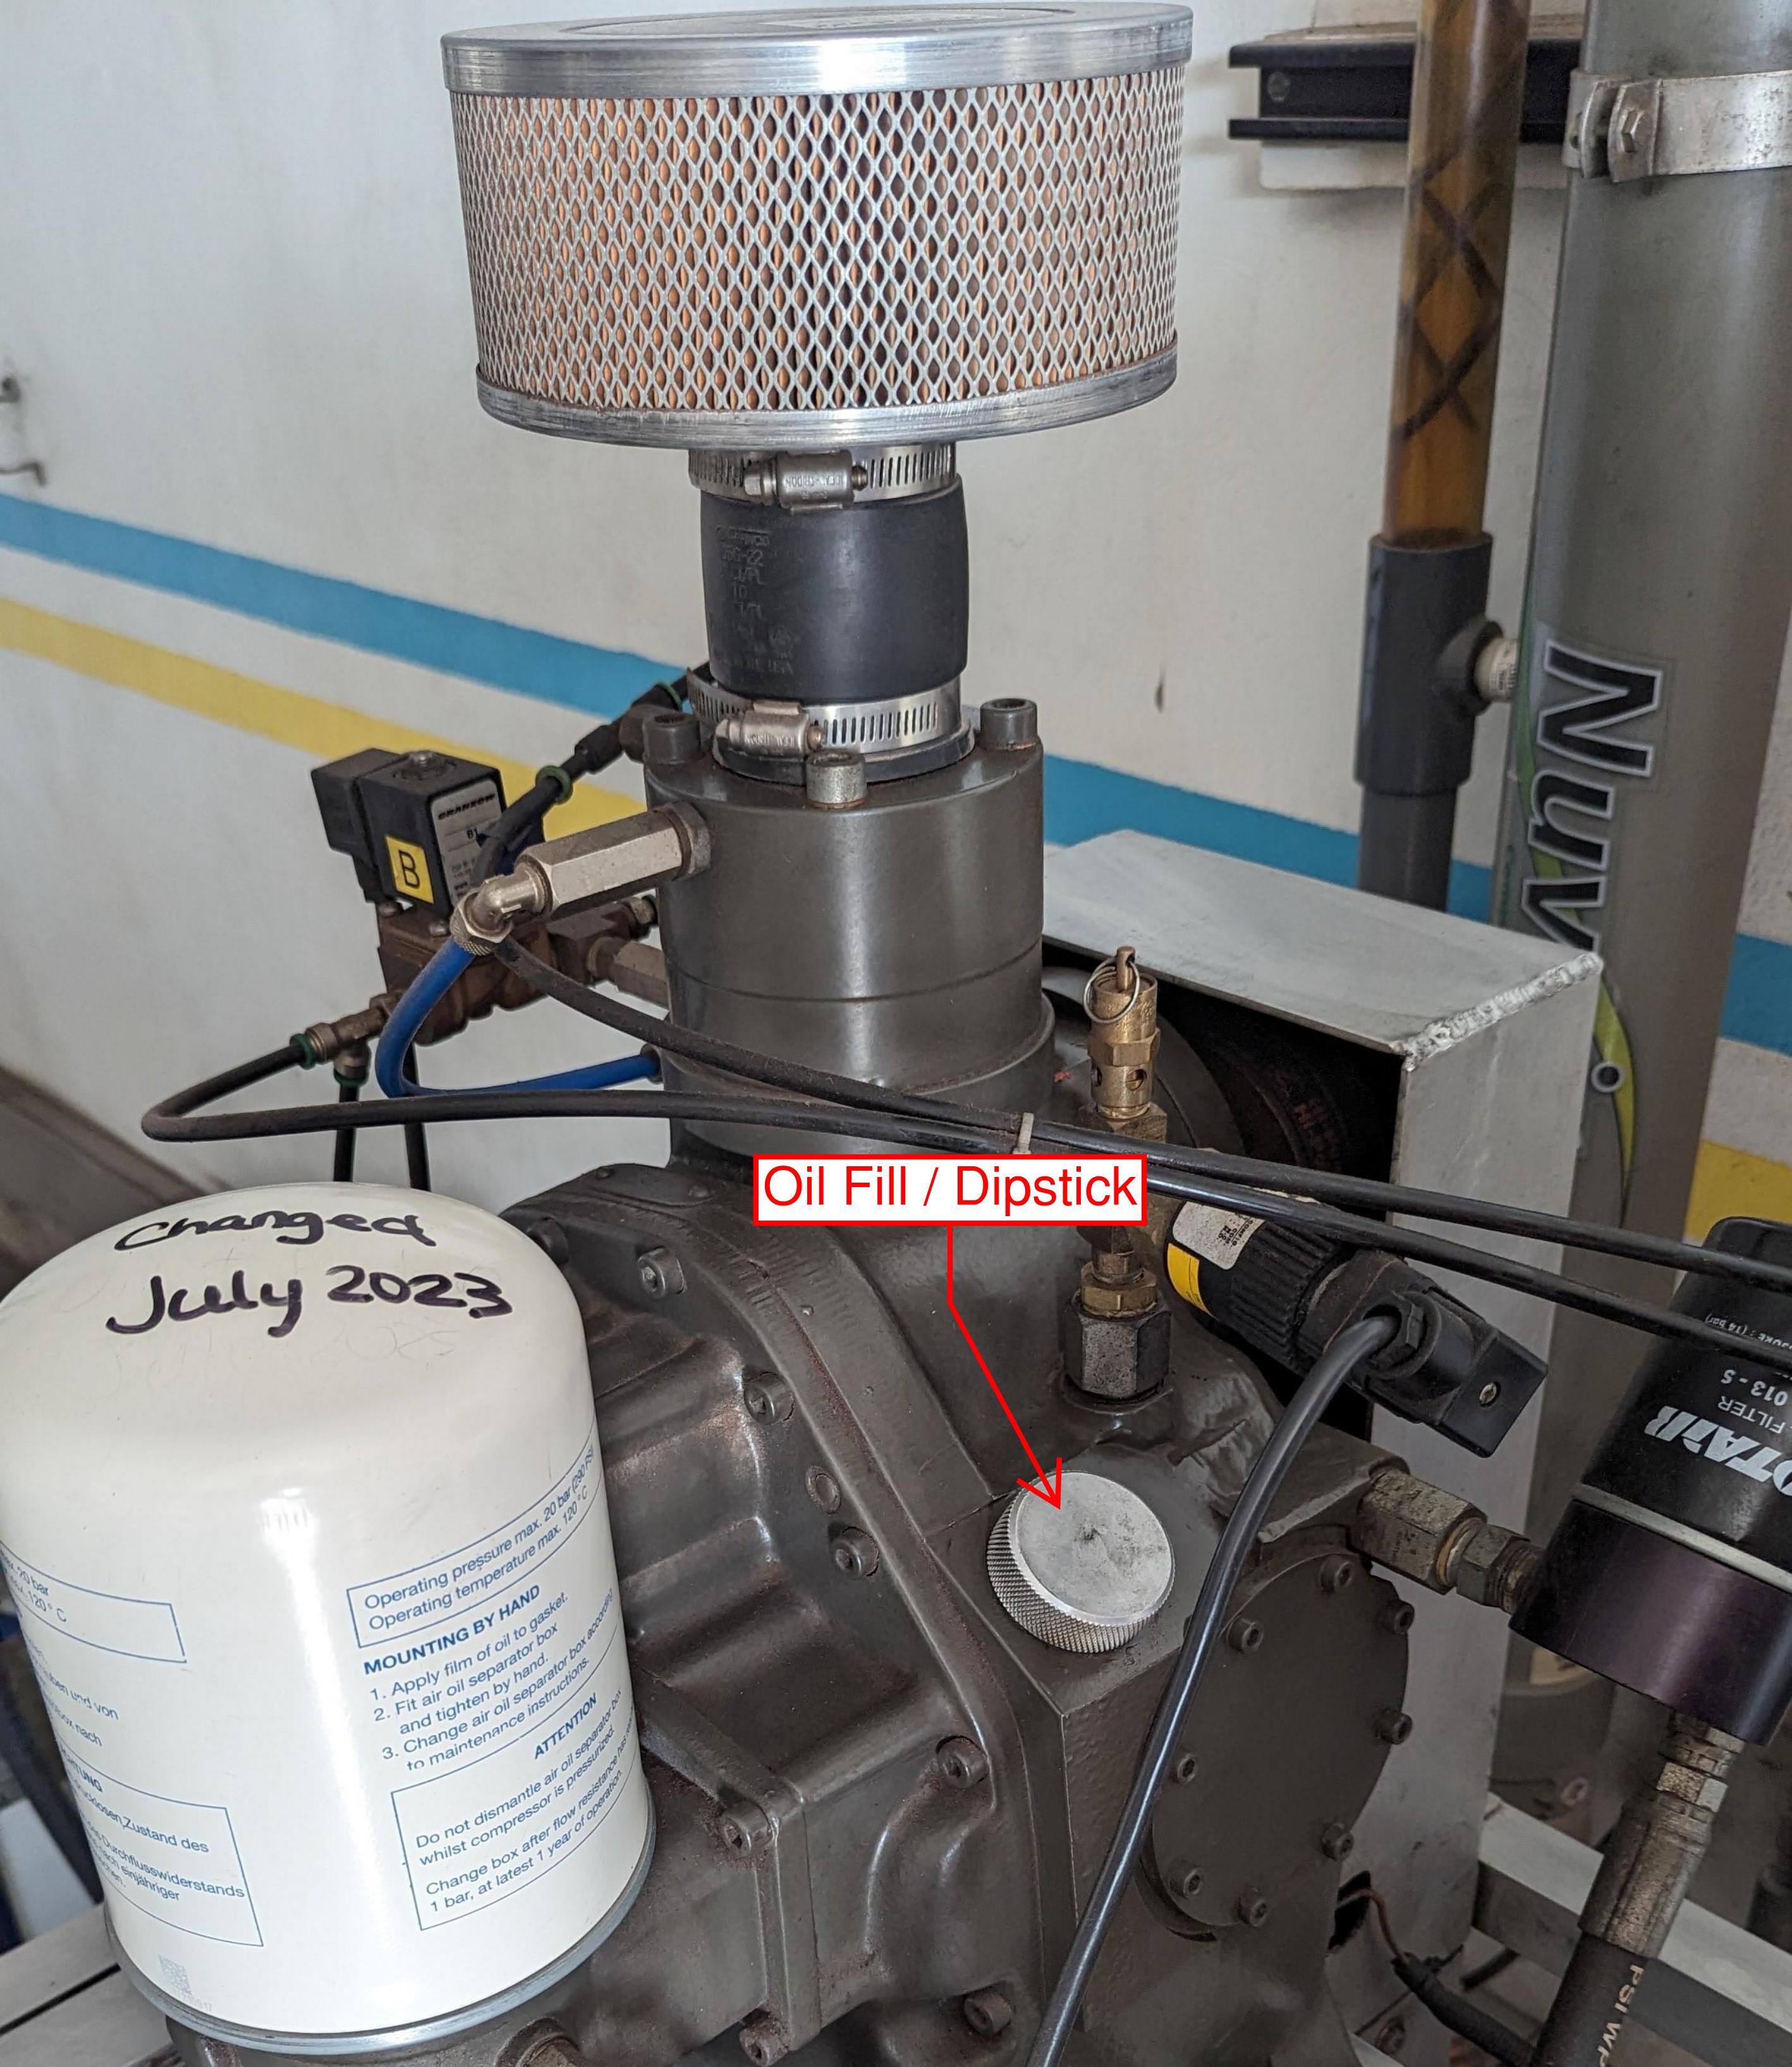
- Nitrox Compressor: Has a screw-in dipstick. The oil should be on the hatch marks.
- Top up if necessary: The Nitrox compressor takes Nuvair 546 oil and the Red Compressor takes SecoLube Tropics. Notify if you had to top up the oil.
Note
Confirm with Management before changing oil due to being "dirty".
Drain Condensate
- Dryer condensate: Only water — can be emptied outside.
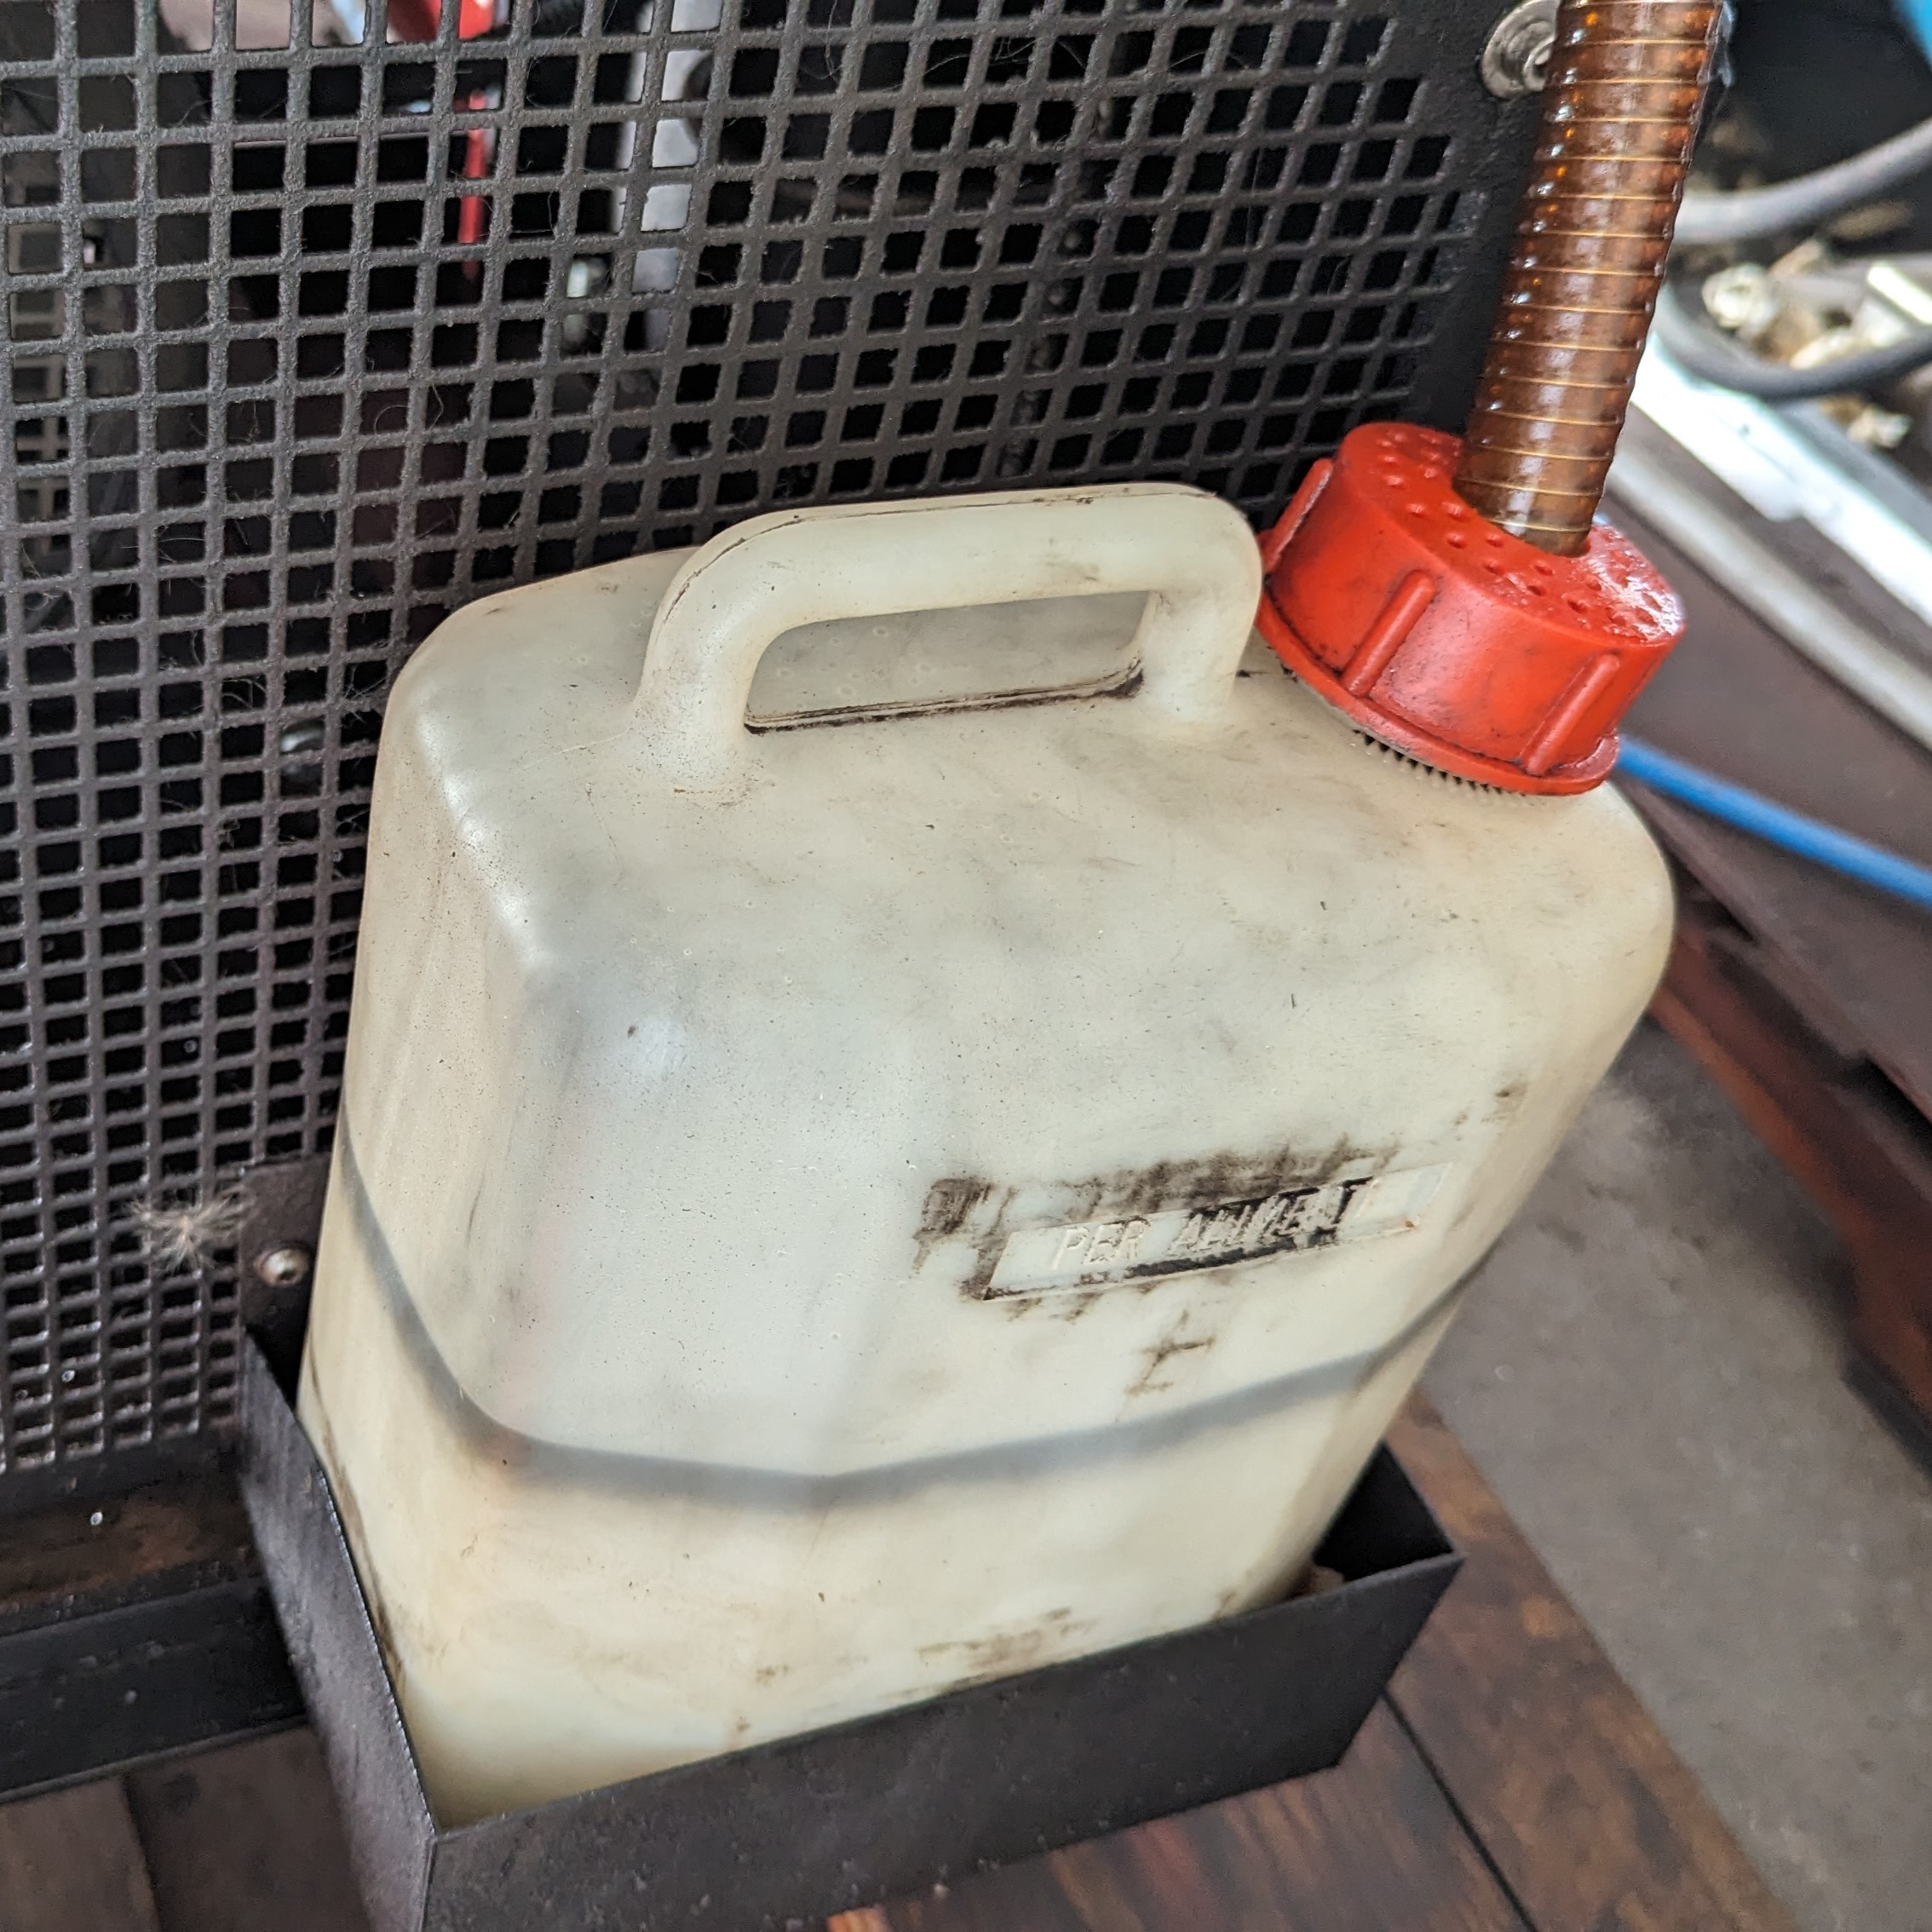
- Red compressor condensate: Must be emptied into a used oil container for proper disposal.
Wipe Down the Machines
- Daily wipe down: Wipe any grease and grime off every day. This makes it easier to spot maintenance issues.
- Report concerns: Alert management if you spot anything of concern.
Starting the Compressors
- Wait for dryer warm-up: After approximately 5 minutes of warming up the dryer, start the compressors.
- Air filling: Start directly.
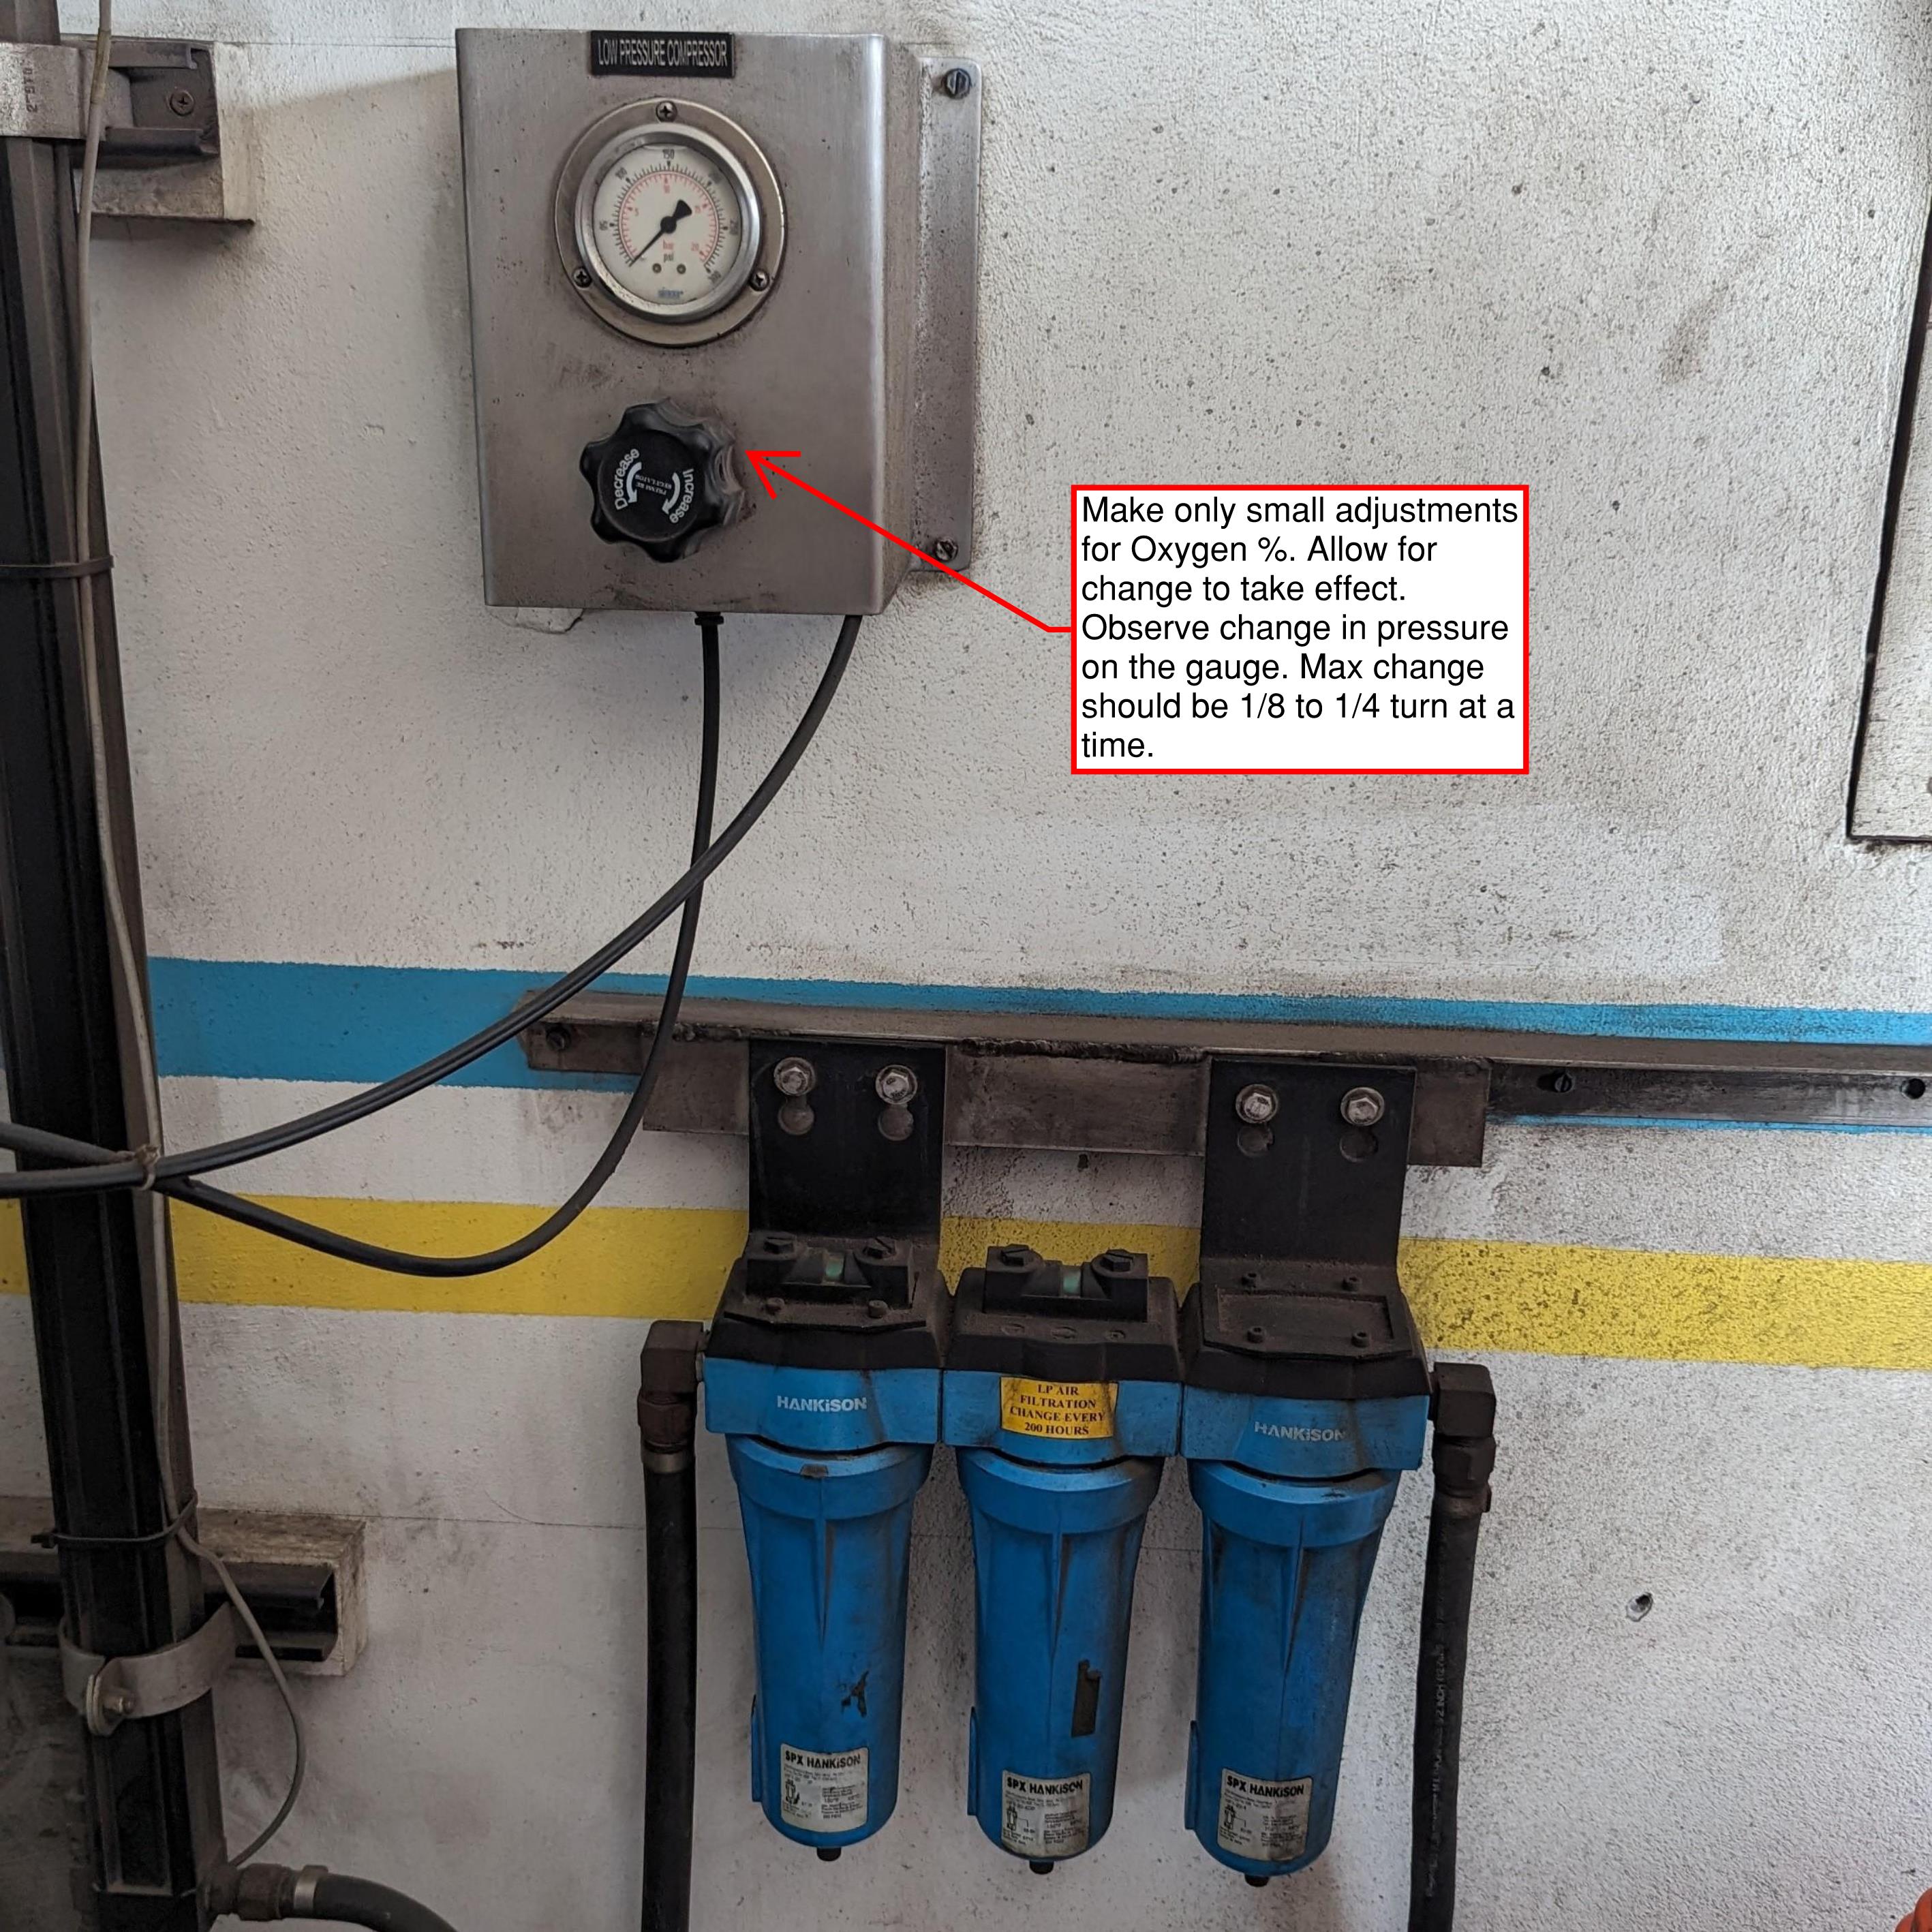
- Nitrox filling: Bleed the system until the air reaches the appropriate oxygen percentage by opening one of the fill whips to atmosphere.
- Monitor the Oxygen Sensor: It is normal on startup for the percentage to start around 32%, fall to near 21%, and then rise again. You can start filling when the percentage exceeds 31%.
Note
Target percentage is 32.3% +/-. You can adjust using the regulator on the Nitrox machine. Don't just turn the knob, look at the pressure gauge and adjust up or down as needed. More pressure = higher O2 %.
Warning
Ensure that the Oxygen Sensor is calibrated! This can be done by taking off the cap and setting the percentage to 20.9%.
Arrange Tanks for Filling
- Arrange rows: Set up 4–5 rows of tanks with a clear path to the control panel.
- Stagger tanks: Allow the whips to be placed on the tanks without putting pressure on the stems.
- Connect fill whips: Attach to the row furthest from the wall for efficient operation.
Warning
Check each tank for Hydro and Visual Inspection Status. Pull any tanks aside that are due for Hydro or Visual Inspection. Do NOT drain the tank unless you are going to complete the VIP that day. Do NOT leave tanks without pressure overnight.
Filling Procedure — Nitrox (Cascade)
-
Duration: Filling a row of 8 tanks using only the compressor takes approximately 20–30 minutes. Using the cascade system can reduce filling time to as little as 4–6 minutes, depending on fill speed. Control the speed by adjusting the bank valves.
-
Initial Filling:
- Begin filling tanks from Bank 2 and the compressor simultaneously.
- Allow the tanks and Bank 2 to reach equilibrium.
-
Switch Banks:
- Close Bank 2 before opening Bank 1 to complete the fill.
- If Bank 1 is below 3300 psi, close it after equilibrium is reached and finish topping off the tanks with the compressor.
-
Reaching Full Pressure:
- Once the tanks reach full pressure (3300 psi hot), close the tank valve.
- Open Bank 1 during the switchover process.
-
Switch Tanks:
- Replace the filled tanks with new ones and repeat the process.
- If you need to step away, consider filling the banks (Note: Bank 2 has a maximum pressure of 3000 psi).
-
Compressor Auto-Shutdown:
- The system will automatically shut off when it reaches 4500 psi.
- If the tanks are full and you need to restart the compressor, close the tank valves and then open the appropriate bank valve.
-
Nitrox Compressor Behavior:
- The Nitrox compressor will not shut down as it continuously supplies enriched air to the high-pressure (red) compressor.
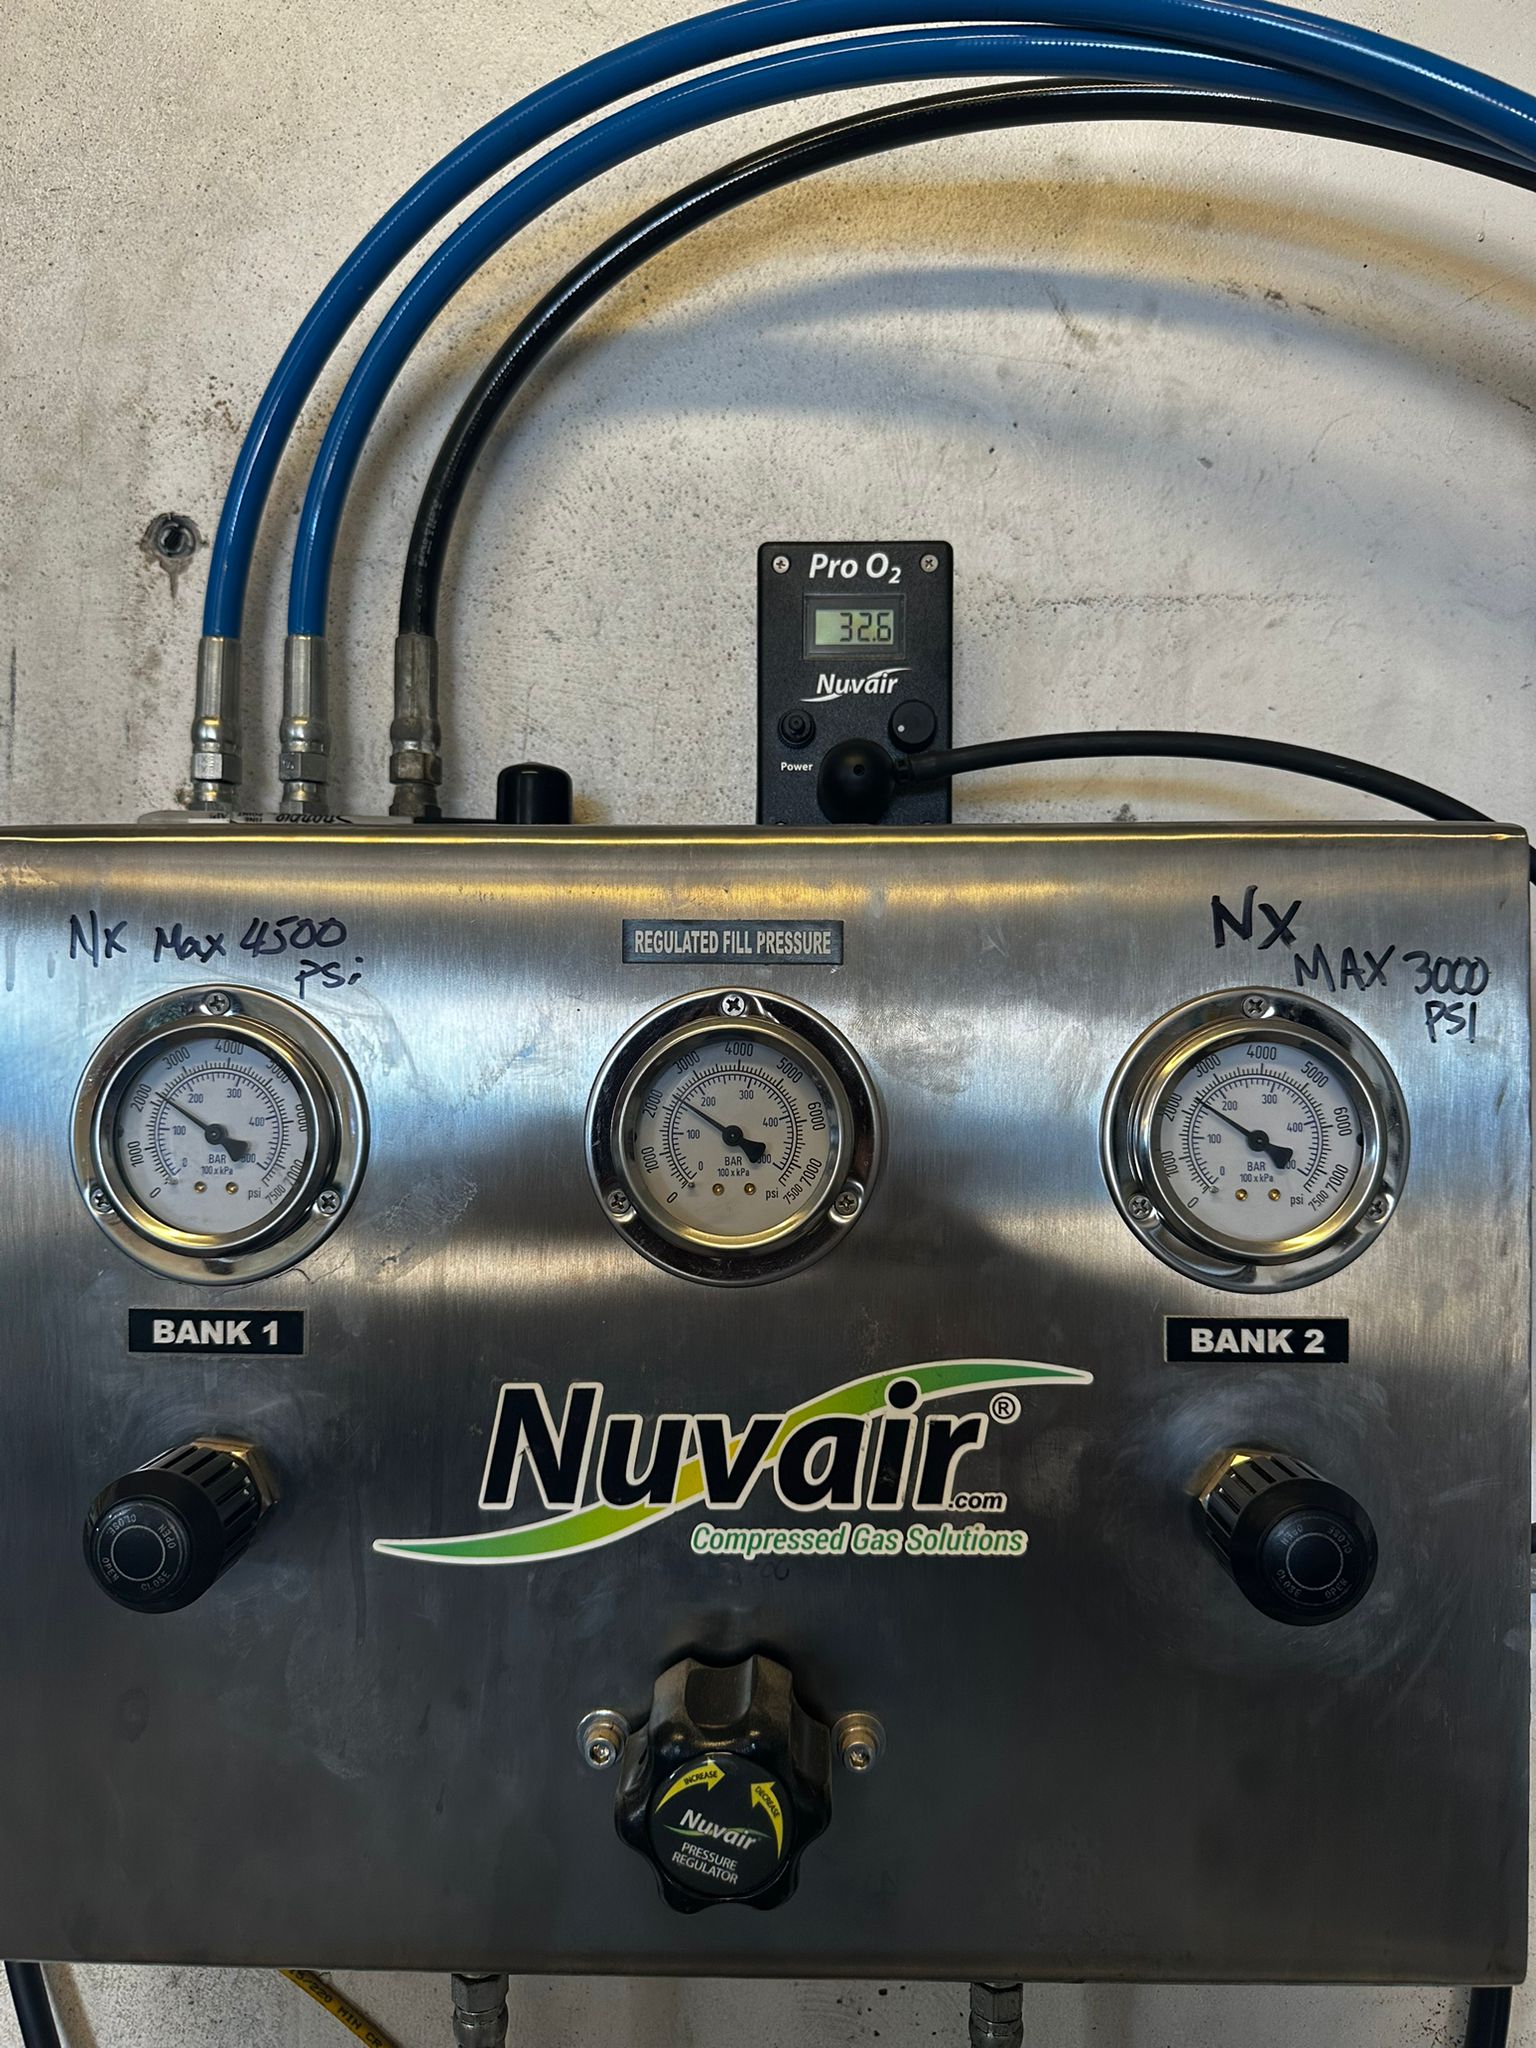
Danger
Never open both banks simultaneously!
Warning
- Maximum Pressure: The max pressure in Bank 2 is 3000 psi with no auto shutoff. Pay close attention.
- Pressure Regulation: The pressure to tanks is regulated at 3300 psi; when this is reached, the valve will close, back pressuring the system.
- Restarting Compressors: If the compressor shuts down at 4500 psi, it's OK, but avoid making it a habit. Ensure the tank valves are closed before opening the bank valve and restarting the compressor.
Filling Procedure — Air
- Duration: It takes approximately 20–30 minutes to fill a row of 8 tanks.
-
Current System: As of this writing, we do not have a dedicated air bank system.
-
Begin Filling:
- Line up the row of tanks and start filling.
- Monitor the pressure as the tanks approach 3000 psi.
-
Shut Off Half the Tanks:
- Once half of the tanks reach 3000 psi, shut them off.
-
Continue Filling to 3300 psi:
- Allow the other half of the tanks to continue filling until they reach 3300 psi.
- Note: Properly timing this will prevent the compressor from shutting off due to back pressure (4500 psi).
-
Switch the Tanks:
- While the compressor is pumping the second half of the tanks to 3300 psi, change out the first half of the tanks that were previously shut off.
-
Repeat the Process:
- Once the second half of tanks reaches 3300 psi, close them.
- Open the new set of tanks (the first half that was replaced) and repeat the process.
- Continue alternating until all tanks are filled to 3300 psi.
Shutting Down
- Shut down Nitrox Compressor: Rotate the On / Off / Start switch to Off. The shutdown procedure takes approximately 30 seconds.
- Purge condensate: Before shutting off the Red Compressor, manually open the drain valves to purge the condensate collectors (~5 seconds each, 3 total). Ensure the knobs are fully tightened when done.
- Shut down Red Compressor: Press the Off button. This shuts down immediately.
- Turn off remaining equipment: Blue Air Dryer, heater and air dryer plugs (two plugs behind the Blue Air Dryer), O2 Analyzer, and ensure the banks are closed.
- Shut off breakers: Turn off breakers for the Compressors and Fans.
Danger
If the banks are not closed, they will leak through the O2 analyzer overnight and drain down significantly.
Accountability
All dive staff are responsible for following this SOP. Report any equipment issues to management immediately.