Shopify POS
Purpose
To provide step-by-step instructions for using the Shopify POS system for all retail transactions, including sales, returns, exchanges, and cash management.
Scope
This SOP applies to all staff members who operate the Shopify POS system at the retail shop or harbor office.
Procedure
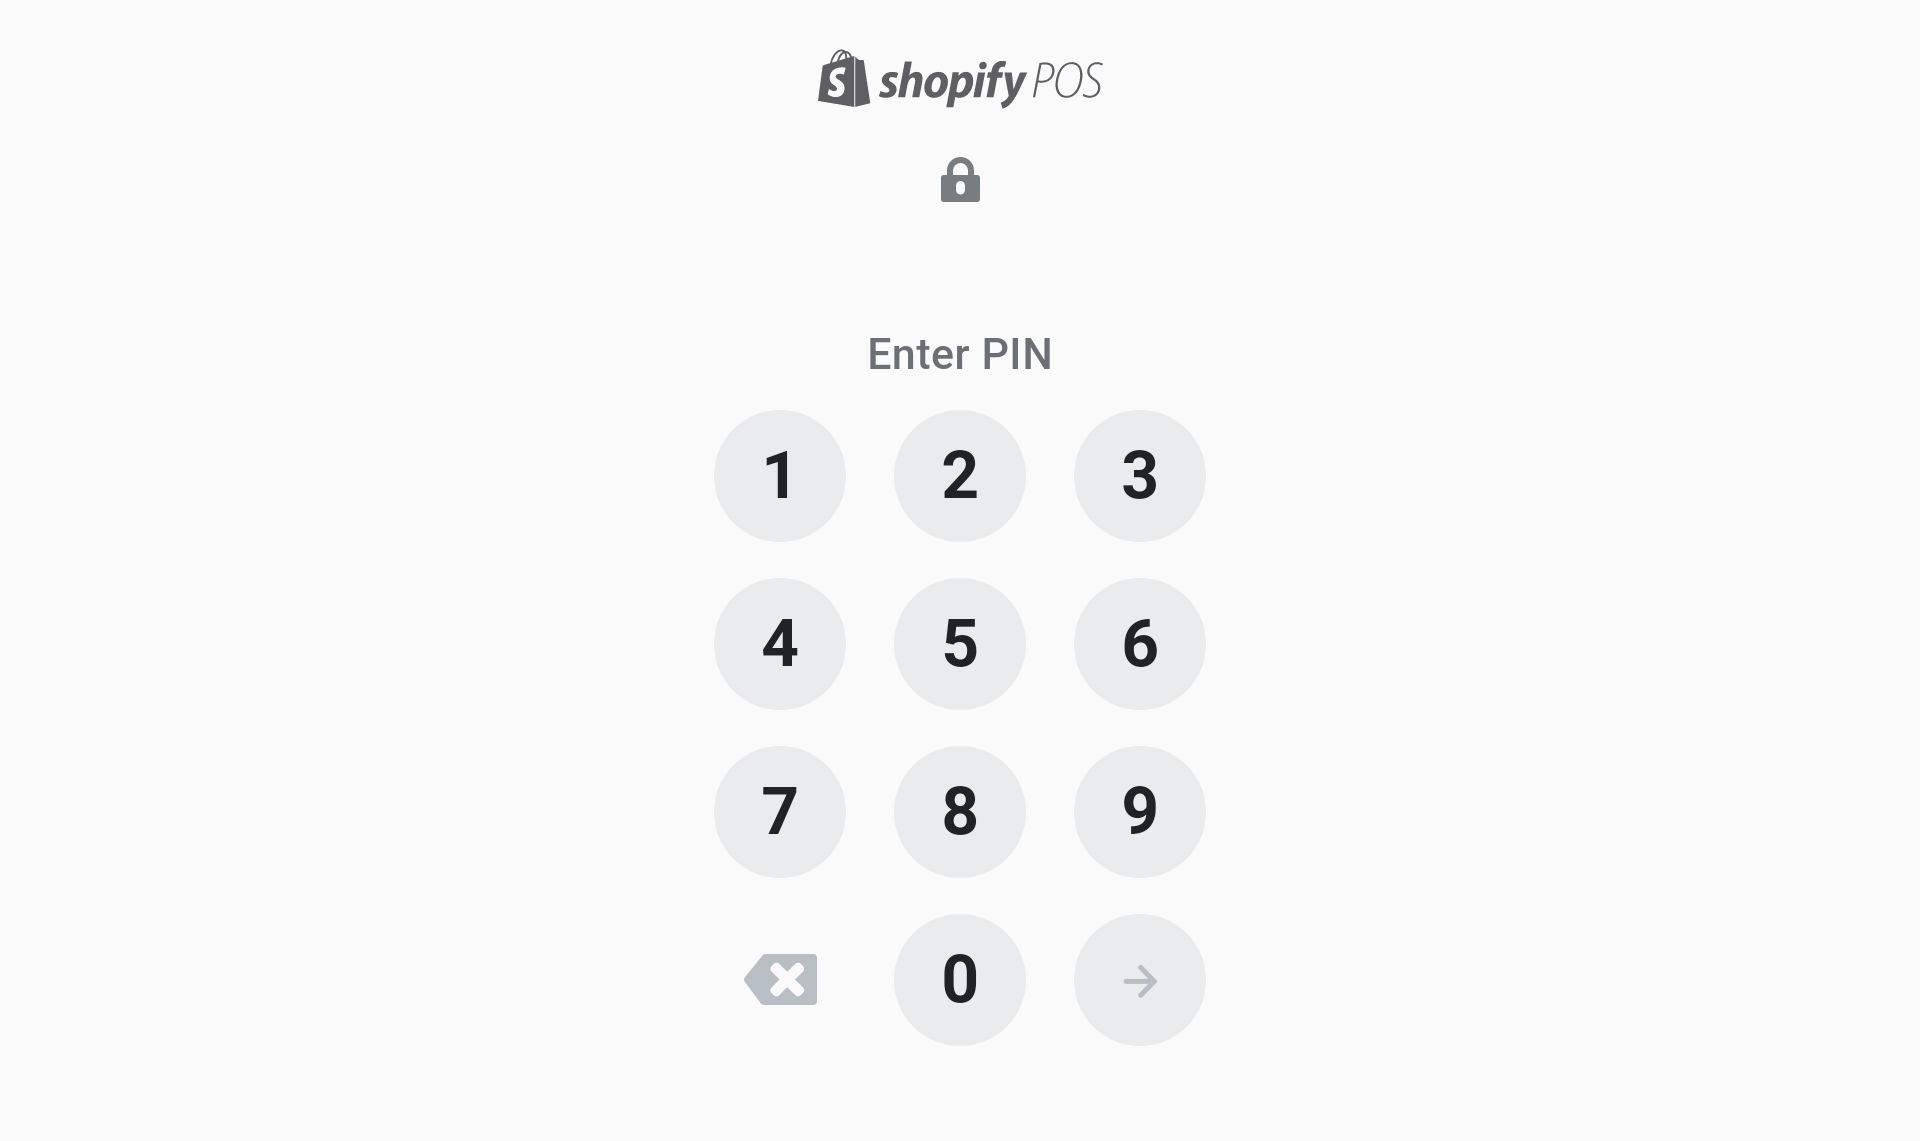
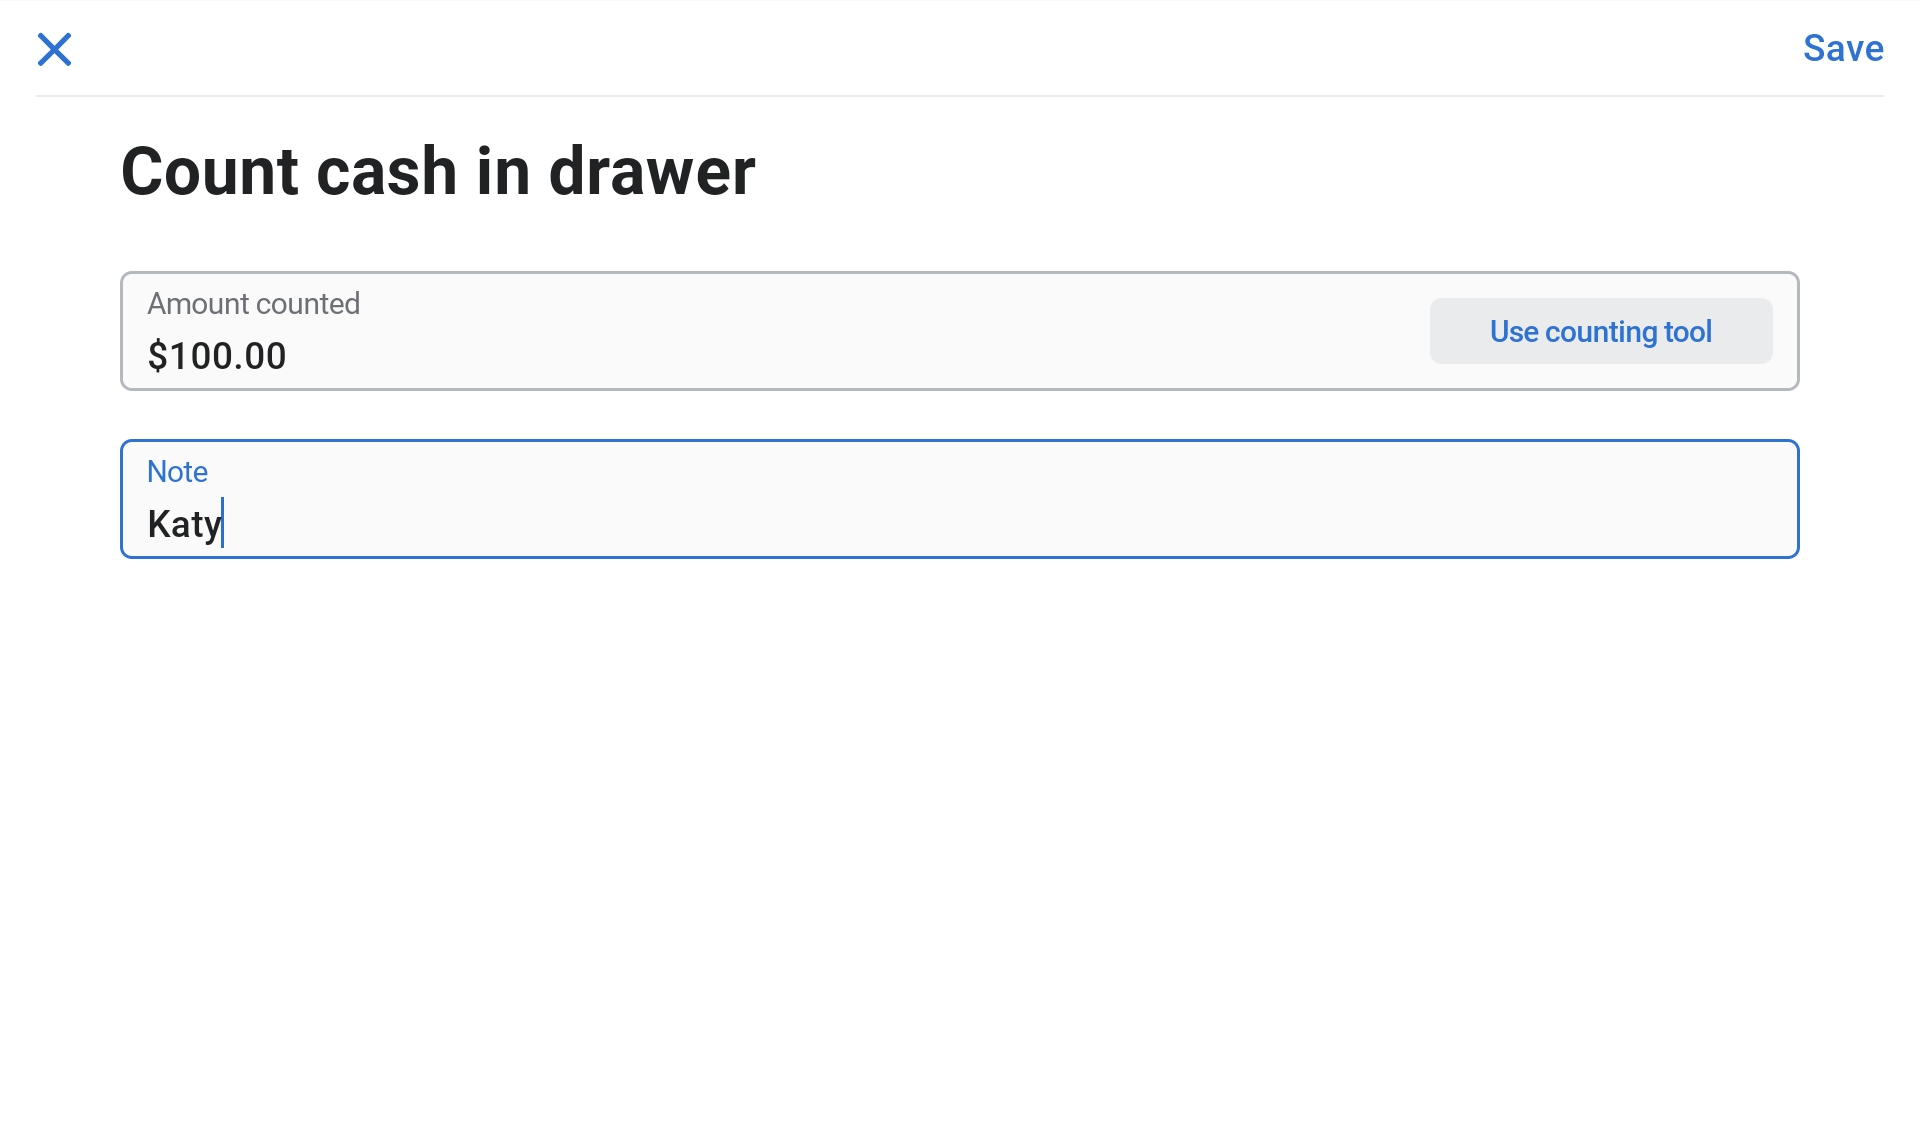
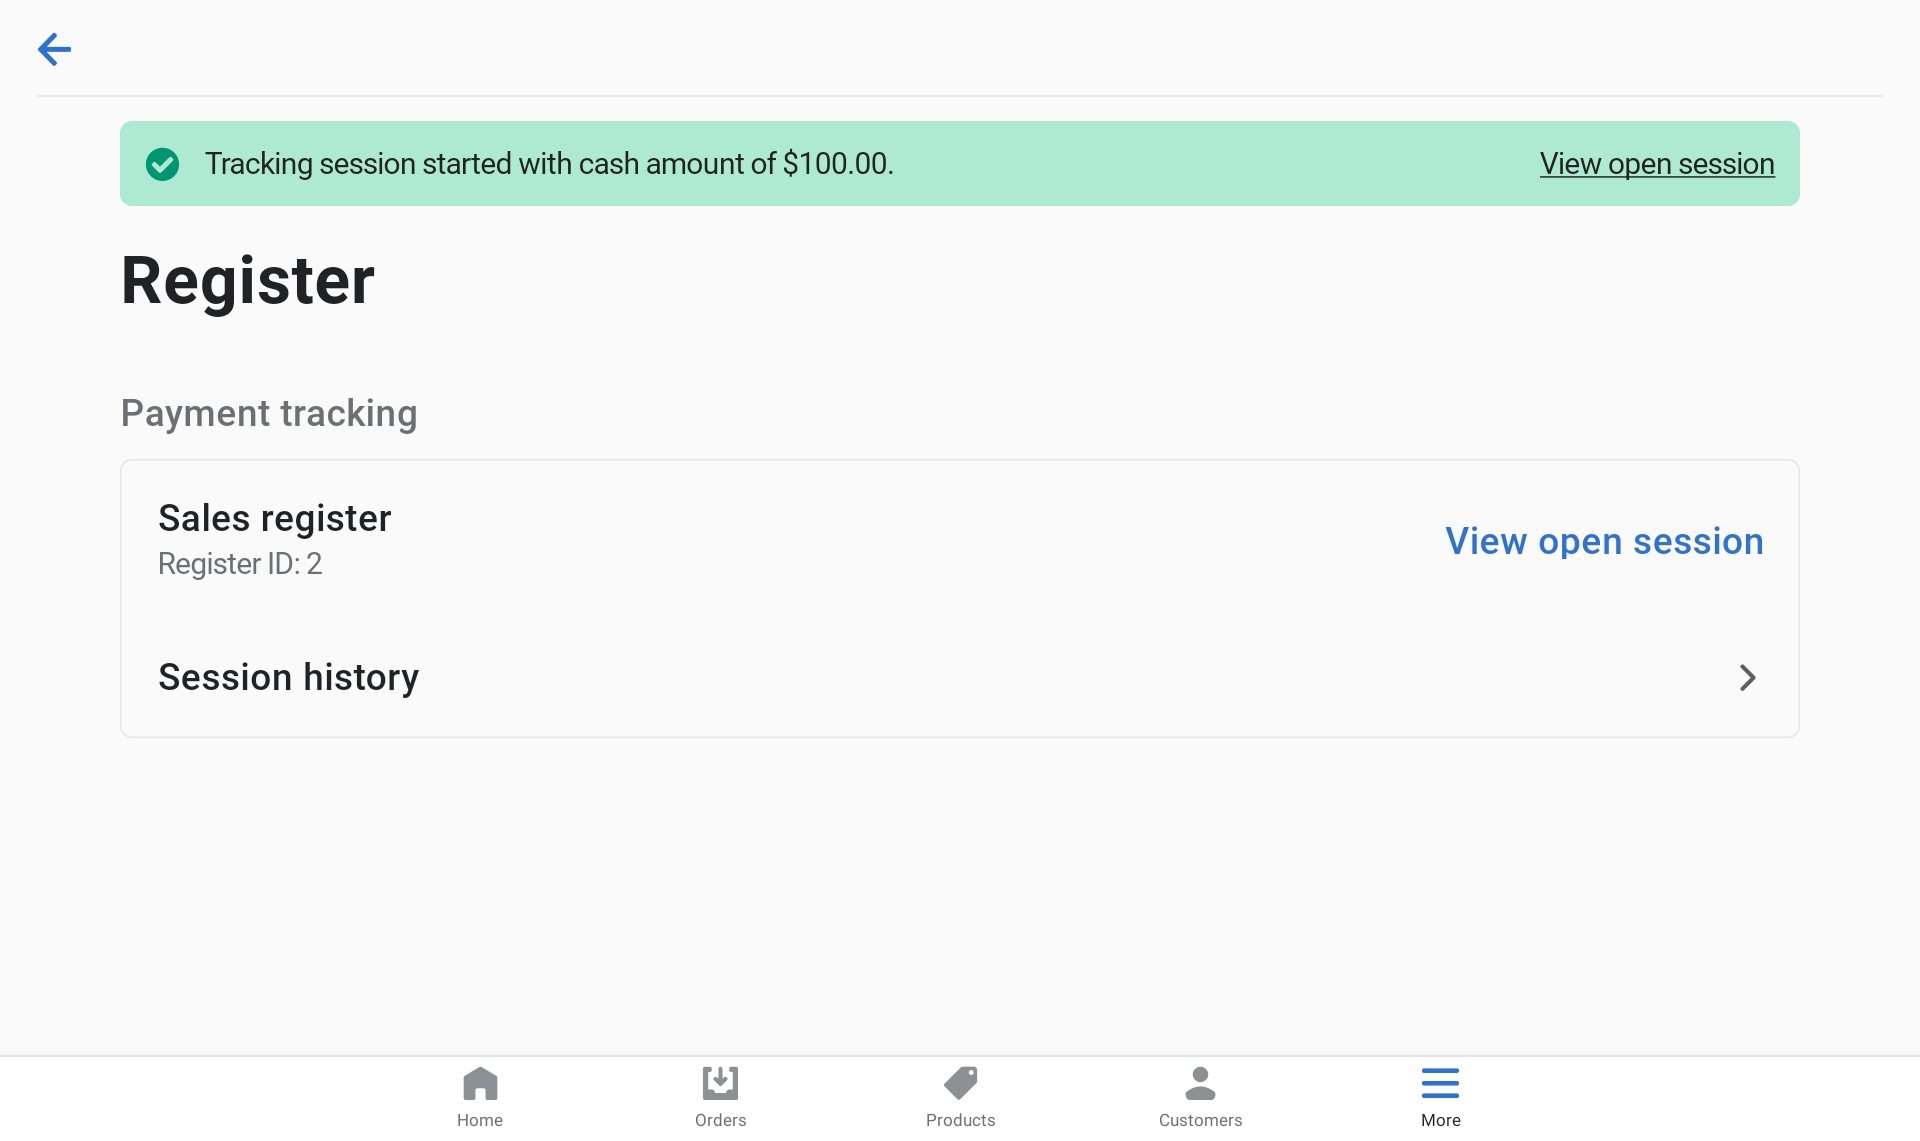
Opening the Register
- Enter your PIN: Use your 4-6 digit PIN.
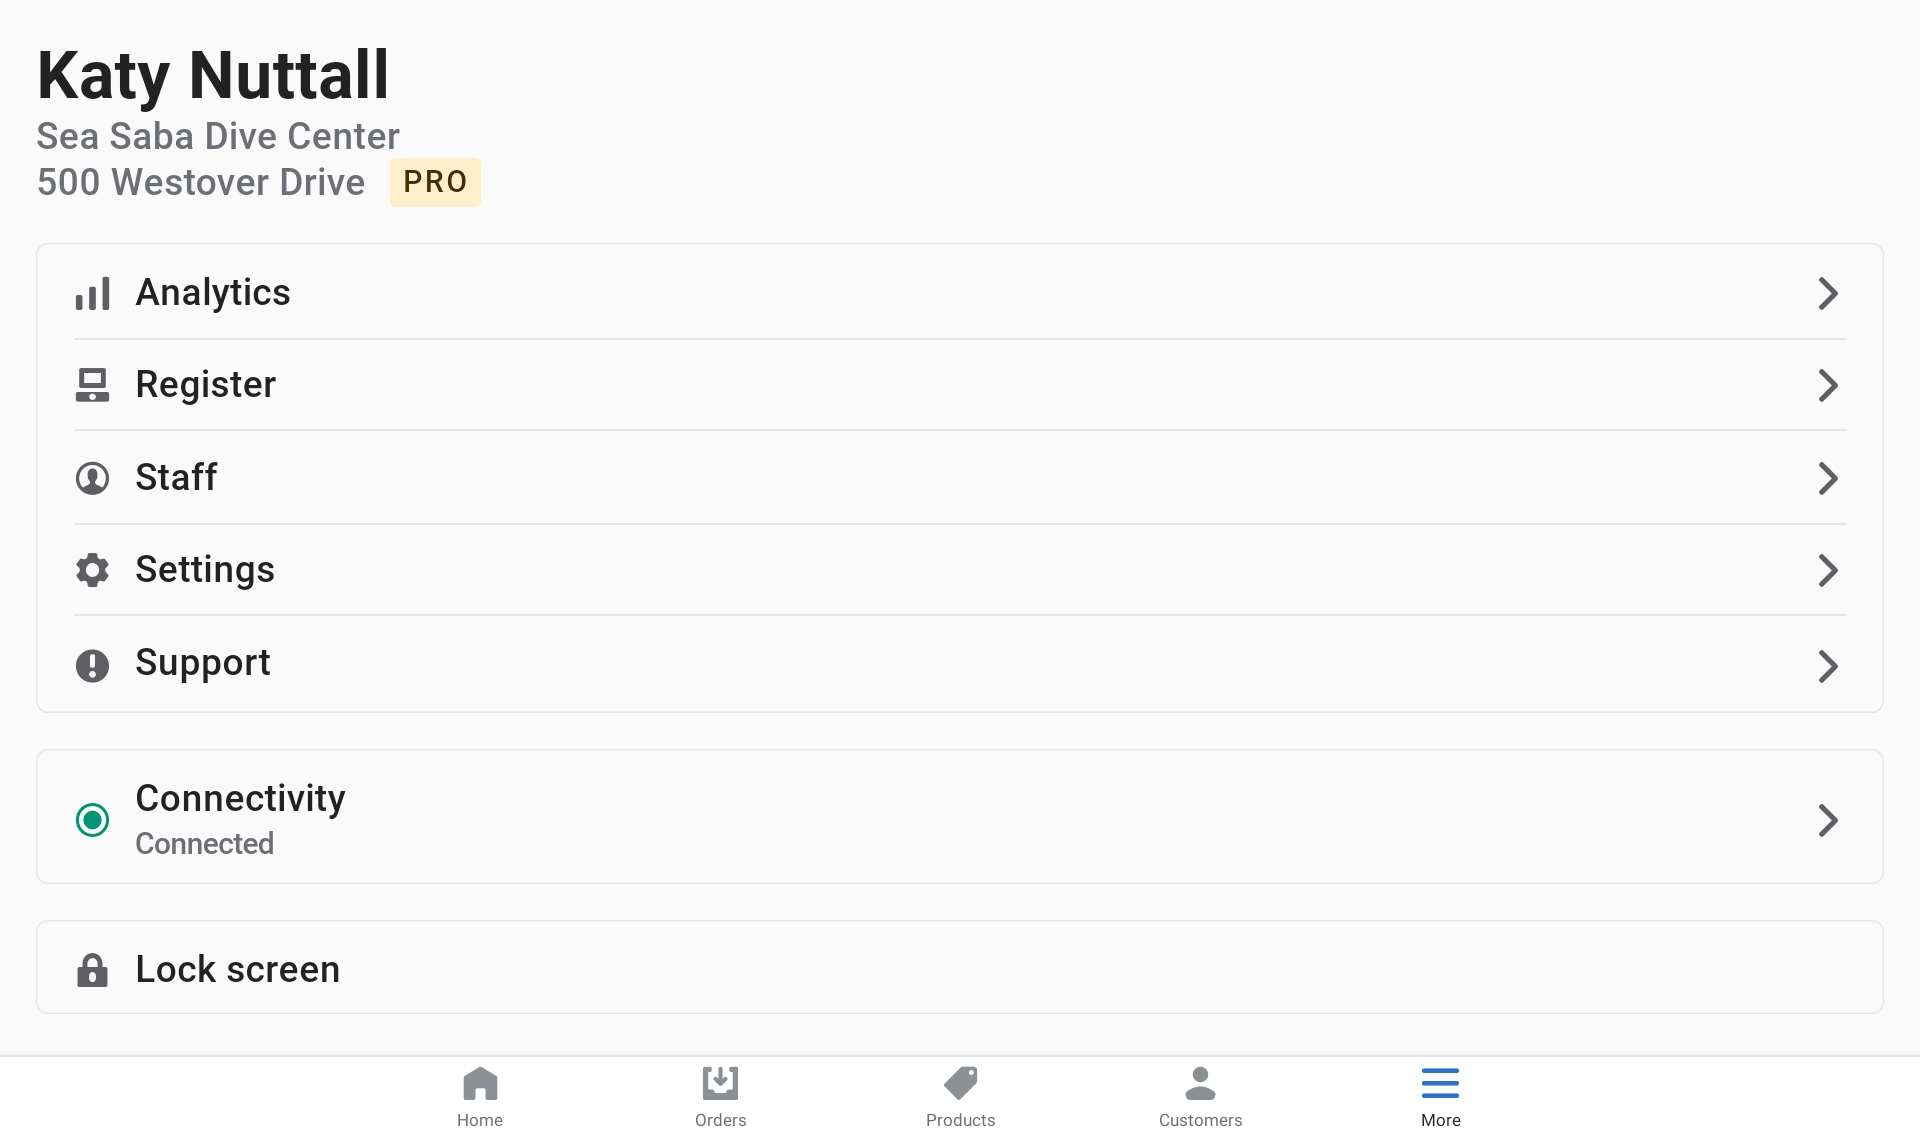
- Click on the "More" tab.
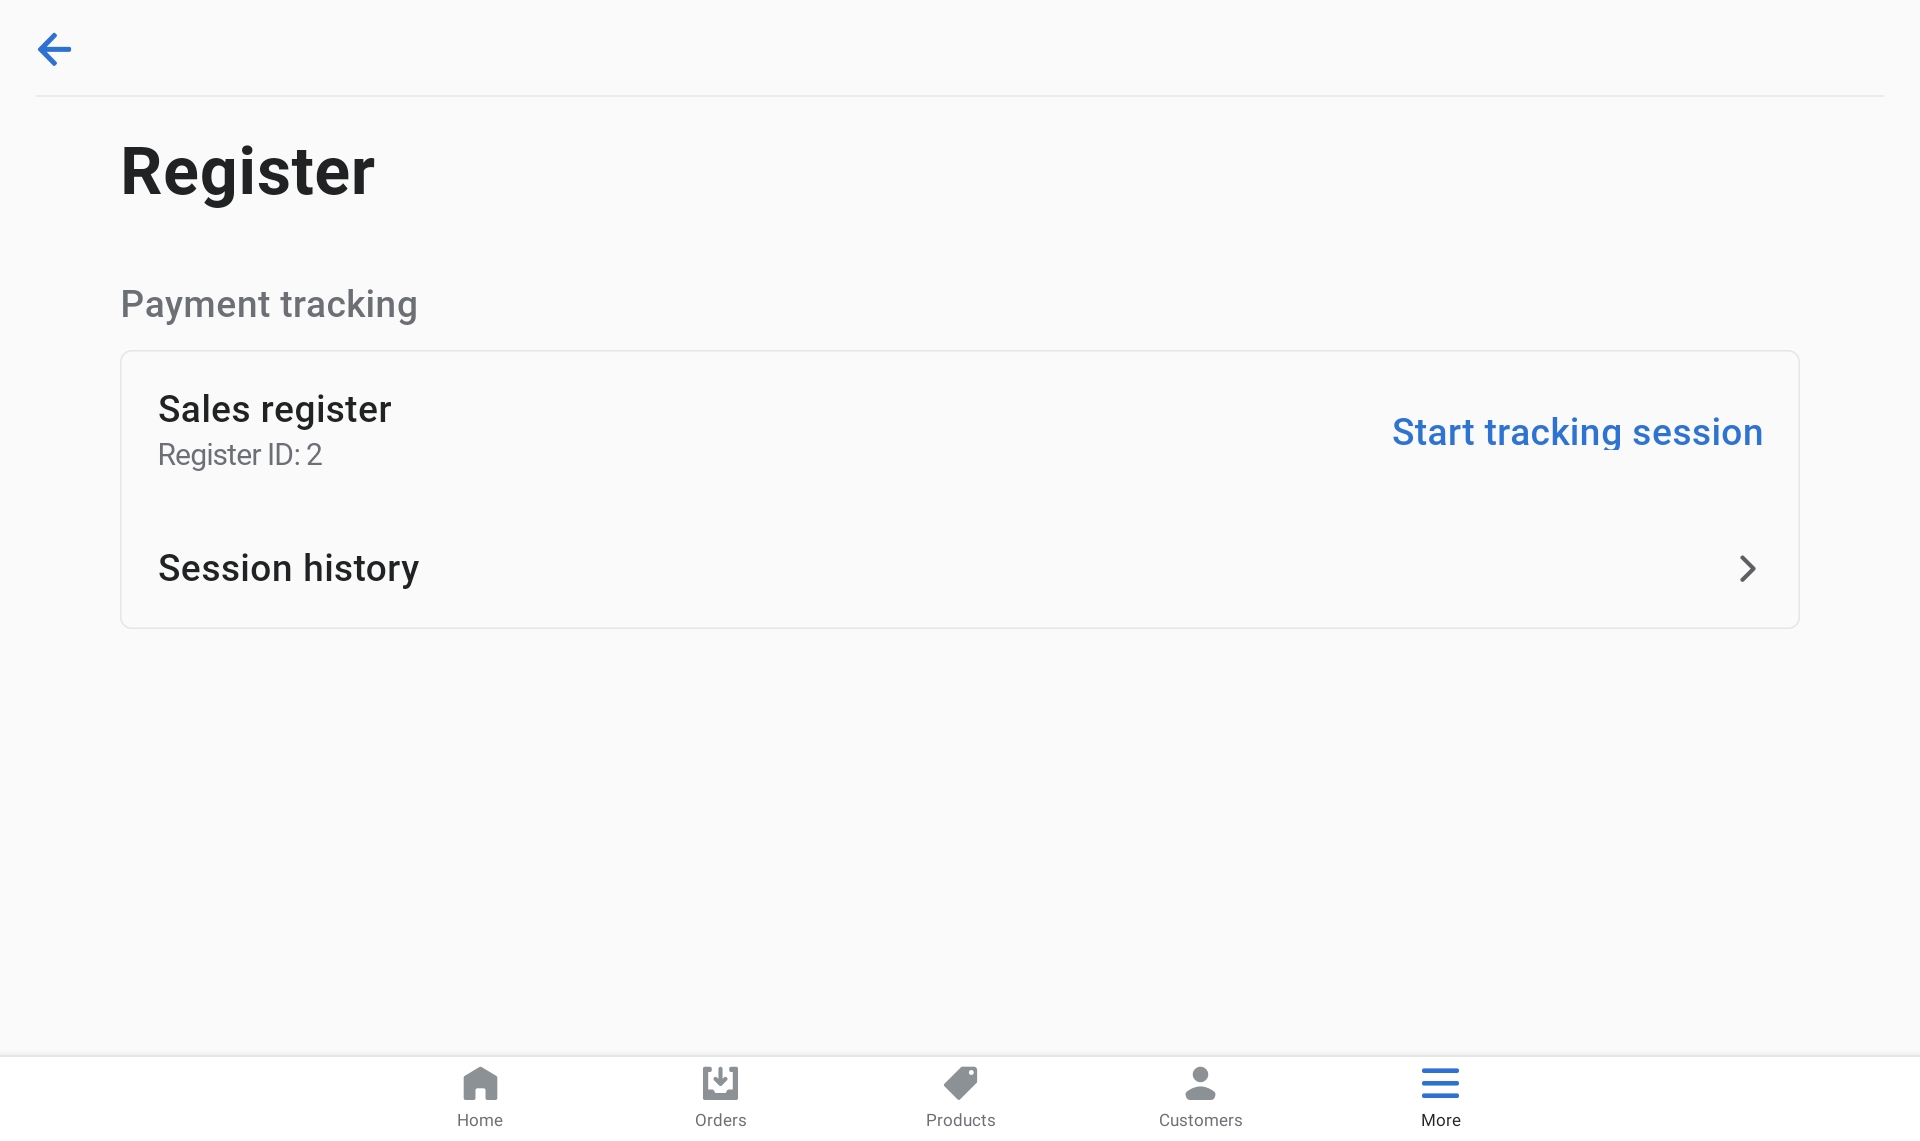
- Select "Register".
- Click on "Start Tracking Session".
- Enter the amount of cash in the register.
- Click on "Start Tracking".
- Count the cash in the drawer to make sure it matches what the float states.
- Save and verify Open Session.
Note
If you do not have a PIN, notify management so they can set you up with one.
Note
If the amount differs from the previous closing balance, correct it and add a note for the variance. Notify management.
Adding Customers
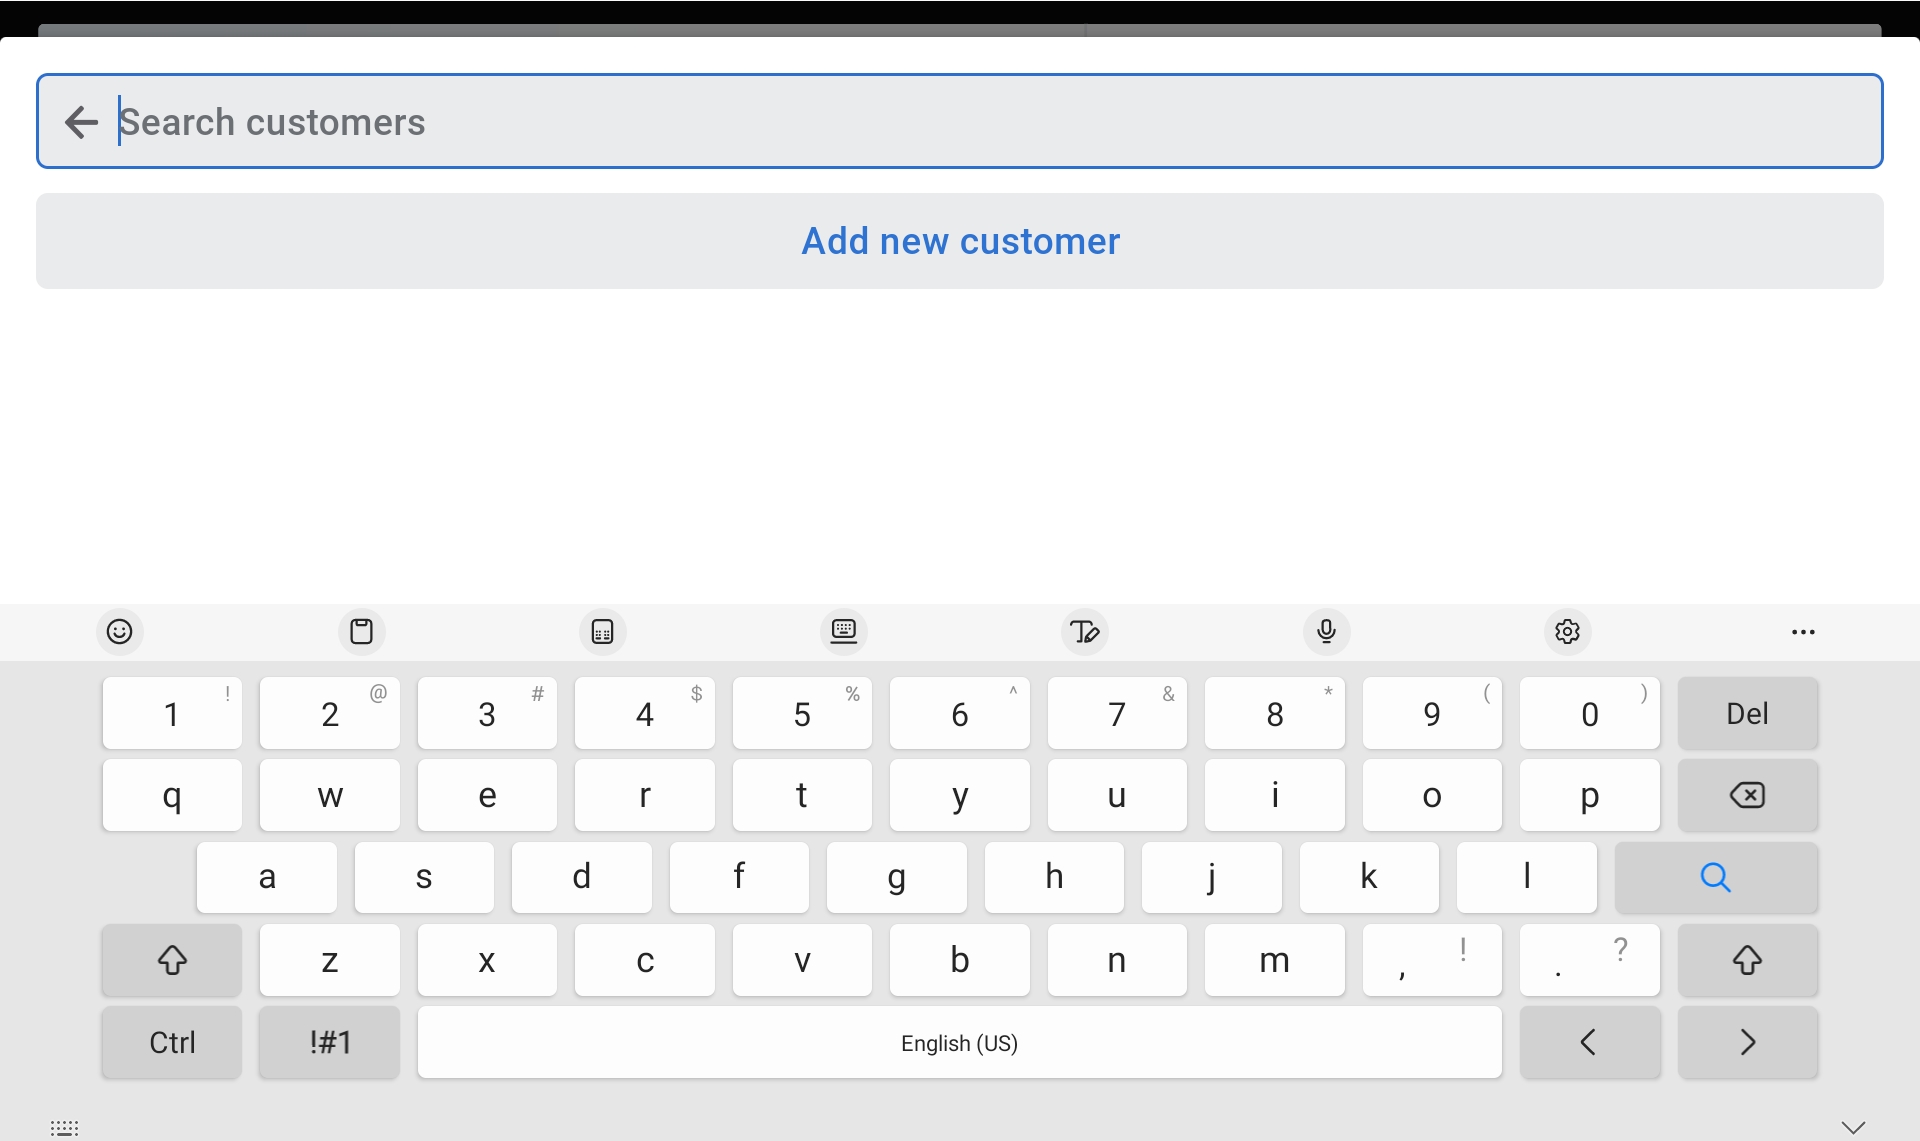
- Click on "Add Customer".
- Search for the customer in the system before adding a new one.
- If not found, click on "Add New Customer".
- Enter First and Last Name. Email/phone is optional for digital receipts.
- Click "Save".
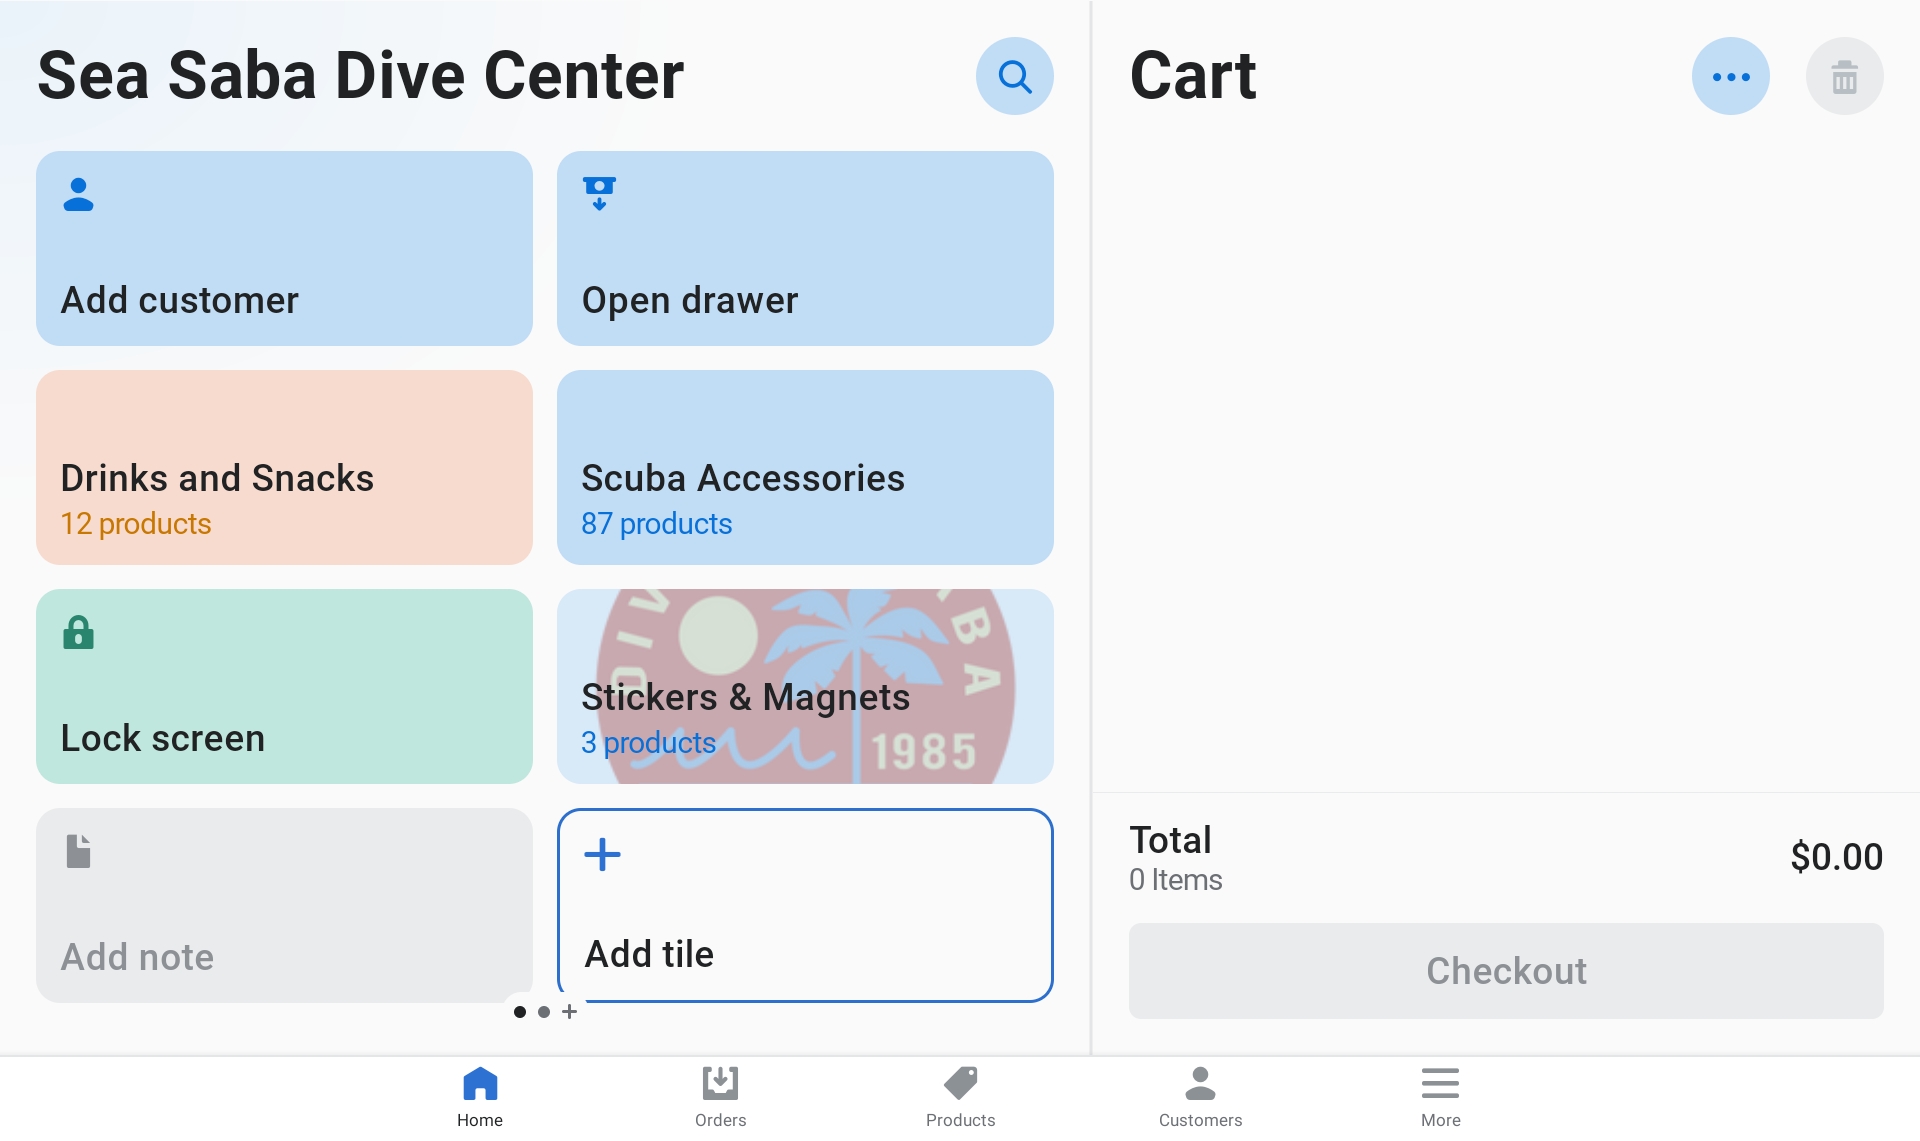
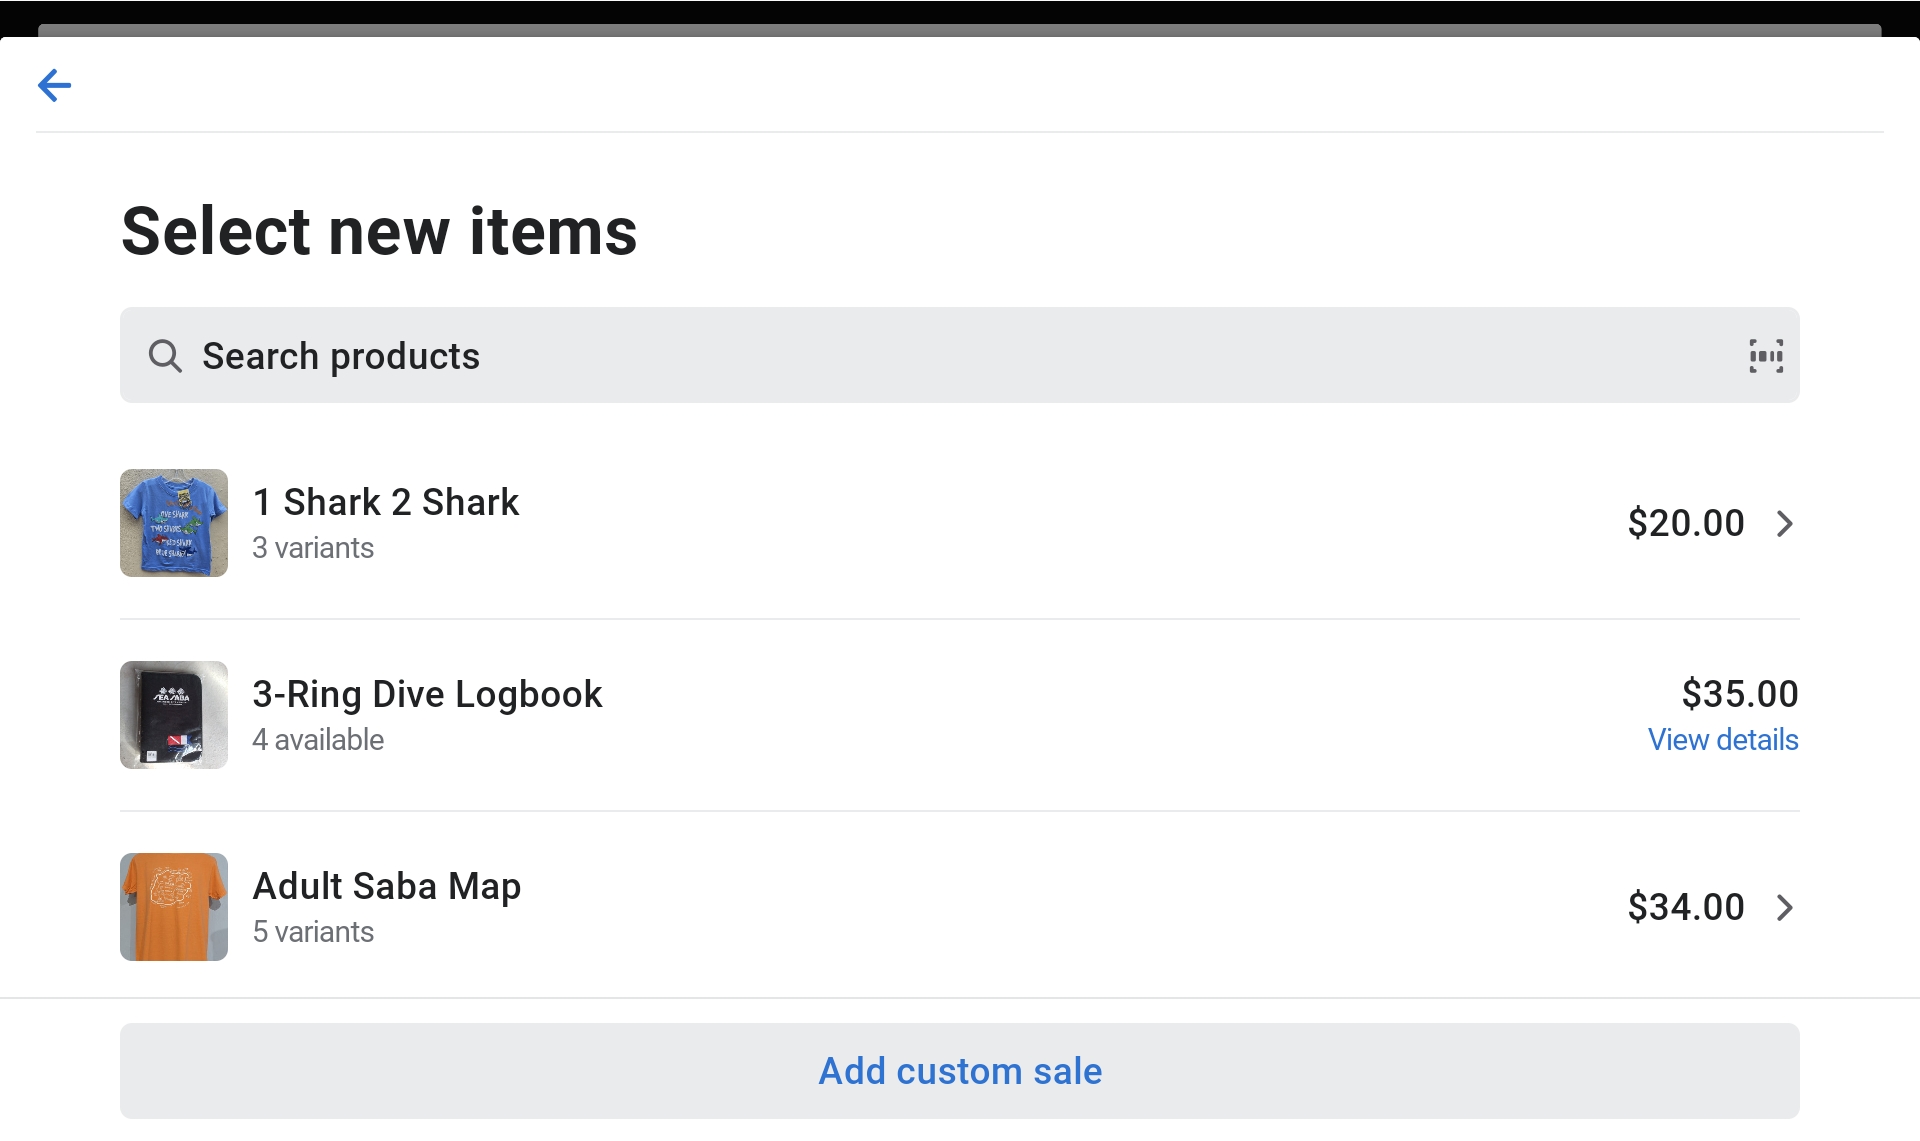
Making a Sale
- Stickers/Magnets: Click on the "Stickers/Magnets" tab, select the type, then select the specific item. This adds it to the cart.
- Search for items: Click on the "Magnifying Glass" icon to search, or click the "Barcode" icon to scan with the camera.
Warning
Make sure you select the correct color/size when selecting items, otherwise the inventory will be incorrect.
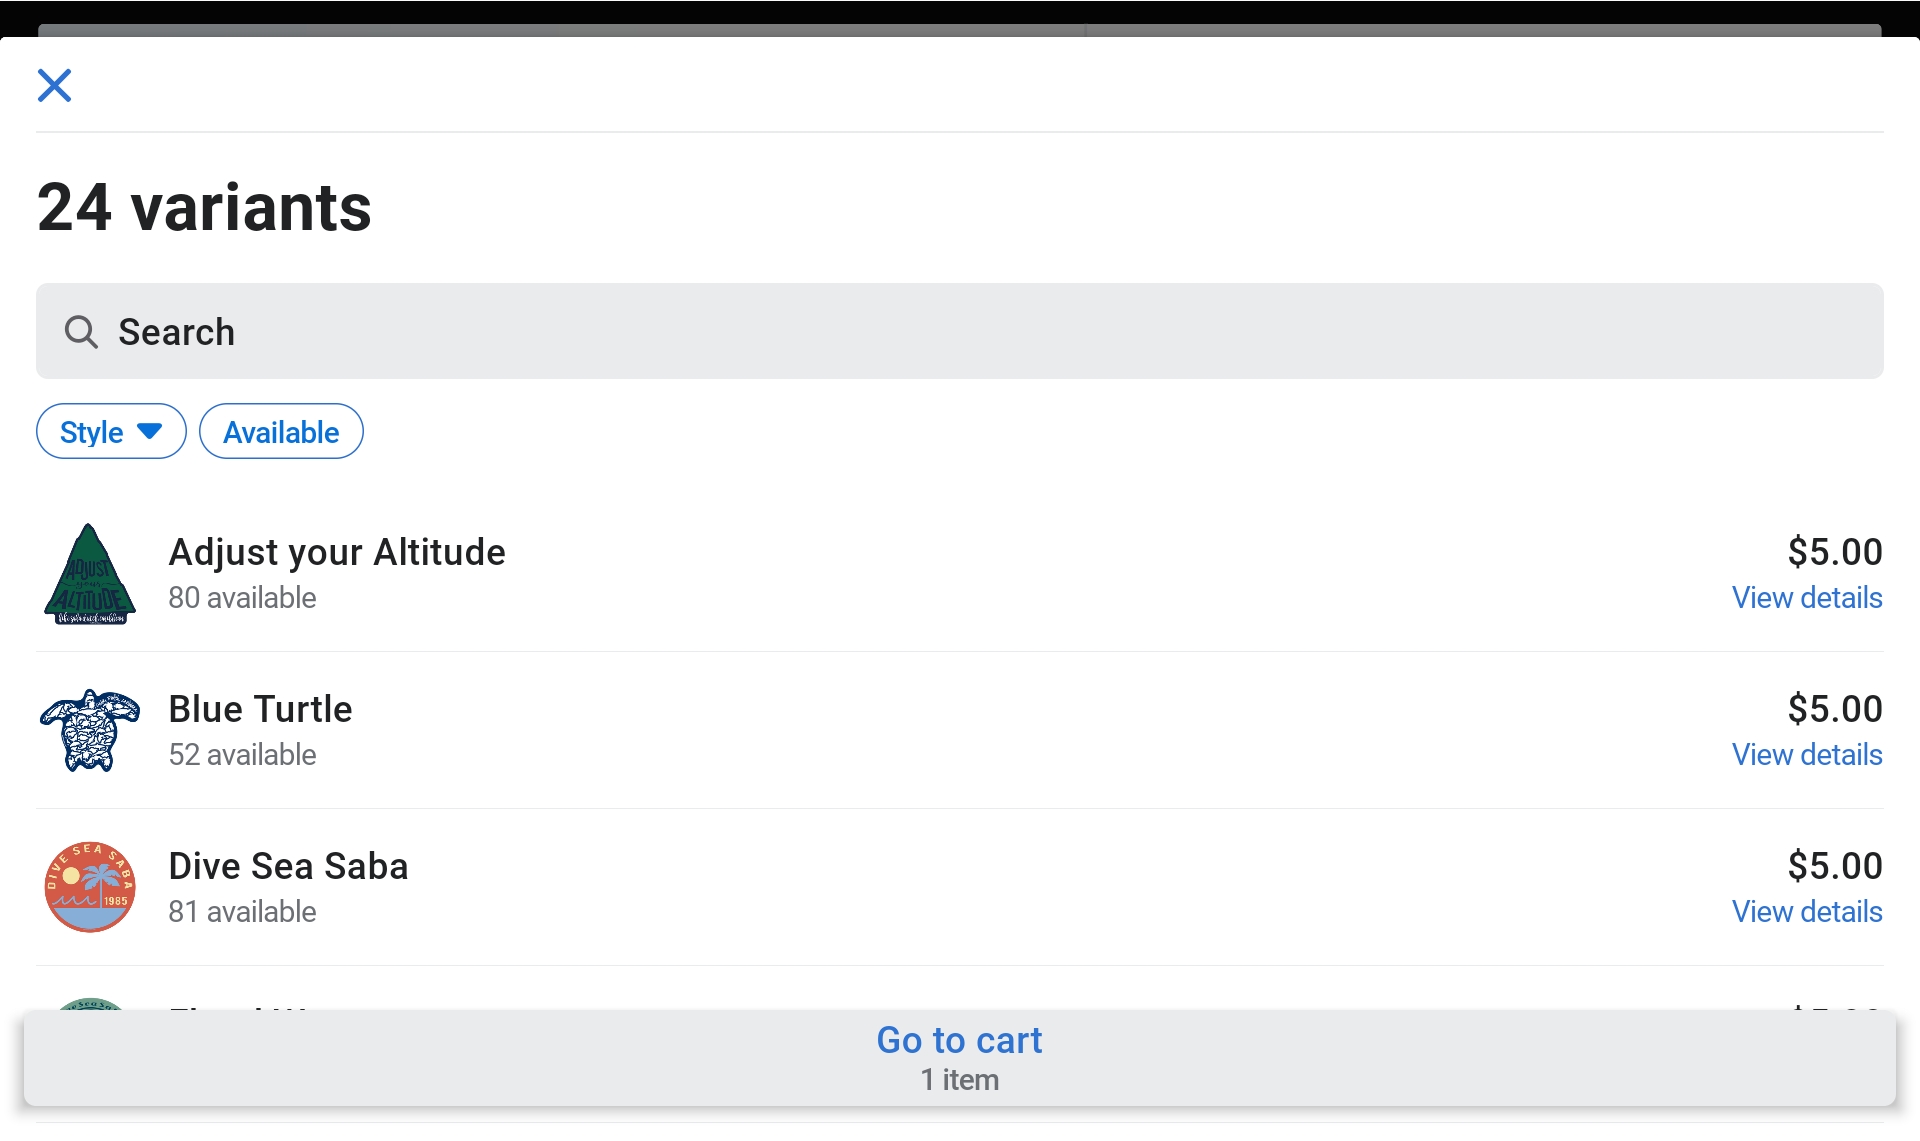
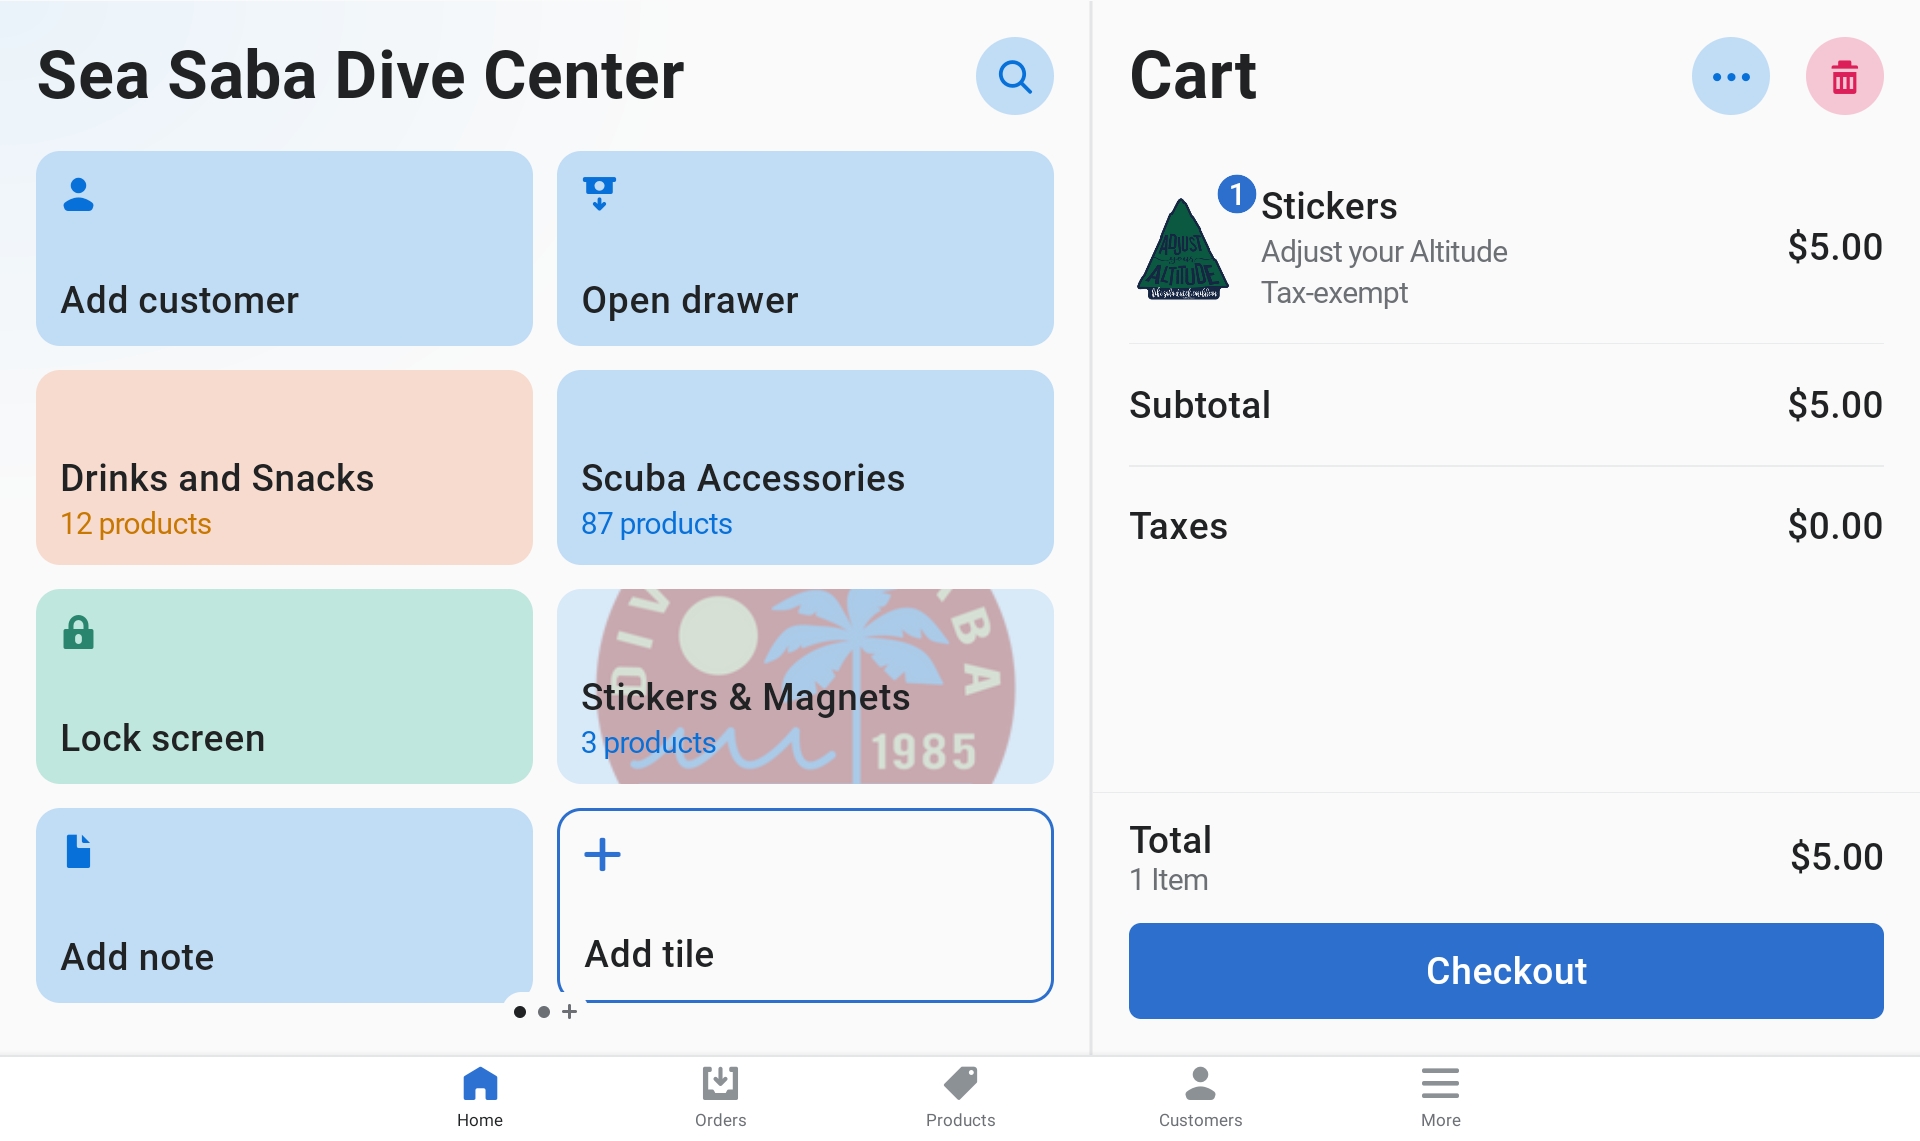
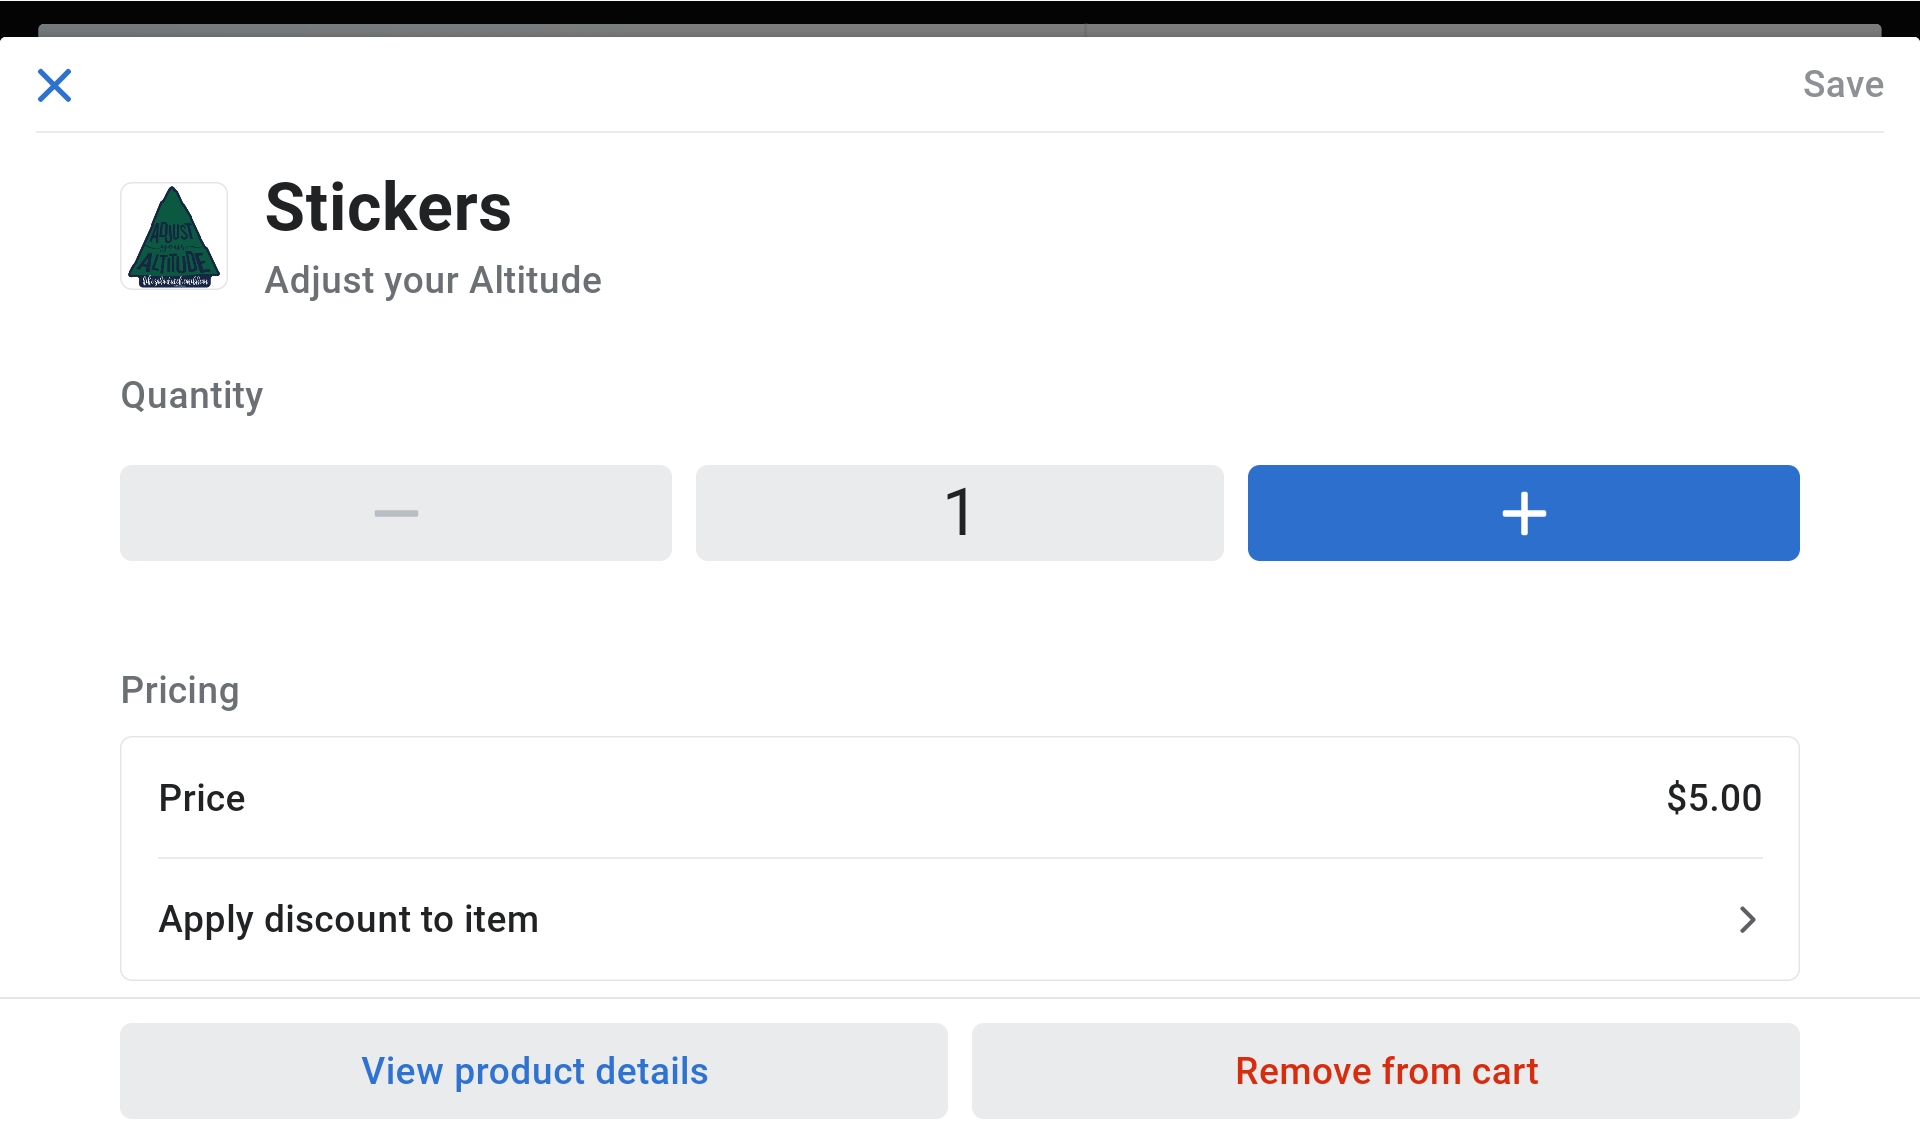
- Adjust quantities: If the customer is buying multiple of the same size and color, click on the item to adjust quantities.
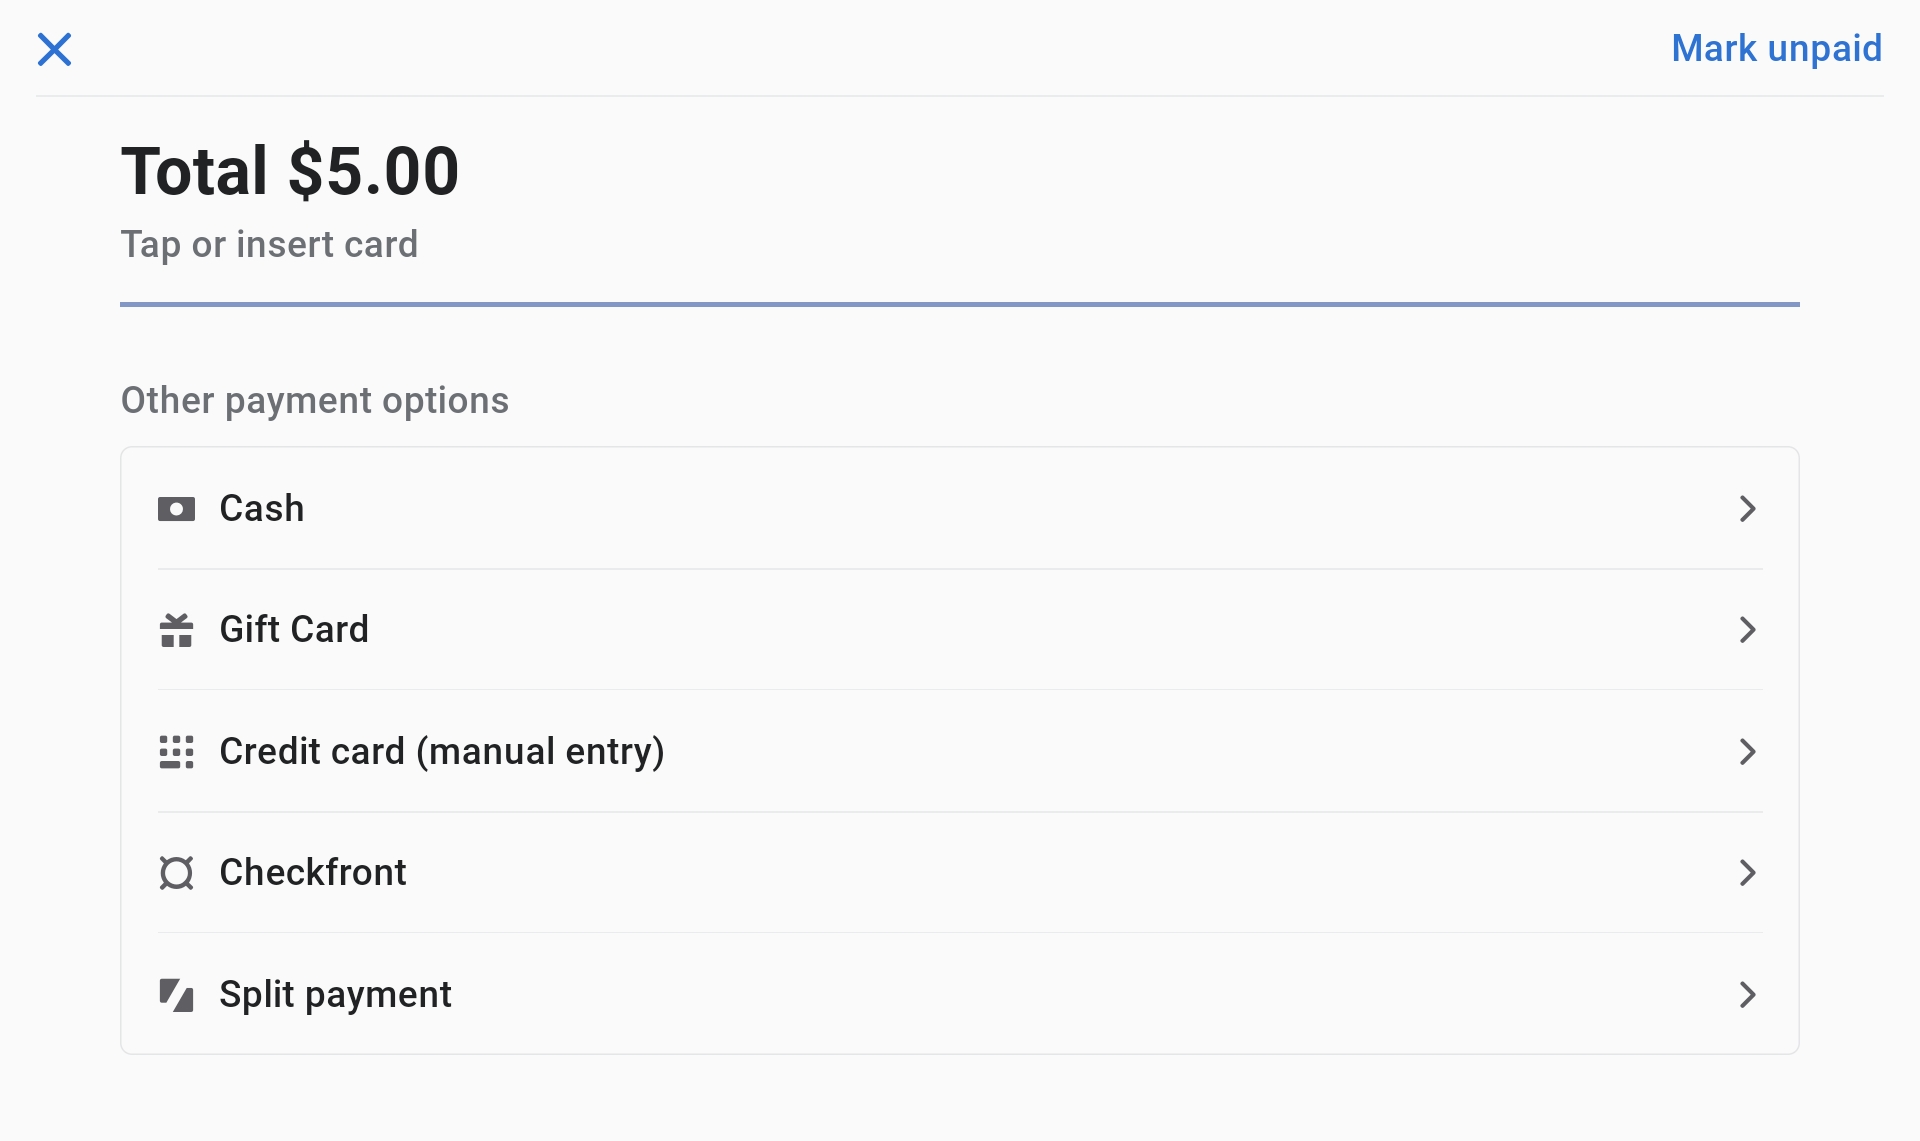
- Click "Checkout" when ready.
- Card payments: Have the customer insert/tap the card on the card reader.
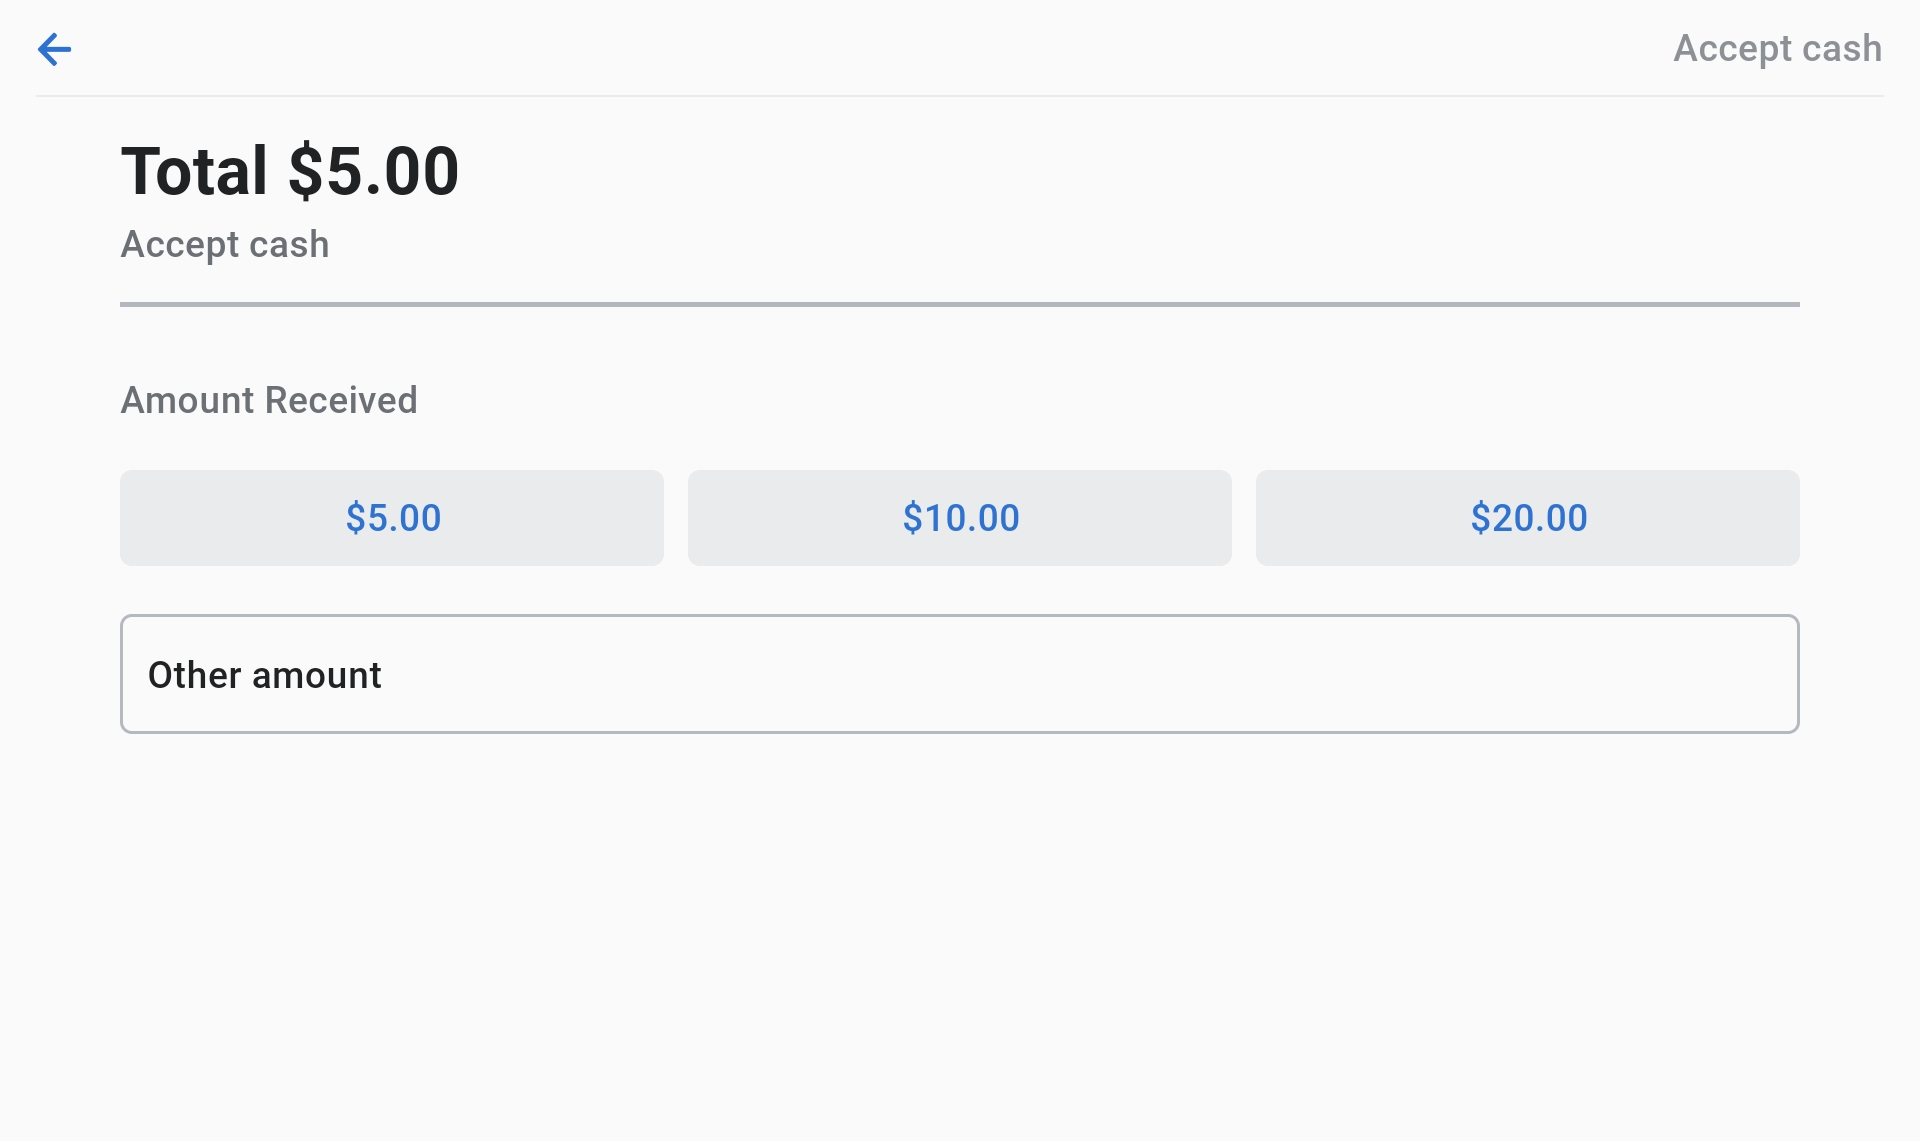
- Cash payments: Click on "Cash" and enter the amount received.
- Receipt: Ask the customer if they would like a printed or digital receipt. If digital, ask email or text and have them enter the information.
Adding Cash to Register
Note
This is mainly used for Checkfront Reservations paid in cash.
- Click on the "More" tab.
- Select "Register".
- Click on "View Open Session".
- Click on "Add Cash".
- Enter the amount received: If the customer pays with $100 for a $60 ticket, enter $60.
- Make a note with the customer's name and what the money was for (e.g., "Joe Blow Diving").
- Save and add cash to the register.
![]()

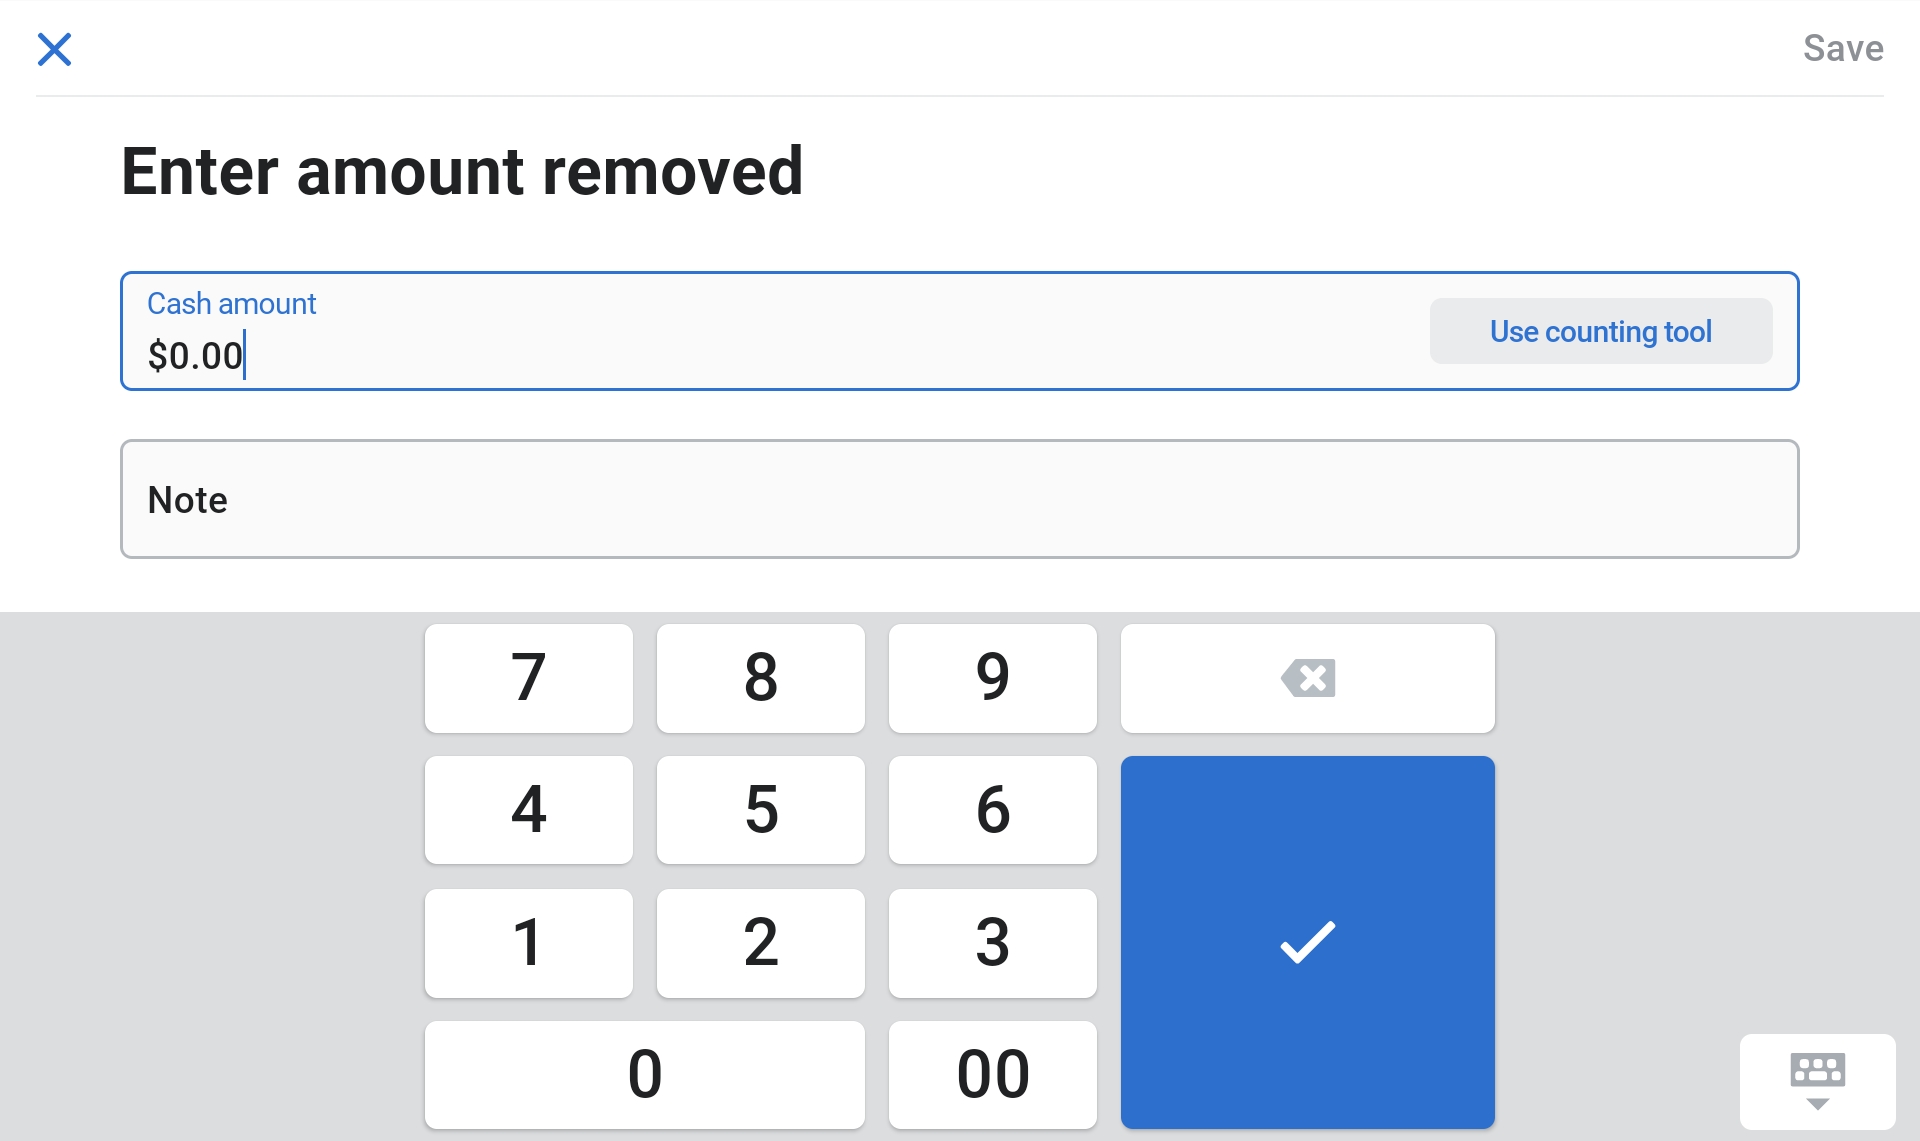
Removing Cash from Register
Note
This is mainly used for Refunds or Online Order Shipping Costs.
- Click on the "More" tab.
- Select "Register".
- Click on "View Open Session".
- Click on "Remove Cash".
- Enter the amount to be removed.
- Make a note for the reason (e.g., "Joe Blow Online Order Shipping").
- Save and remove the cash from the register.
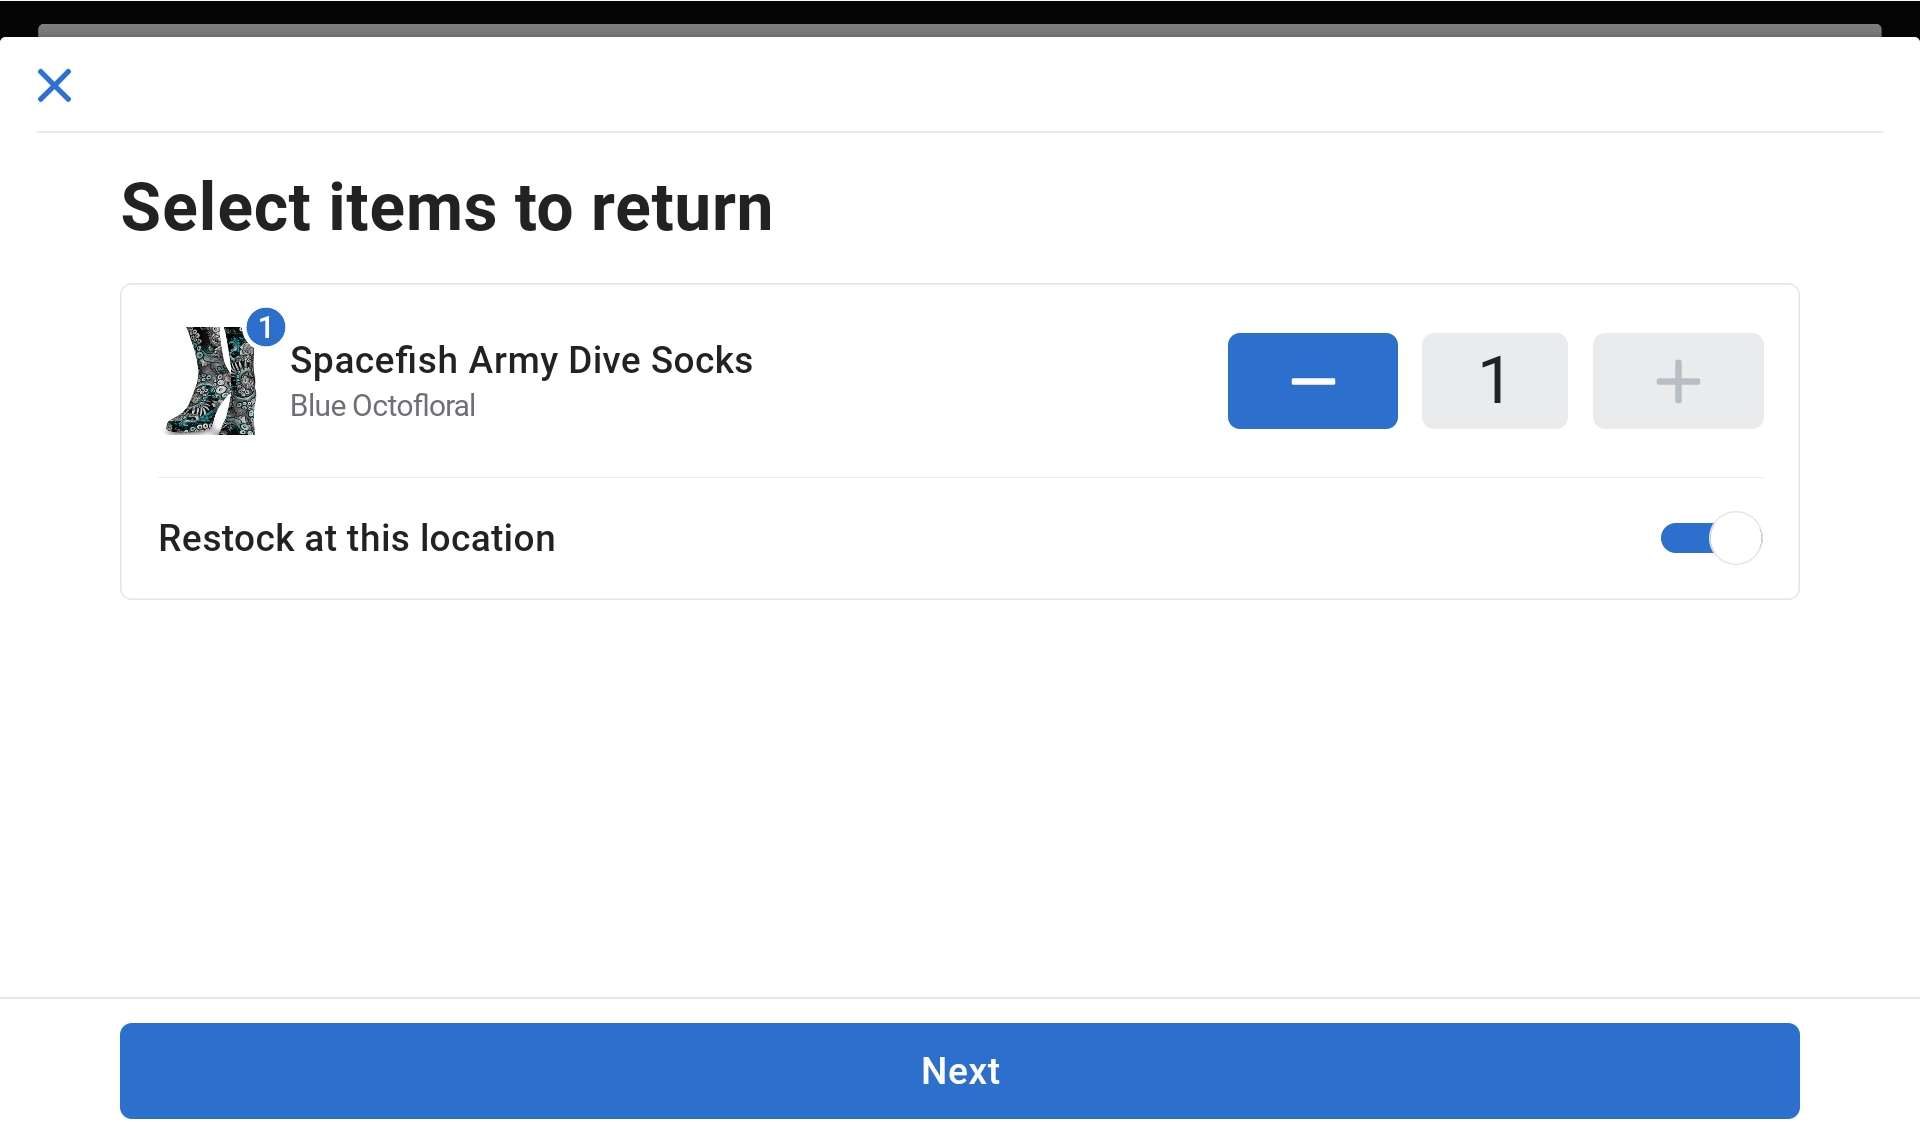
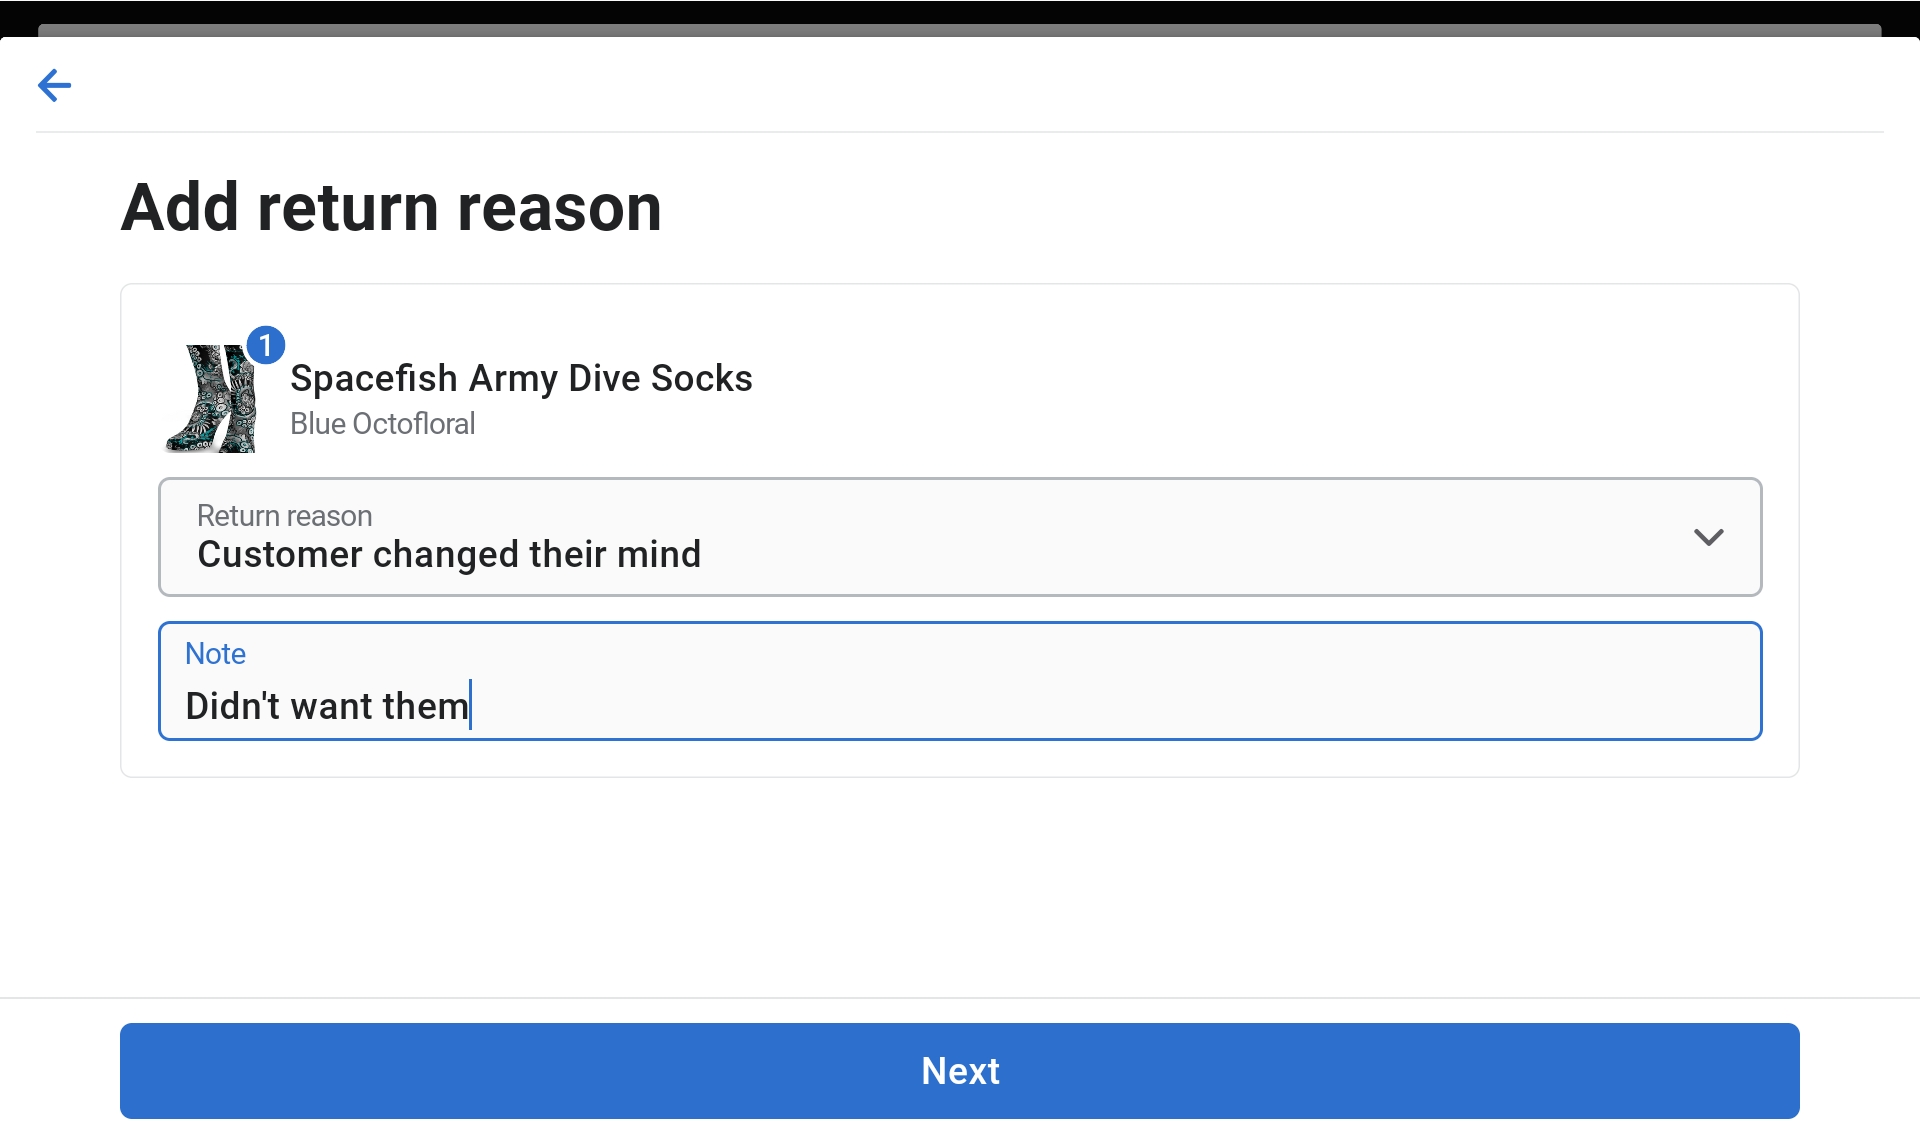
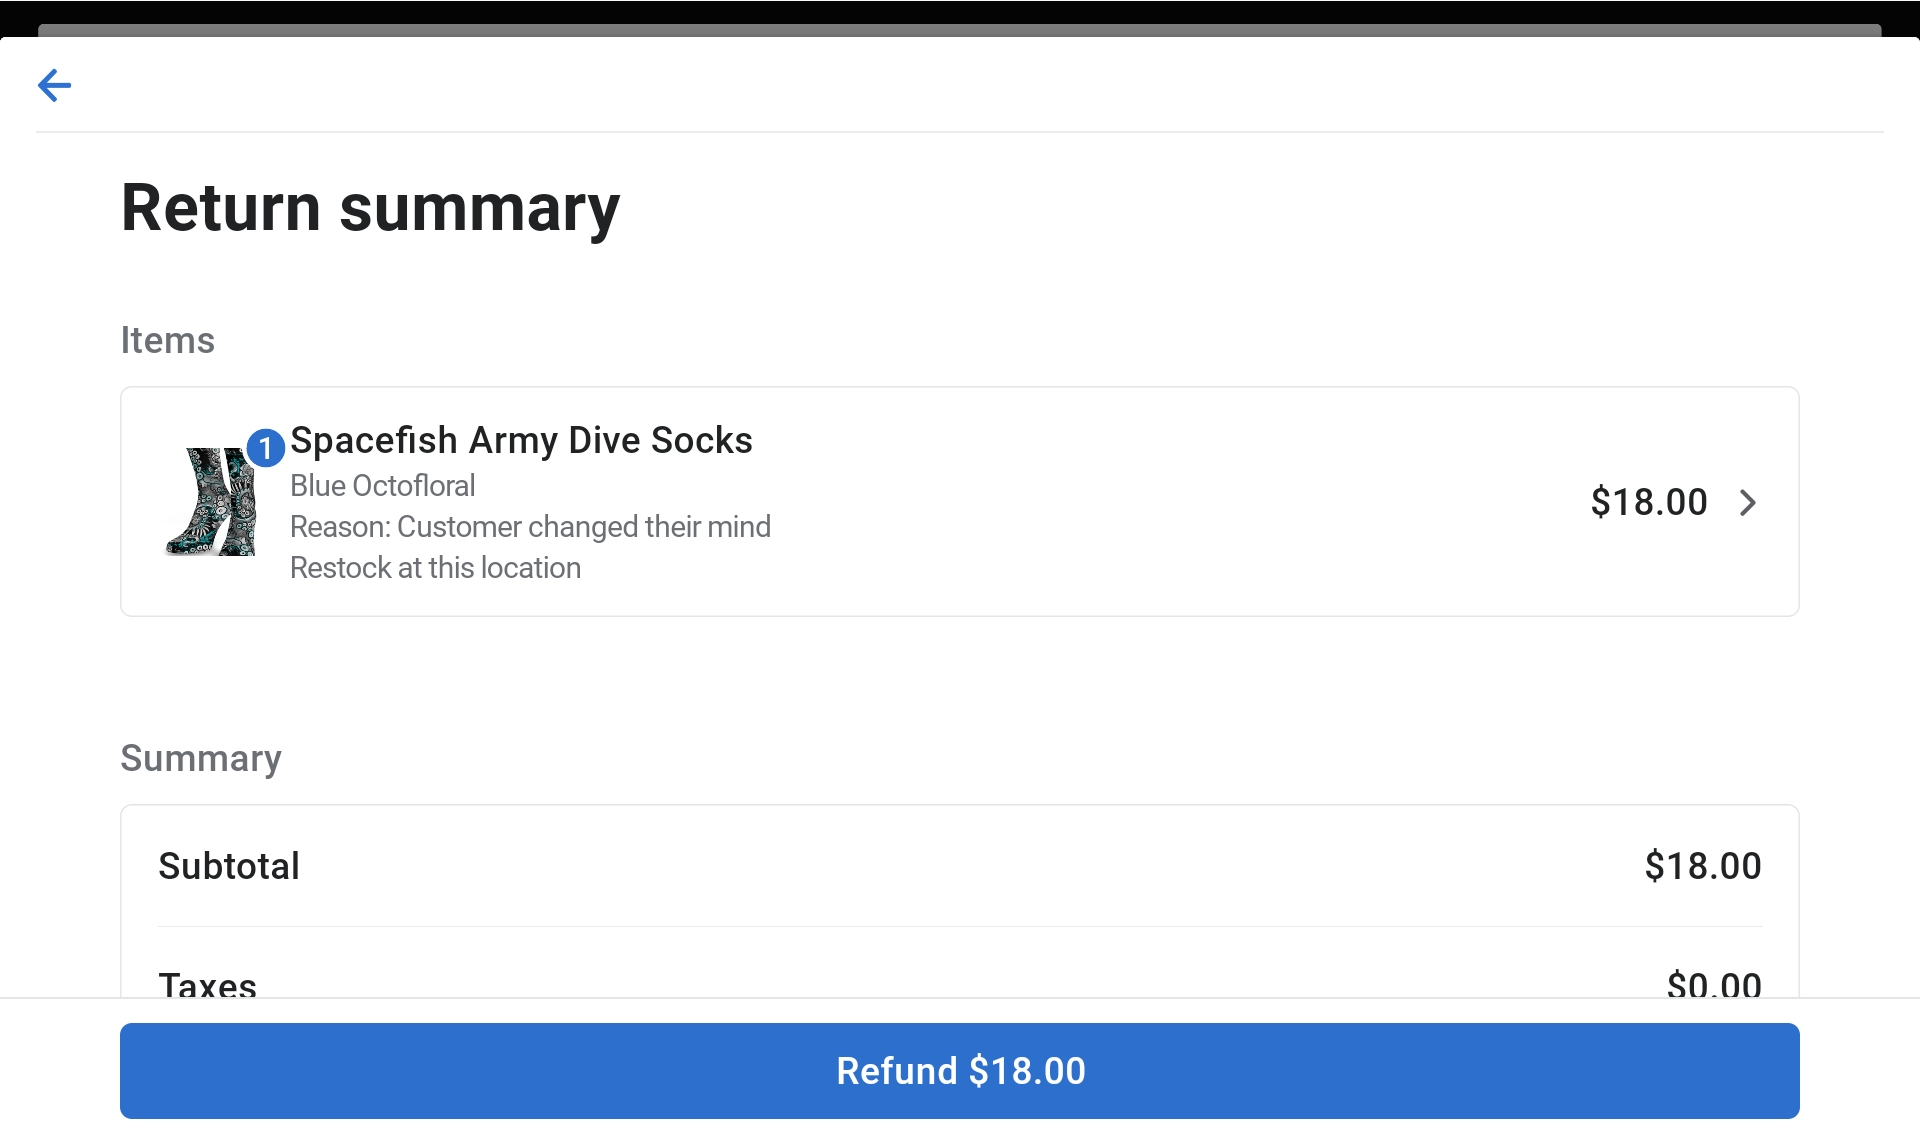
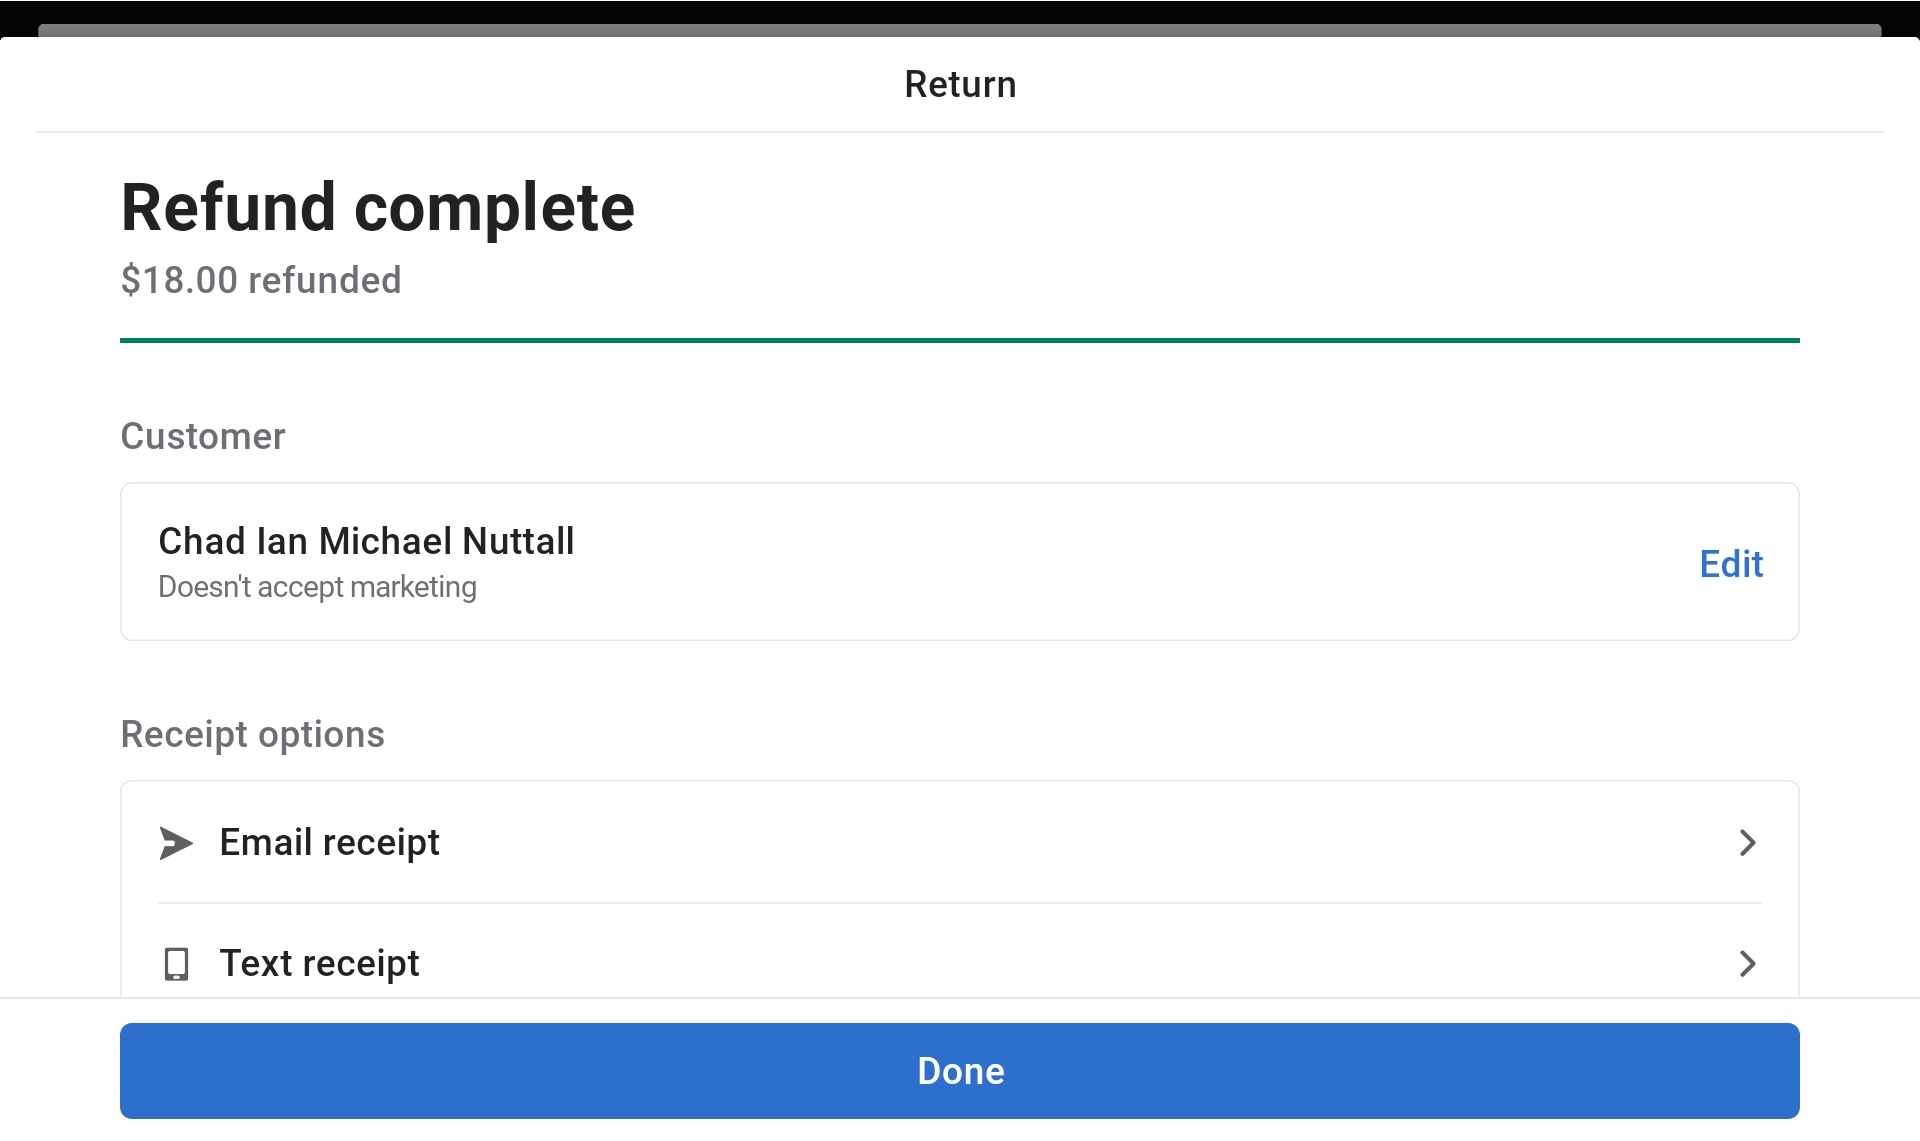
Returns
Note
Returns are allowed for items that still have the tags attached (NOT Worn or Washed).
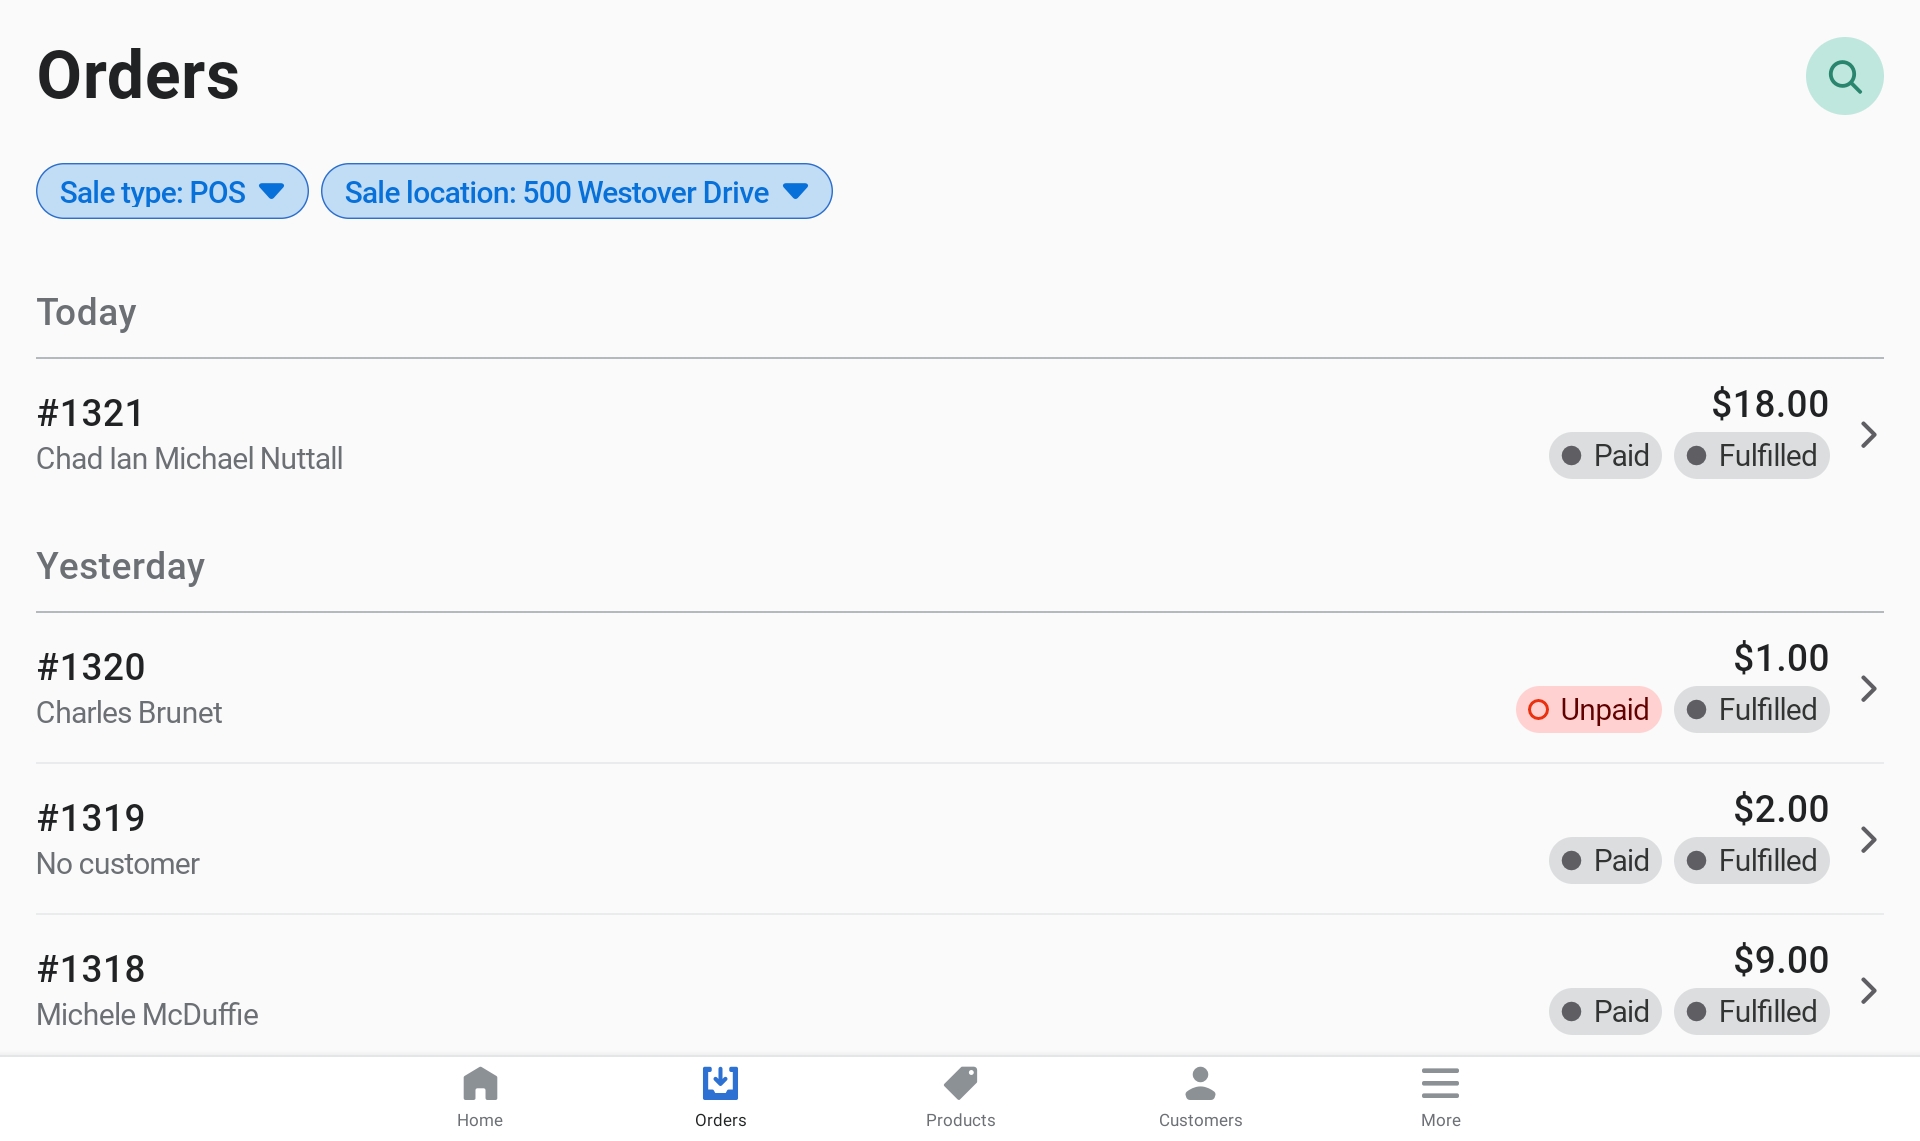
- Click on the "Orders" tab.
- Find the order: Scan the receipt barcode, or search by name or Order Number.
- Click on their order.
- Click on "Return".
- Select the items to return.
- Click "Next".
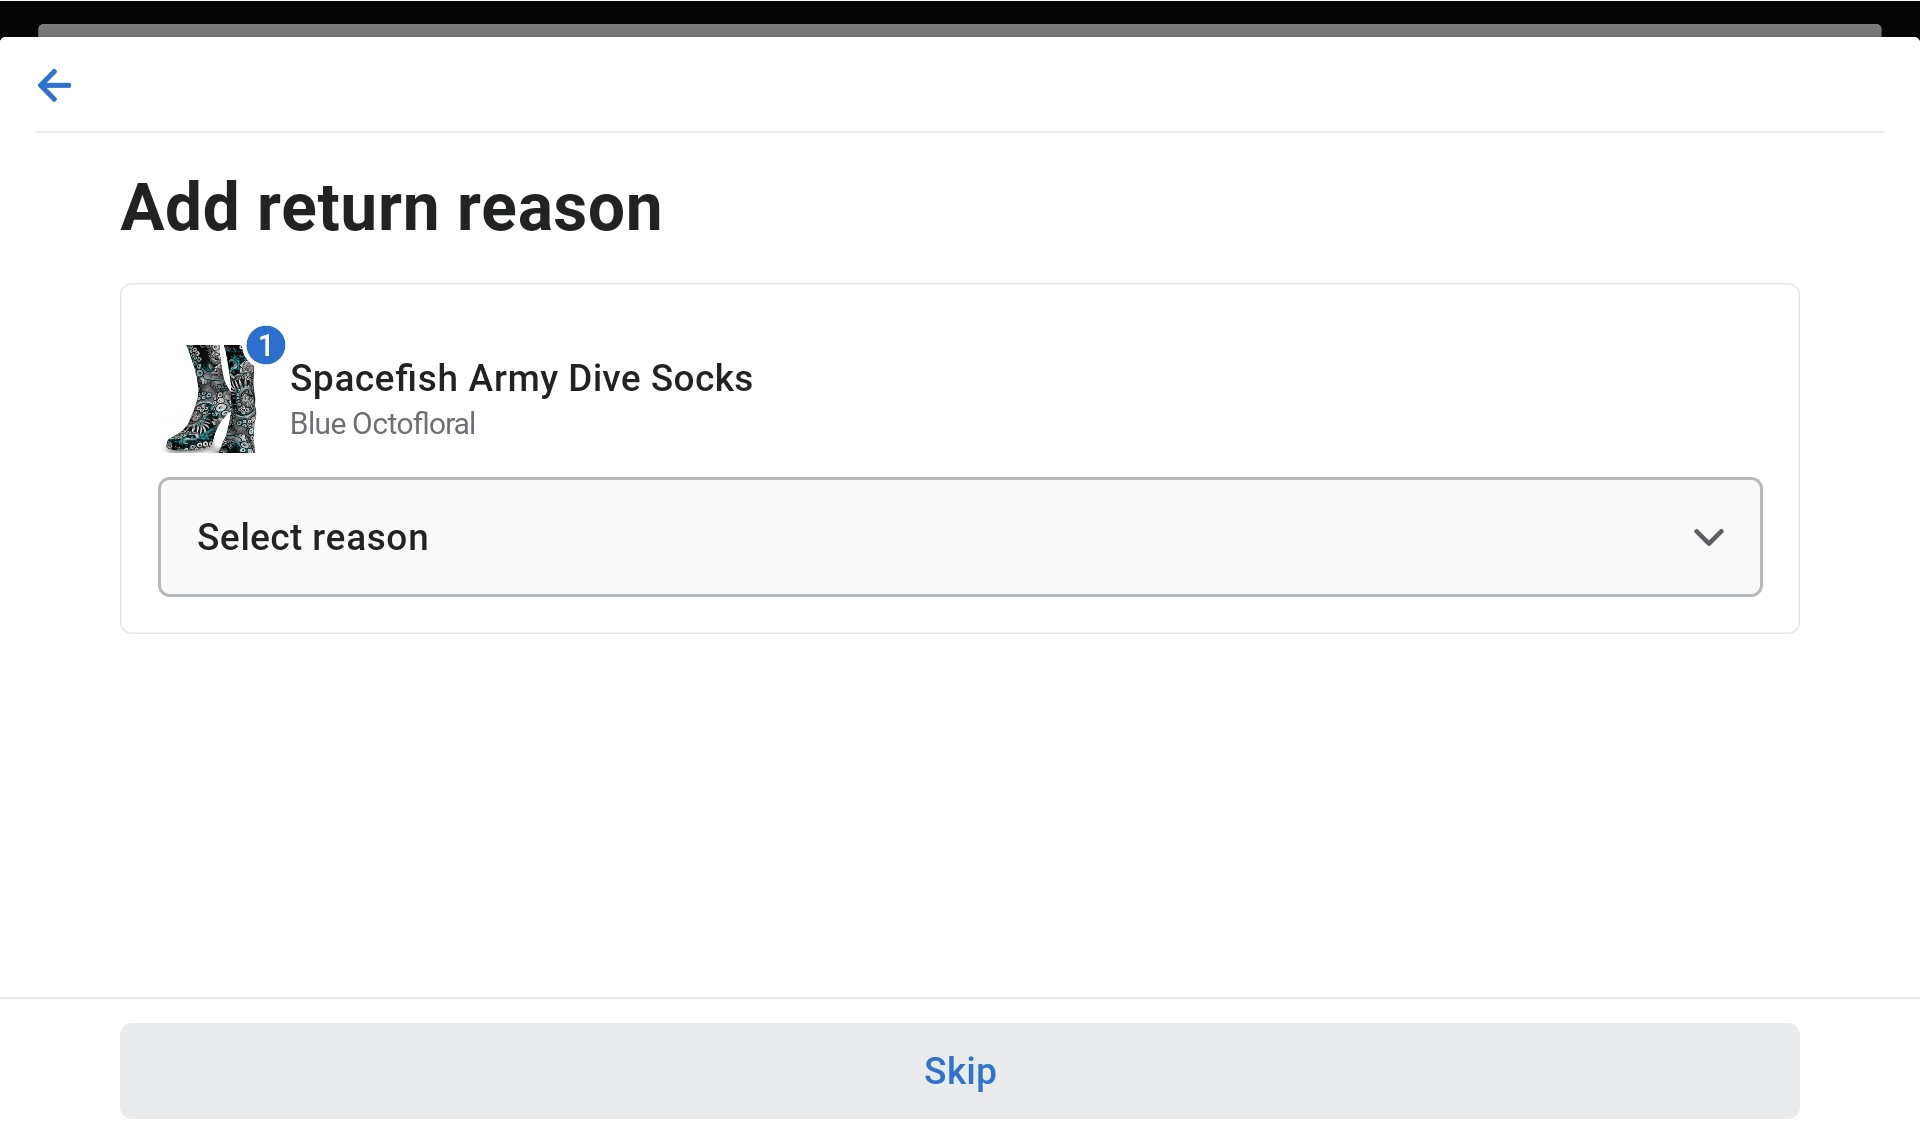
- Select the reason for return and add a note if applicable.
- Click "Next".
- Refund: The system automatically selects the original payment method. Card payments are refunded to card; cash is only refunded if they paid with cash.
- Click "Refund" to complete.


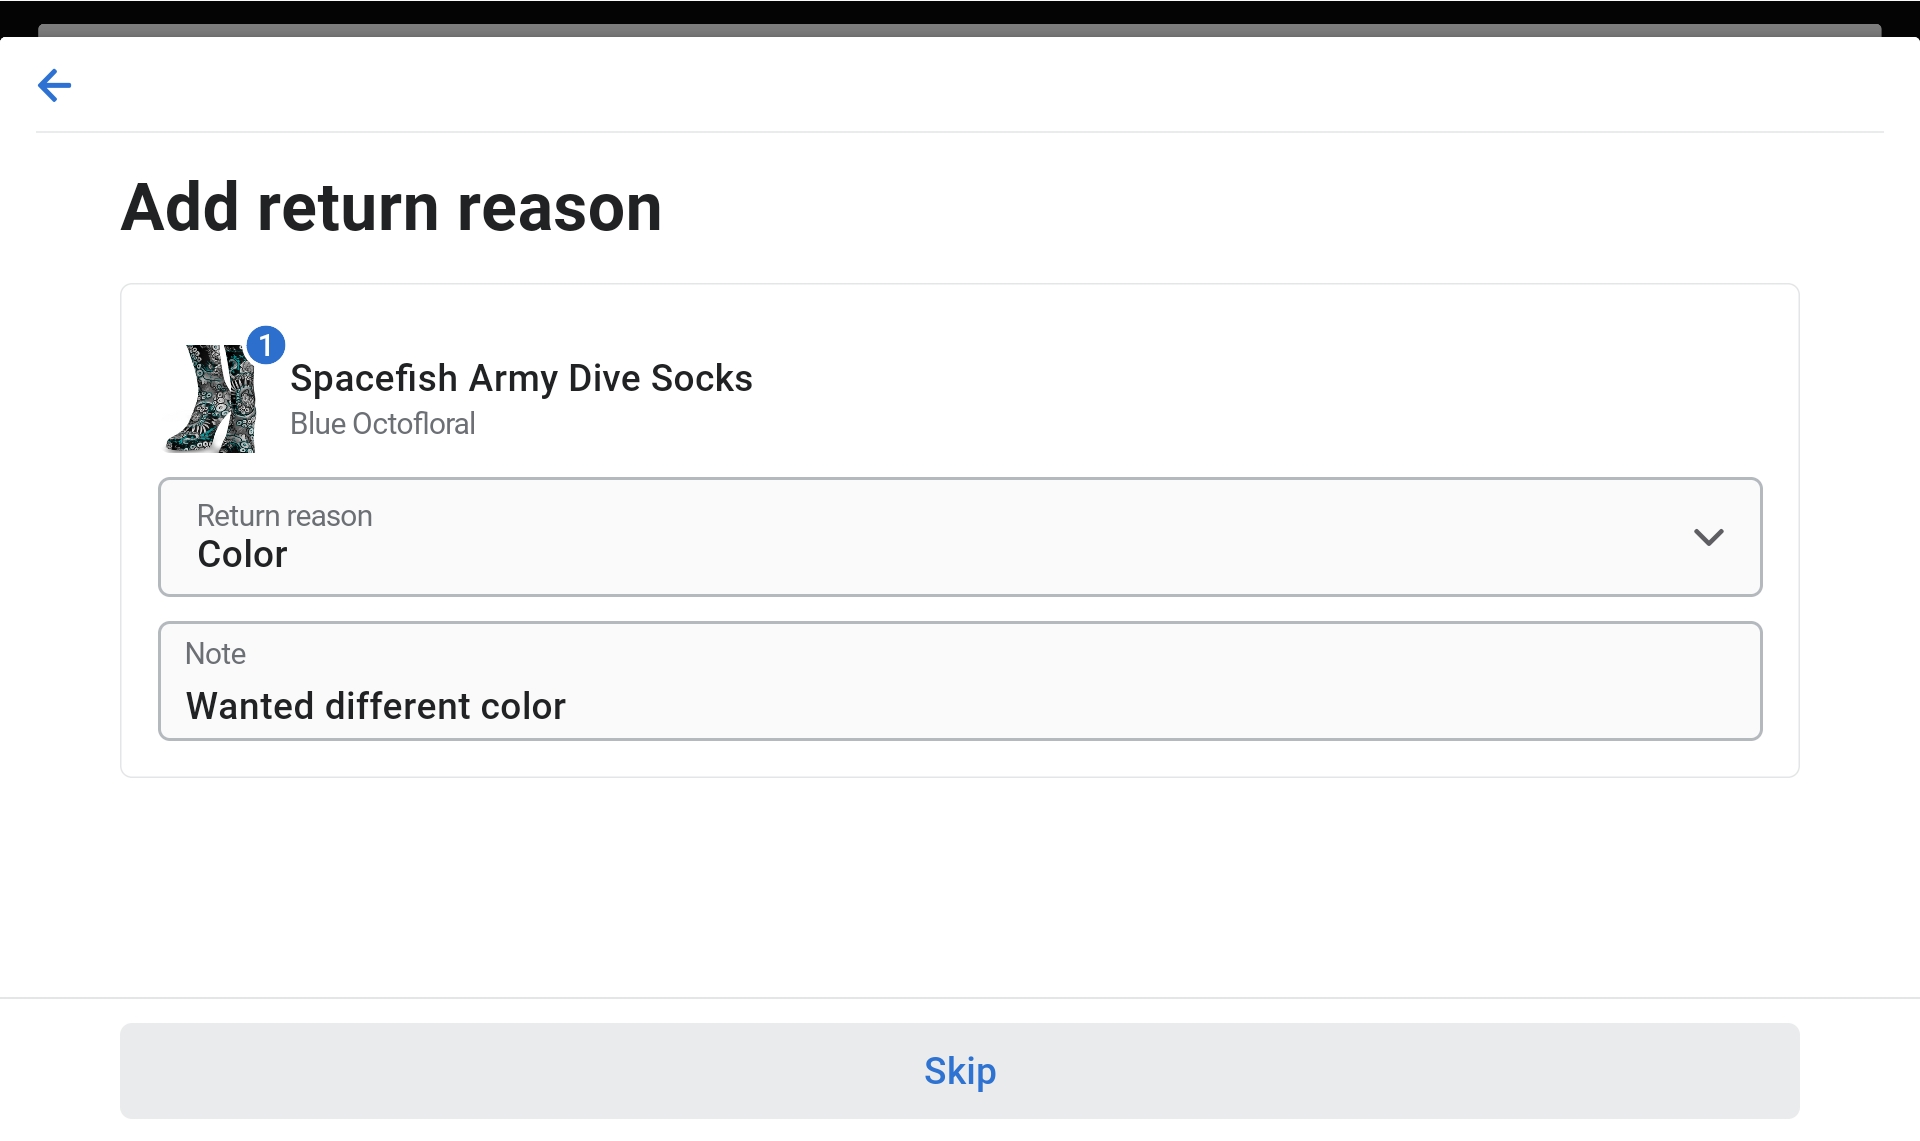
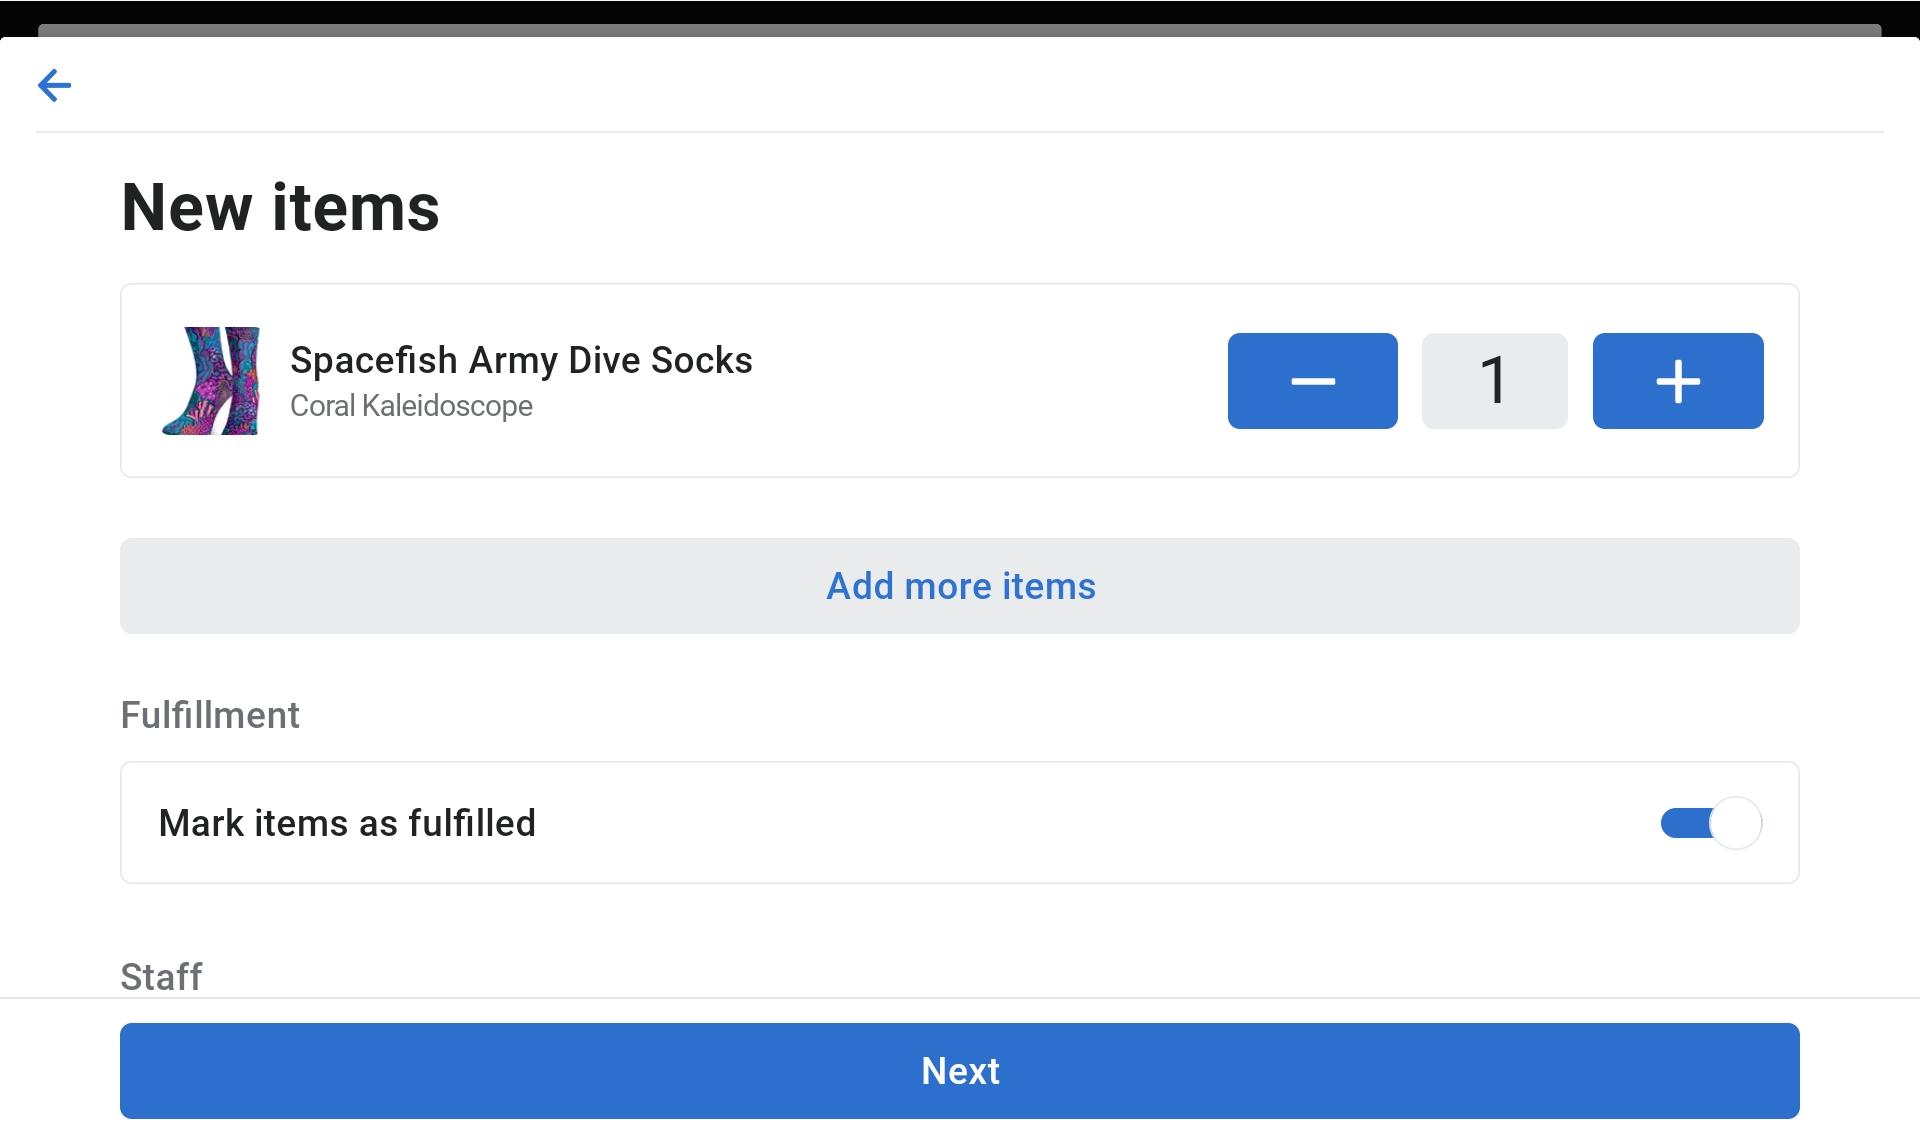
Exchanging Items
Note
Same rule applies as returns — items must have tags attached (NOT Worn or Washed).
- Follow the same steps as Returns until you get to their order.
- Click on "Exchange".
- Select the reason for exchange with a note.
- Select the new item they would like to exchange for.
- Add more items: If the customer wants to add more items, click "Add More Items".
- Click "Next" when complete.
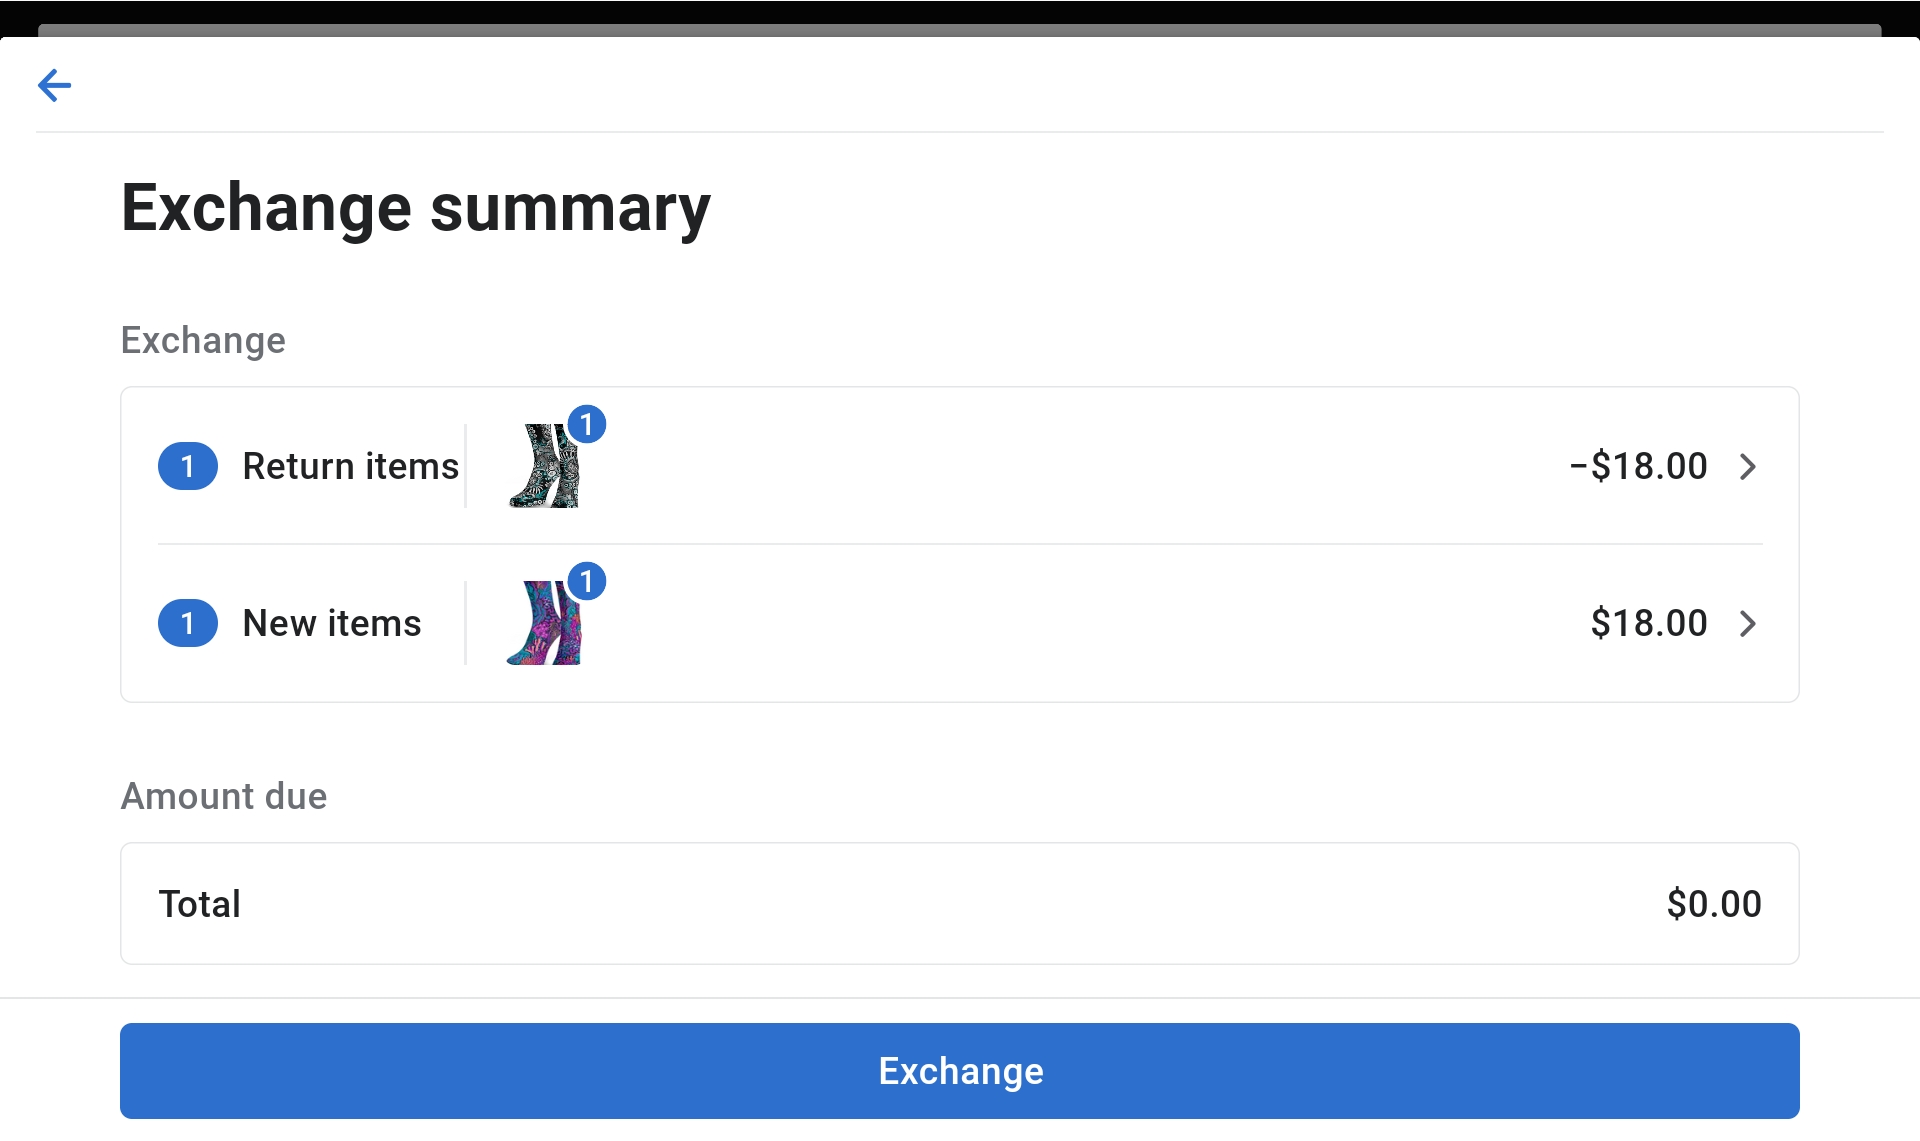
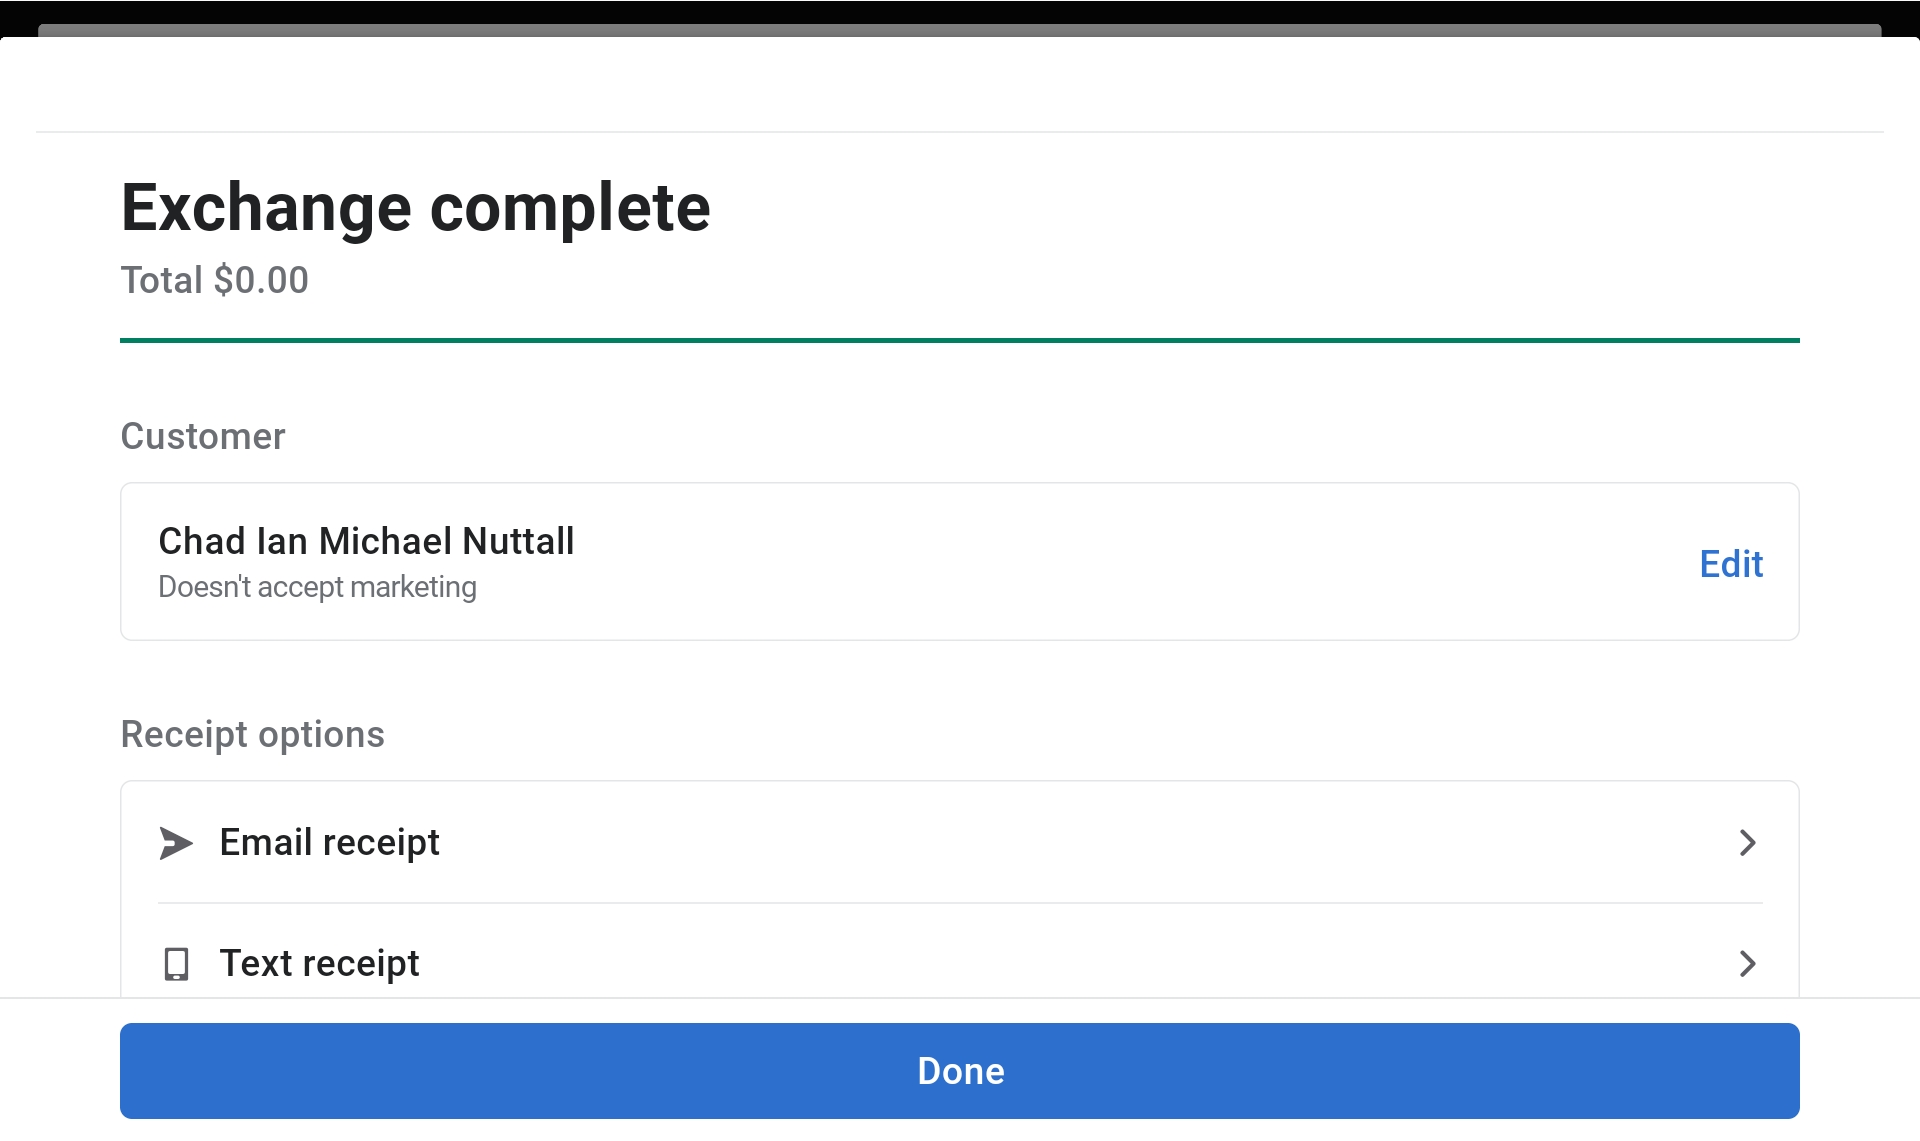
- Confirm Exchange Summary by clicking "Exchange".
- Receipt: Print/text/email the new receipt. If more money is needed, follow steps to take payment.
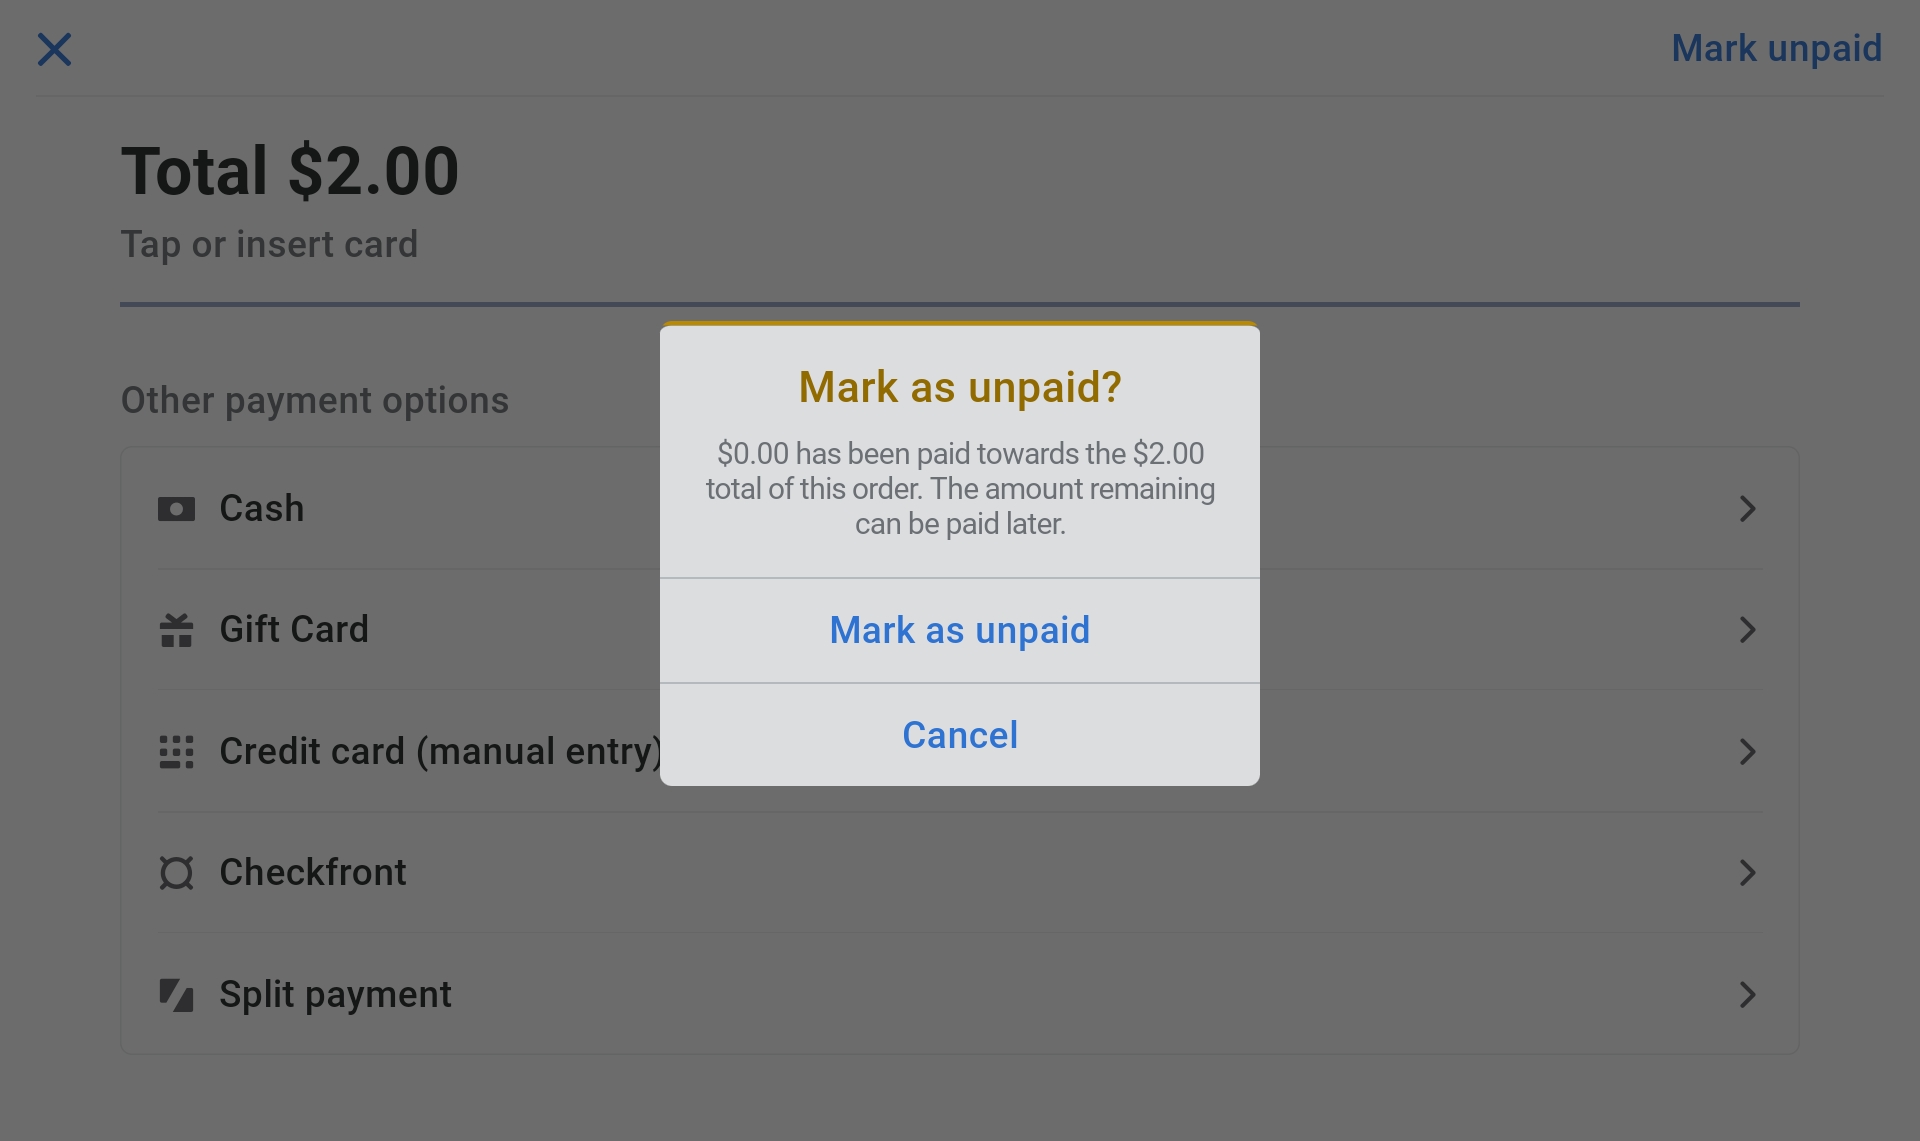
Employees Charging on Account
- Select the employee as the Customer.
- Add items to the cart.
- Click "Checkout".
- Click on "Mark As Unpaid".
- Confirm by selecting "Mark As Unpaid" again.
Warning
When charging to account, there is NO employee discount. Items must be charged at full price.
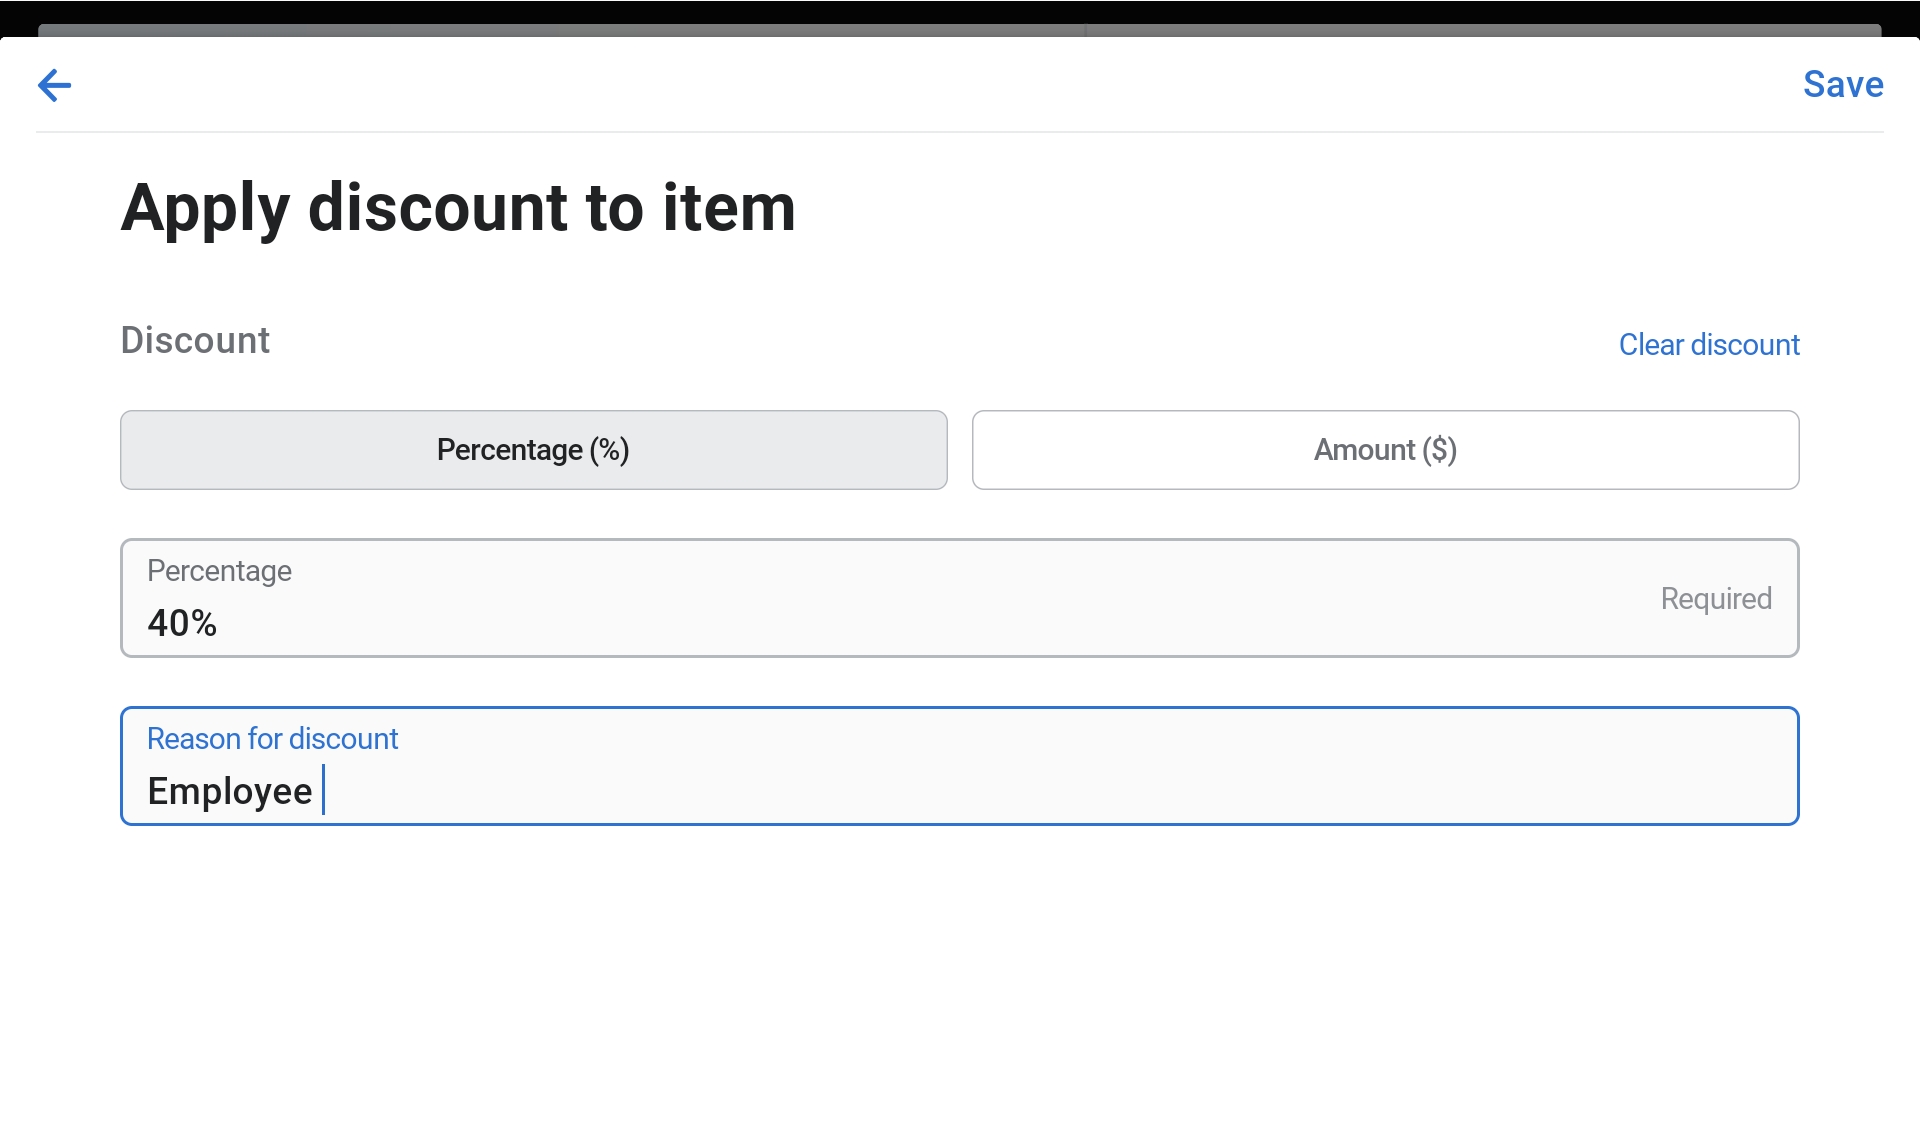
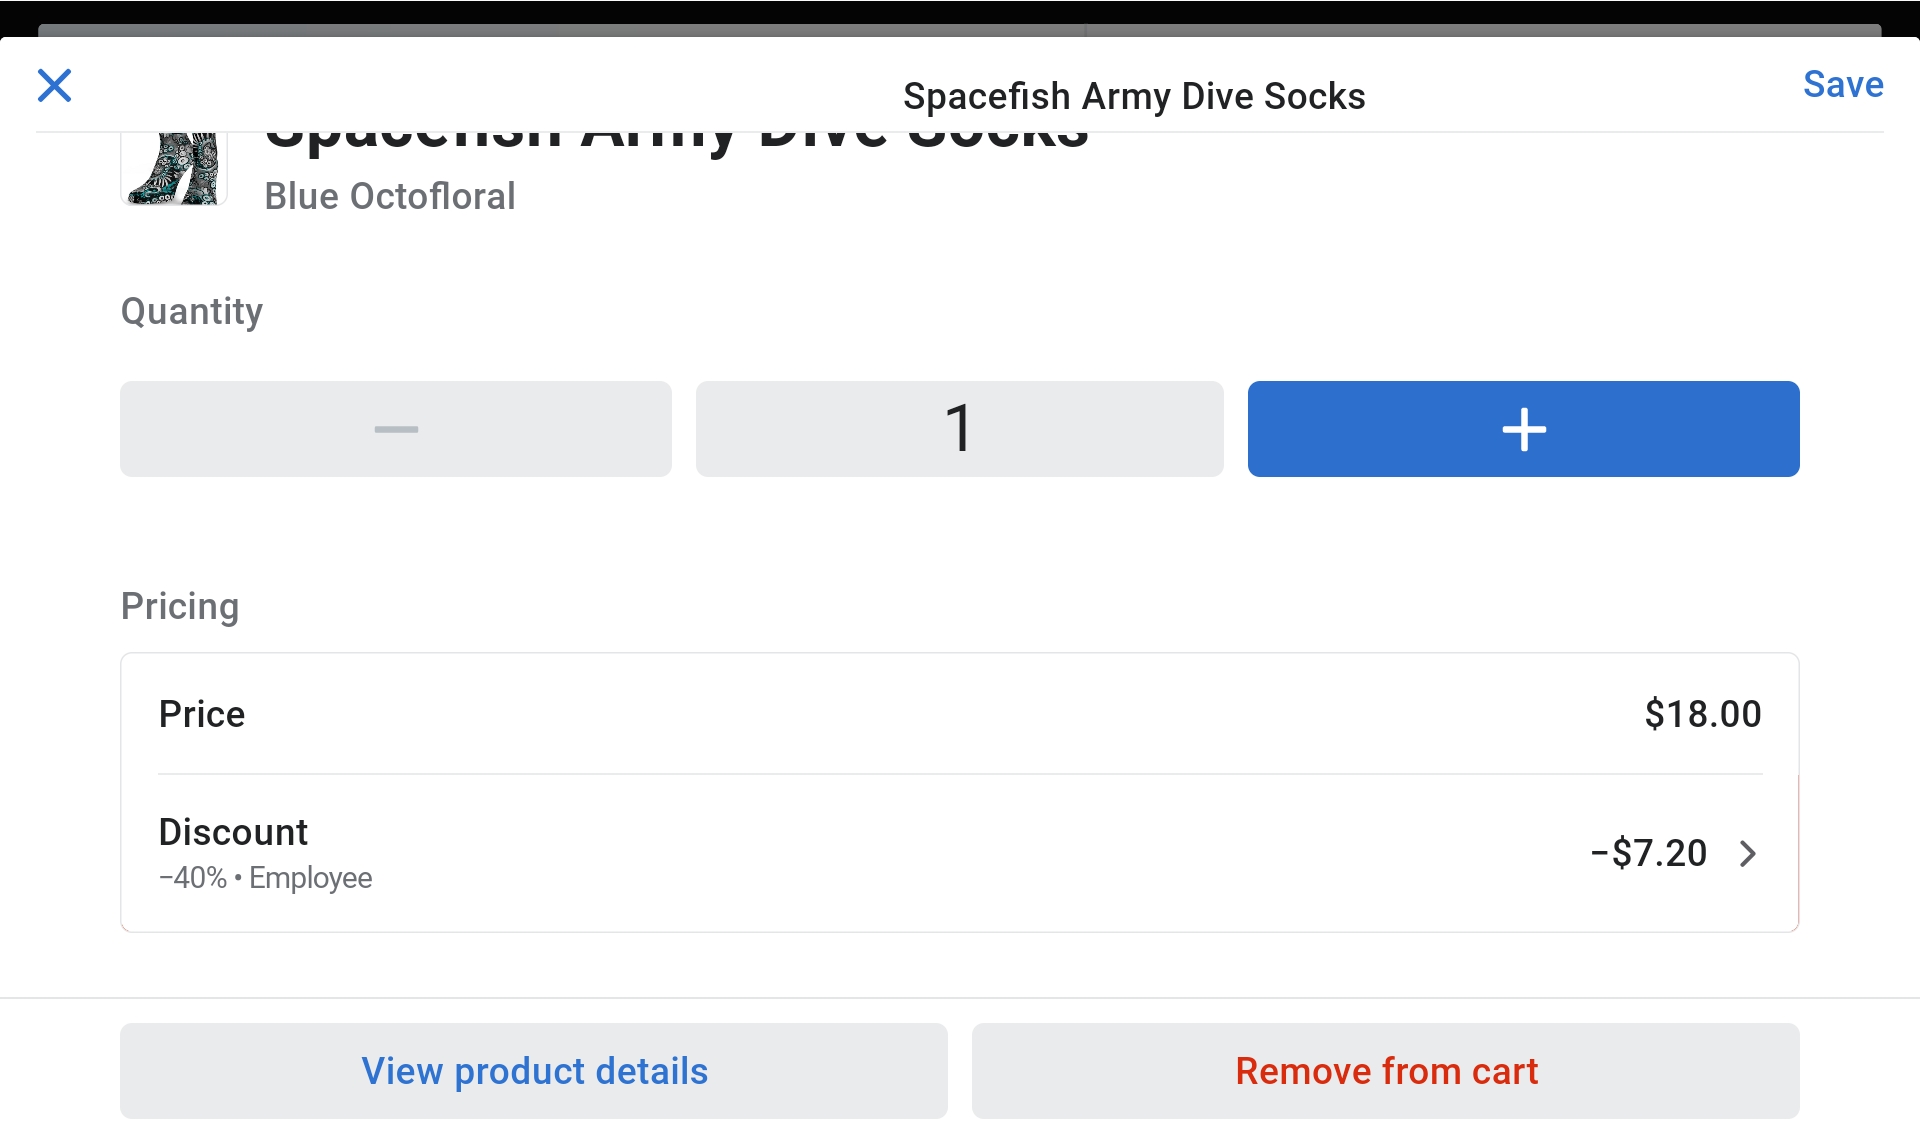
Employee Discount
Note
Employee must pay with cash or card to receive the discount. Not applicable when charging to account.
- Select the employee as a customer.
- Add items to the cart.
- Click on one of the items.
- Click on "Discount".
- Enter 40% in the Percentage box.
- Reason for discount: Type "Employee".
- Click "Save" twice.
- Continue with the checkout process.
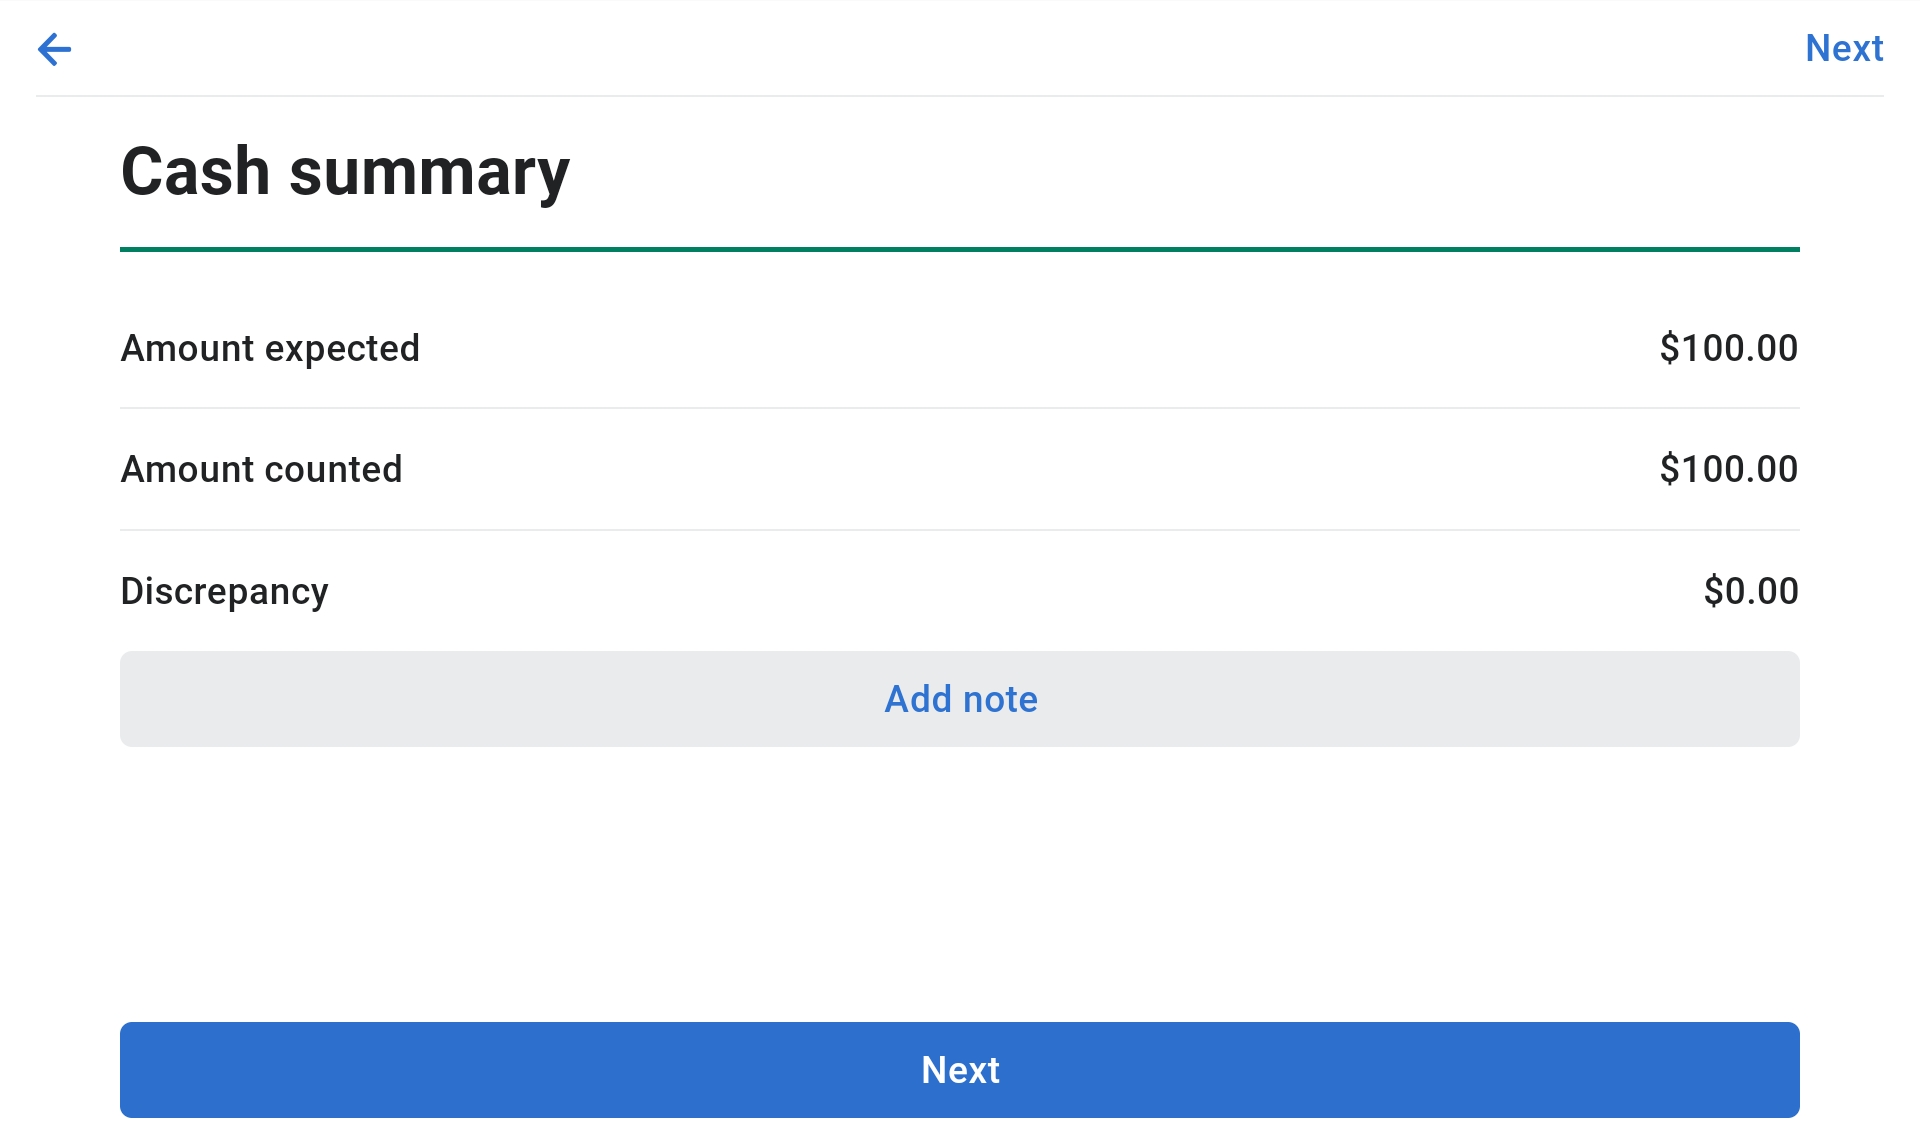
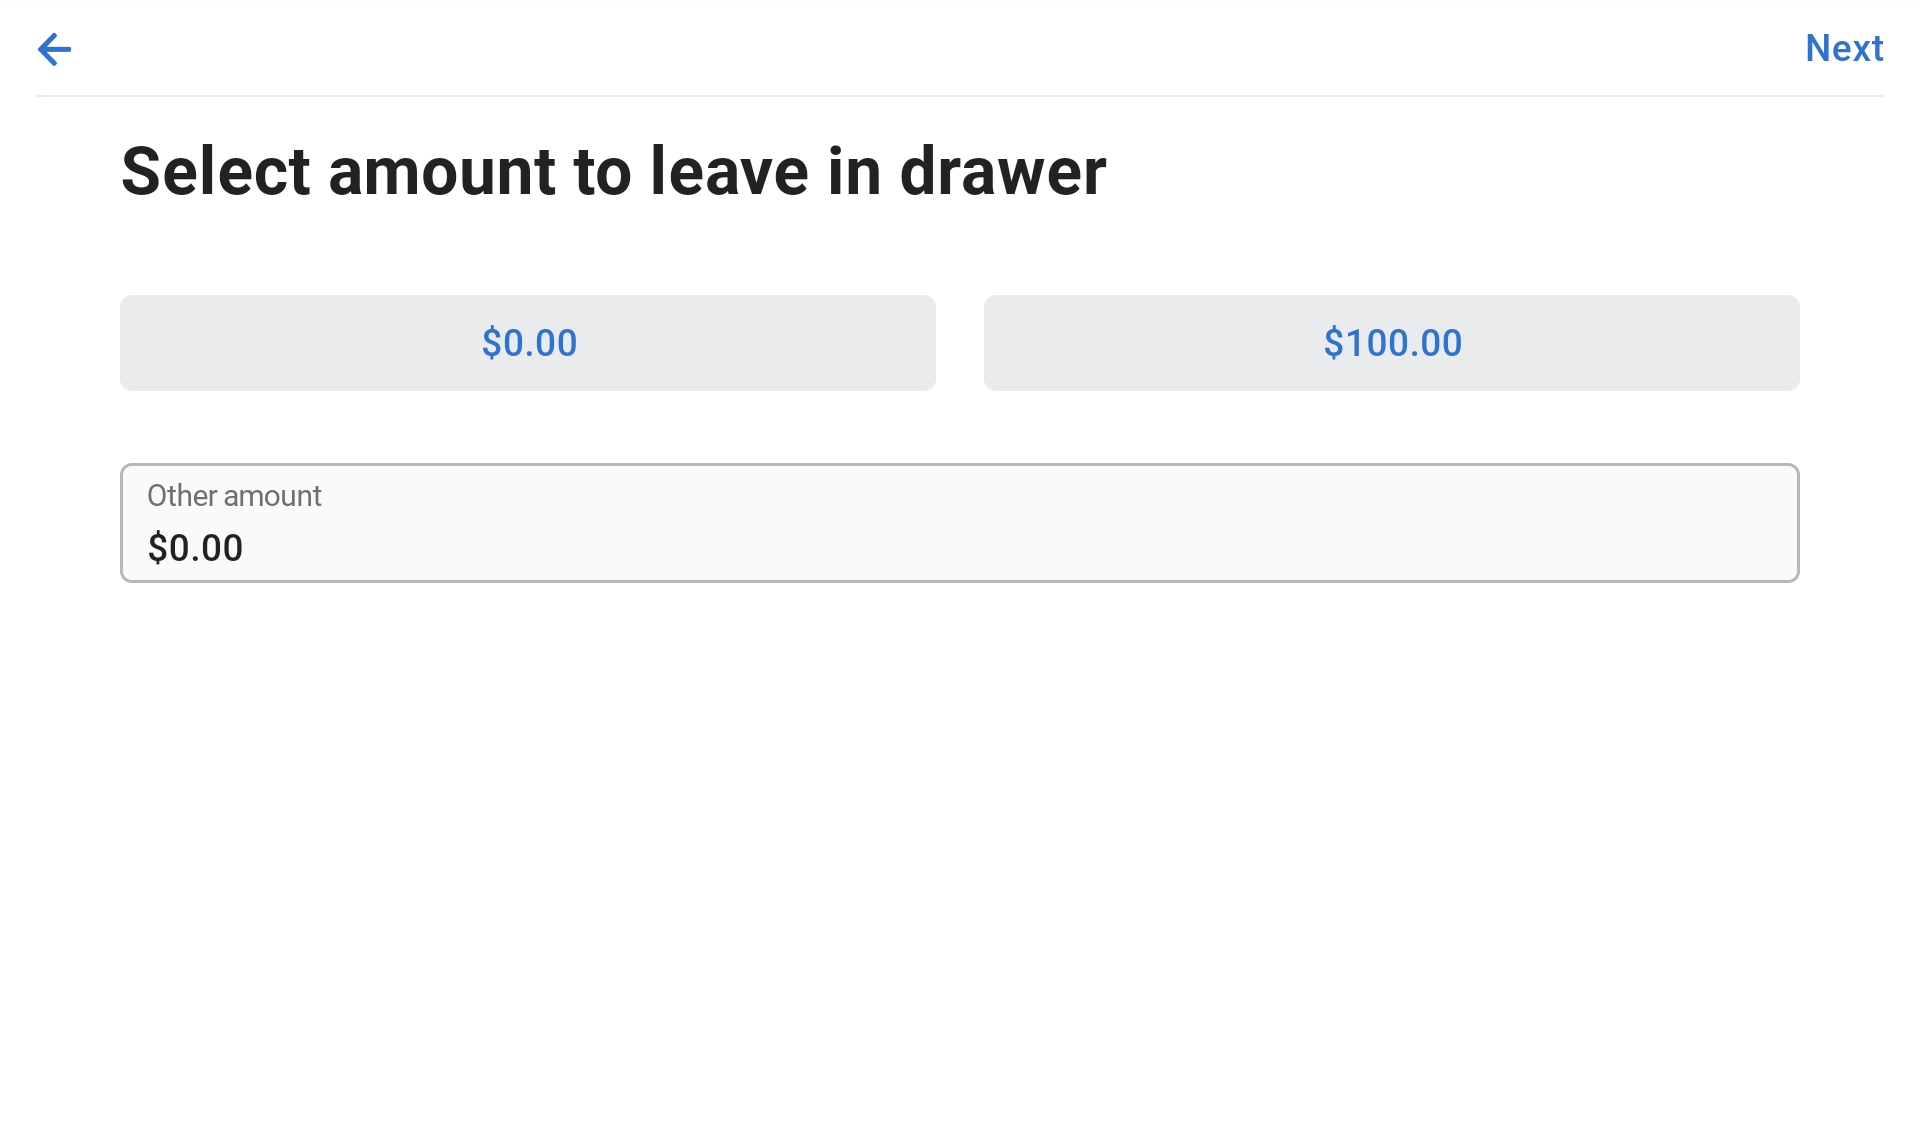
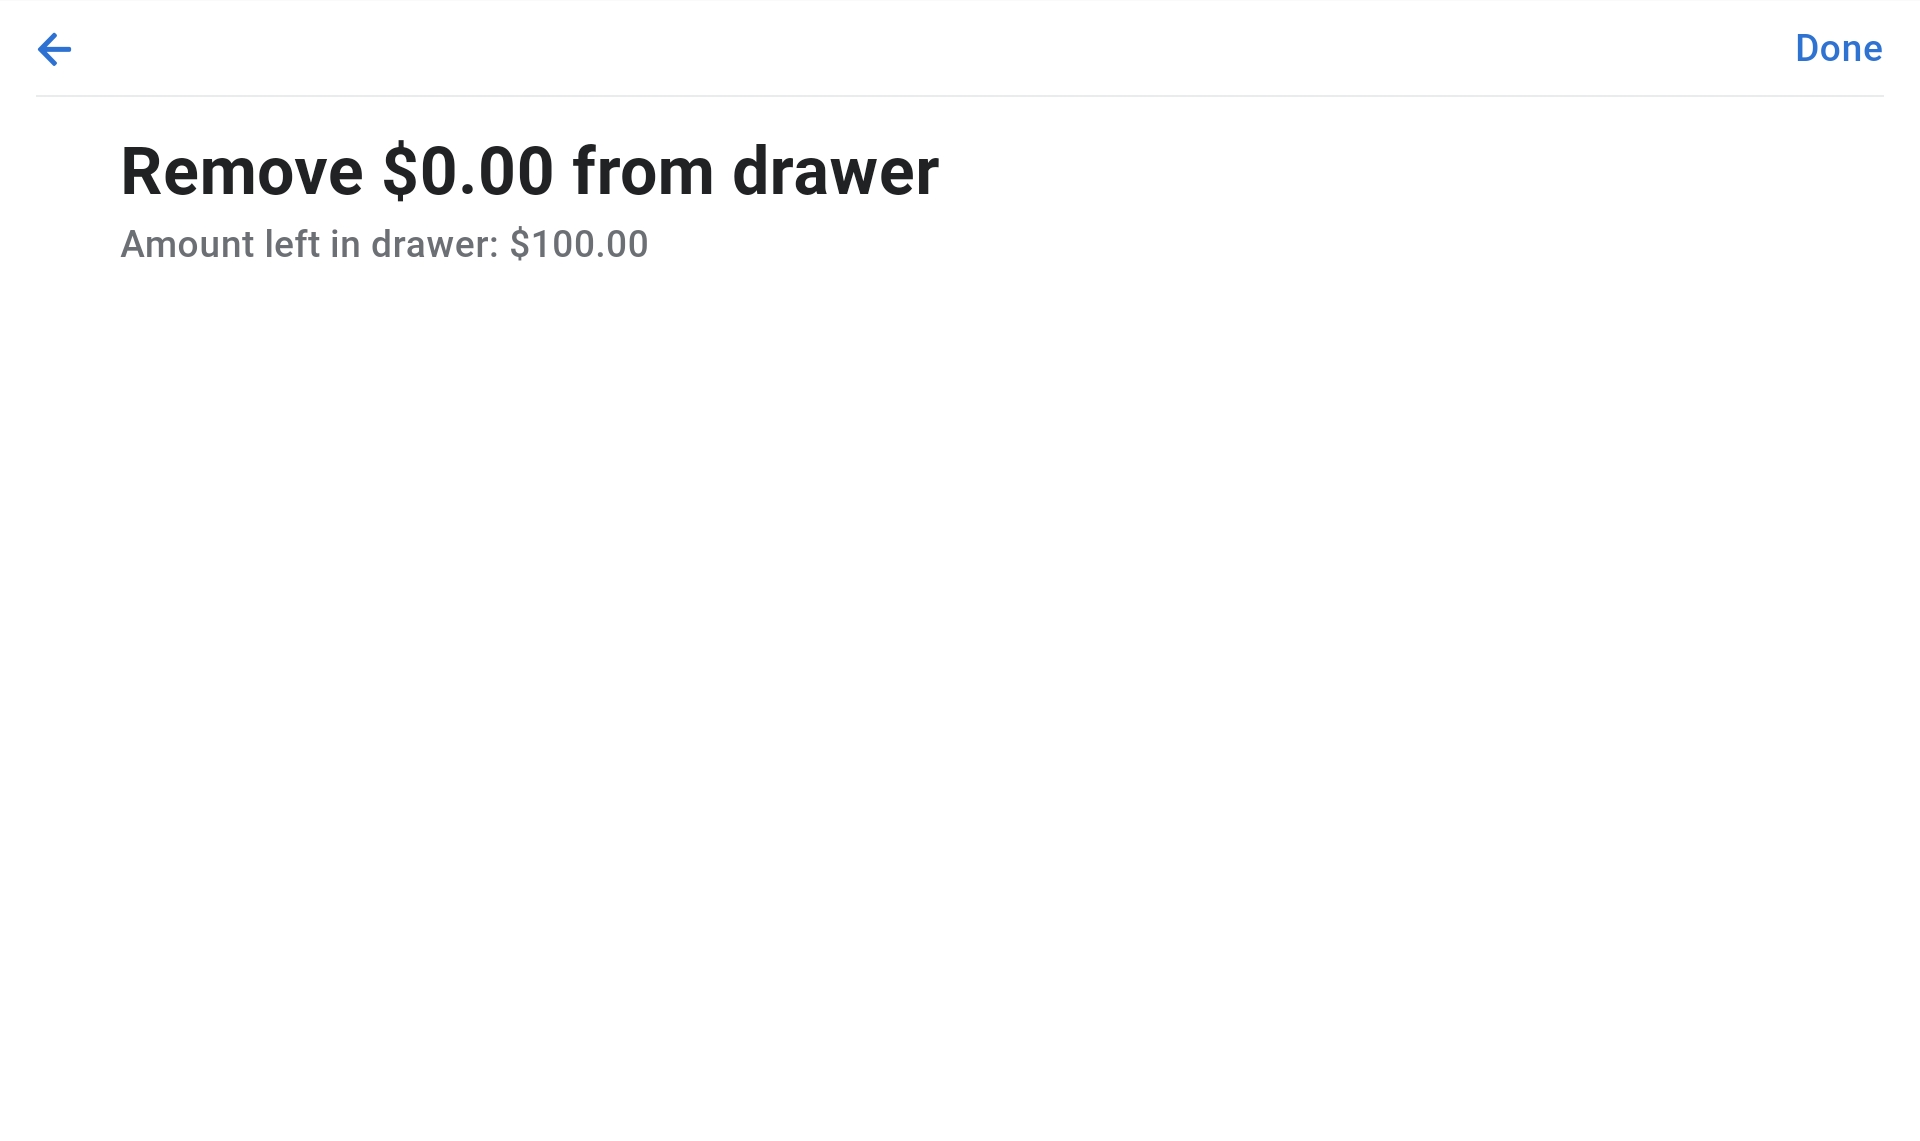
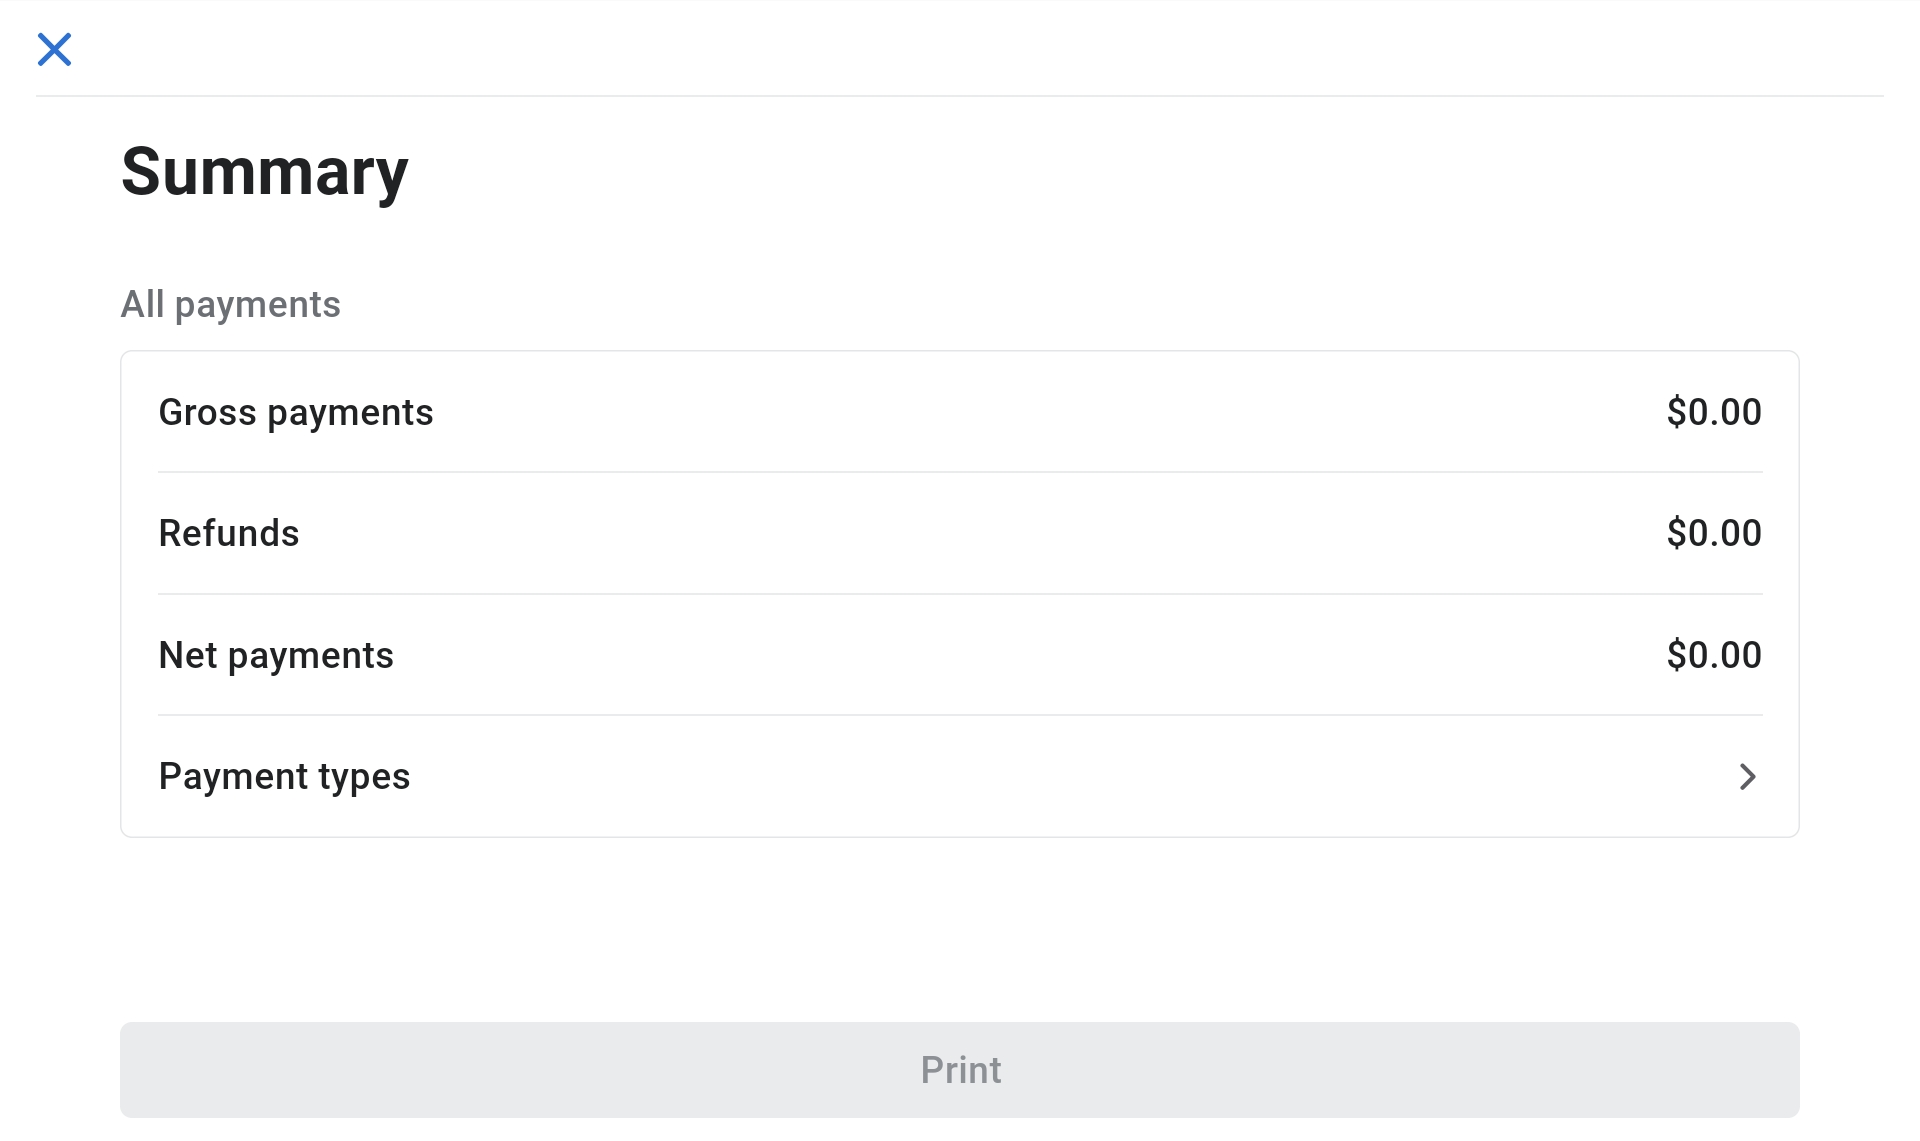
Closing the Register
- Click on the "More" tab.
- Select "View Open Session".
- Click on "End Tracking Session".
- Count the cash in the drawer (you can use the counting tool).
- Enter the amount you counted and click "Next".
- Check for discrepancies: Make a note if any.
- Select the float amount to leave in the register (Retail Shop: $200, Harbor Office: $100).
- Remove the stated amount of cash.
- Click "Done" and print the summary.
- Paperclip the summary to the cash removed and place into the safe. If no cash was removed, just place the summary in the safe.
![]()
Accountability
All staff members operating the POS system are responsible for following this SOP. Report any discrepancies or system issues to management immediately.